grommunio Groupware
Microsoft Outlook
grommunio accounts can be configured for Microsoft Outlook, as grommunio natively supports the protocols used by Microsoft Outlook (RPC-over-HTTP and MAPI-HTTP).
In this configuration setup, it is assumed no profiles have been set up so far.
If MAPI profiles already exist on the system, new profiles and accounts can be
added by executing outlook /profiles.
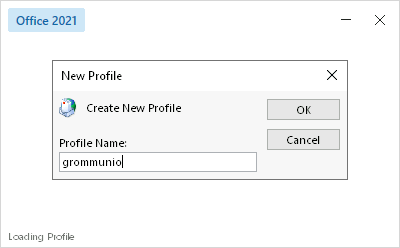
Select a name for the new profile and confirm.
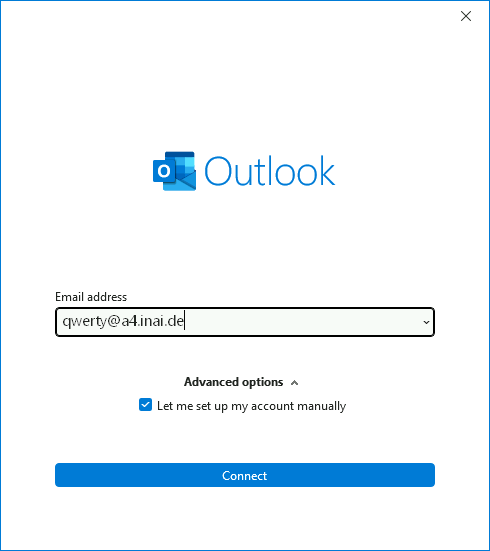
In the following dialog, the Outlook profile assistant will request your email address. It is recommended to check "Let me set up my account manually", to ensure the correct protocol is chosen, as some Outlook versions otherwise choose a non-native protocol like IMAP, which would incur feature limitations.
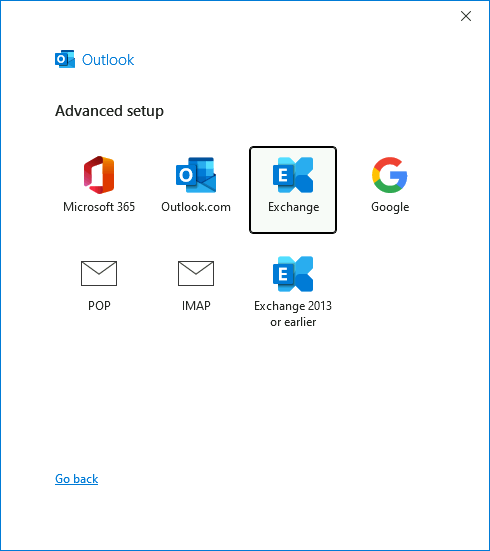
The account type / protocol choice dialog. For grommunio, select "Exchange".
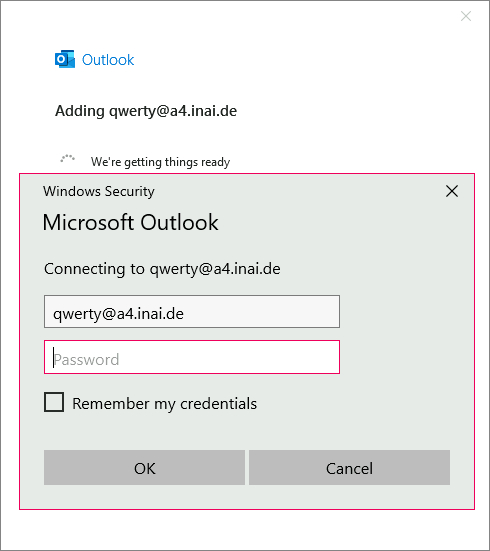
The following progress dialog might take a few seconds, since Outlook is now attempting to contact the mailbox for the first time and populate the Outlook profile. In that process, it will ask for credentials. Select "Remember my credentials" to save the password for this user identity in the Windows system. Anytime Outlook requests access to the mailbox it can do so without prompting again.
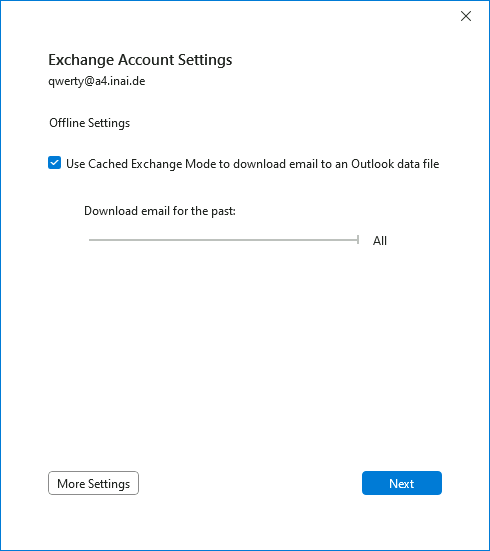
As part of the manual setup, the wizard will display another page with Offline Settings. You can switch between Online Mode and Cached/Offline mode here. When offline mode is enabled, Outlook keeps a copy of the mailbox locally and uses forth-and-back synchronization. A slider is shown to specify the timeframe of messages to synchronize. Older versions of Outlook allow choosing from a handful of options for the timeframe, e.g. 1 day, 1 week, 2 weeks, ... 3 months and "All". Contemporary version of Outlook (circa 2019 and onwards) are somehow defective, and the slider is greyed out, leaving only full synchronizatino for the offline mode.
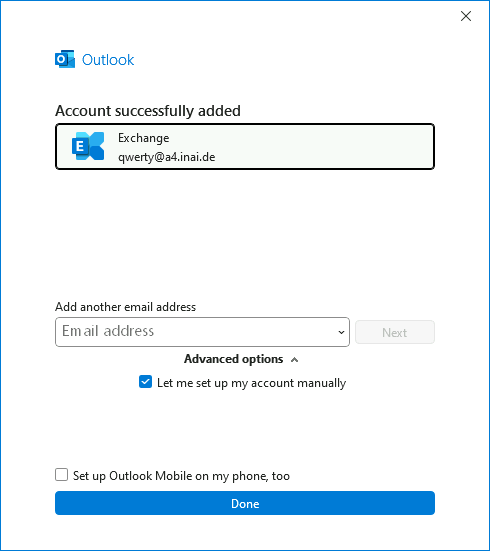
The profile has now been set up and ready for use.
Note
By default, the account setup will show "Microsoft Exchange" account type. The setup procedure of Microsoft Outlook with grommunio Groupware does not differ from a setup with Microsoft Exchange. As with Microsoft Exchange, the default profile is set up for Offline/Cached Mode, which synchronizes the mailbox for offline usage. grommunio Groupware supports Offline/Cached Mode. However, this might not be preferred in some use cases and should be disabled, e.g. with most Remote Desktop Server environments.
Important
For the groupware features of grommunio, no separate software needs to be installed. However, the exact Microsoft Outlook setup procedure might differ from what is depicted above, depending on the version used. When setting up the Outlook account with grommunio Groupware in use, proceed with the client installation as if it were to be configured with Microsoft Exchange. For automation purposes, third-party software may be used for account and profile creation, so long as the compatibility of the third party software includes Microsoft Exchange.
Android
grommunio Accounts can be easily added to Android devices, as they natively support the Microsoft Exchange ActiveSync (EAS) protocol.
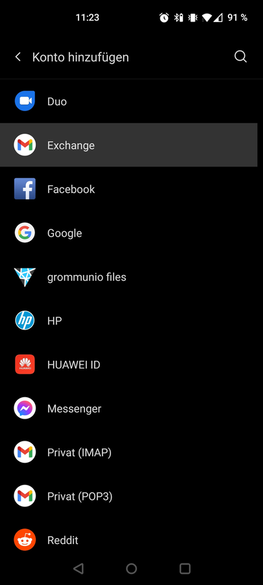
To add your grommunio account to your Android device, navigate to
Settings -> Accountspage, and selectExchange
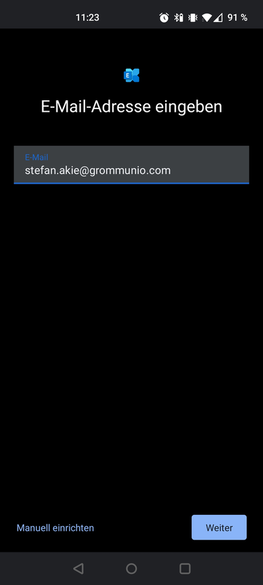
In the following setup dialog, enter your email address, select
Next
In the following setup dialog, enter your password, select
Next
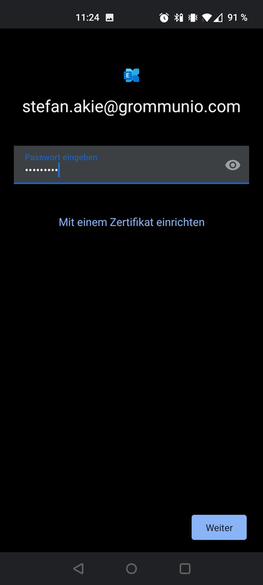
After finishing the account setup your data is being synchronized in the background.
Depending on the grommunio backend configuration, you might be requested to accept a corporate policy setting to finish and accept the configuration. Note that this (depending on your configuration) might allow system administrators (and yourself through grommunio web) to setup specific policies or handle the device through mobile device management. The rights you are to be granting by this so-called provisioning step are shown in the subsequent dialog. The possibilities of profile settings vary from Android versions and OEM configurations (brand of mobile device).
After having setup the device, your new account will show up at Settings ->
Accounts, with the possibility to setup more configuration options with your
profile (such as signatures, synchronization periods, and more). The
possibilities of configuration settings vary by Android versions and OEM
configurations (brand of mobile device).
With the configuration of your mobile device with an exchange account, your mobile device has access to the data of your account through the personal information manager (PIM) interface. This allows you to use your grommunio mailbox with a variety of applications of your choice, such as a mail or calendar application of your preference.
Apple iOS
grommunio Accounts can be easily added to iOS devices (such as iPhone or iPad), as they natively support the Microsoft Exchange ActiveSync (EAS) protocol.
To add your grommunio account to your iOS device, navigate to
Settingspage, and selectMail
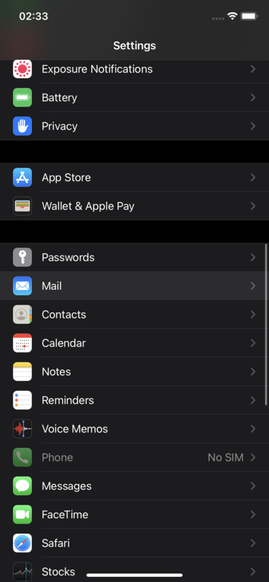
In the
Mail settings, selectAdd Account
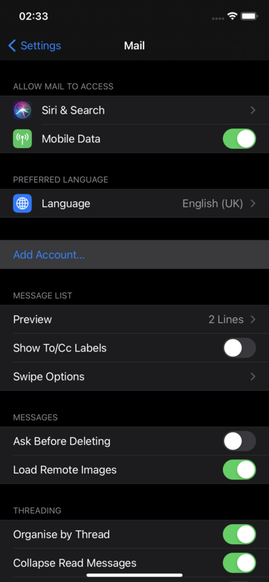
In the following setup dialog, select
Microsoft Exchangeas account type
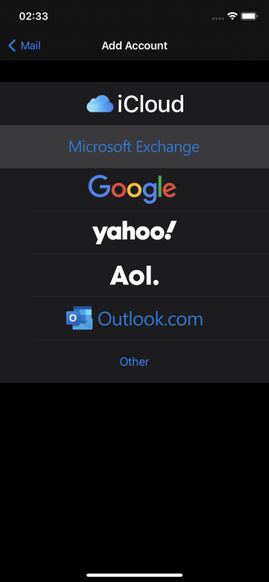
In the following setup dialog, enter your email address, choose an account description, and select
Next
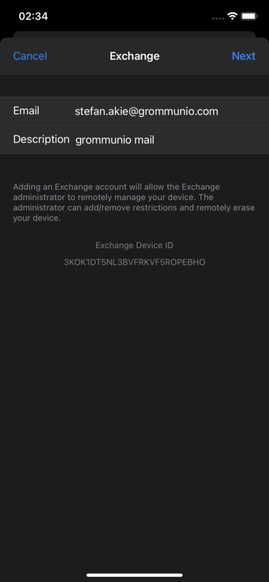
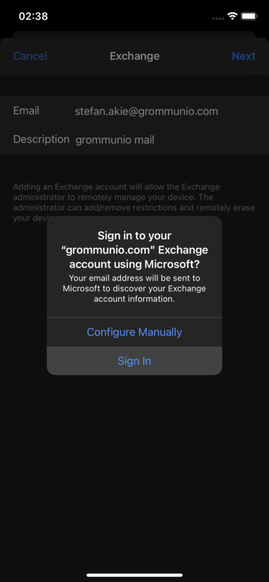
After confirming your account information, you will be requested whether you want to sign-in by using Microsoft, or manually want to configure your account information. Since grommunio is equipped with AutoDiscover technology, both possibilities are available.
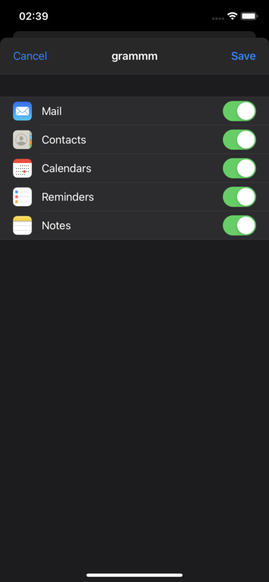
With the following dialog, your credentials (which you are requested to enter) could be verified correctly, and you can select which information should be synchronized with your iOS device, namely Mail, Contacts, Calendar, Reminders and Notes. After hitting
Saveyour account setup has finished and your data is being synchronized in the background.
After finishing the account setup your data is being synchronized in the background.
Depending on the grommunio backend configuration, you might be requested to accept a corporate policy setting to finish and accept the configuration. Note that this (depending on your configuration) might allow system administrators (and yourself through grommunio web) to setup specific policies or handle the device through mobile device management. The possibilities of profile settings vary by different iOS versions.
With the configuration of your mobile device with an exchange account, your mobile device has access to the data of your account through the personal information manager (PIM) interface. This allows you to use your grommunio mailbox with a variety of applications of your choice, such as a mail or calendar application of your preference.
Apple macOS
Microsoft Mail
grommunio Accounts can be easily added to Microsoft Mail, as grommunio natively supports the protocols used by Microsoft Mail.
To add your grommunio account to Microsoft Mail, open Microsoft Mail and select
Accountsin the left menu and after thatAdd accounton the account management pane on the right side.
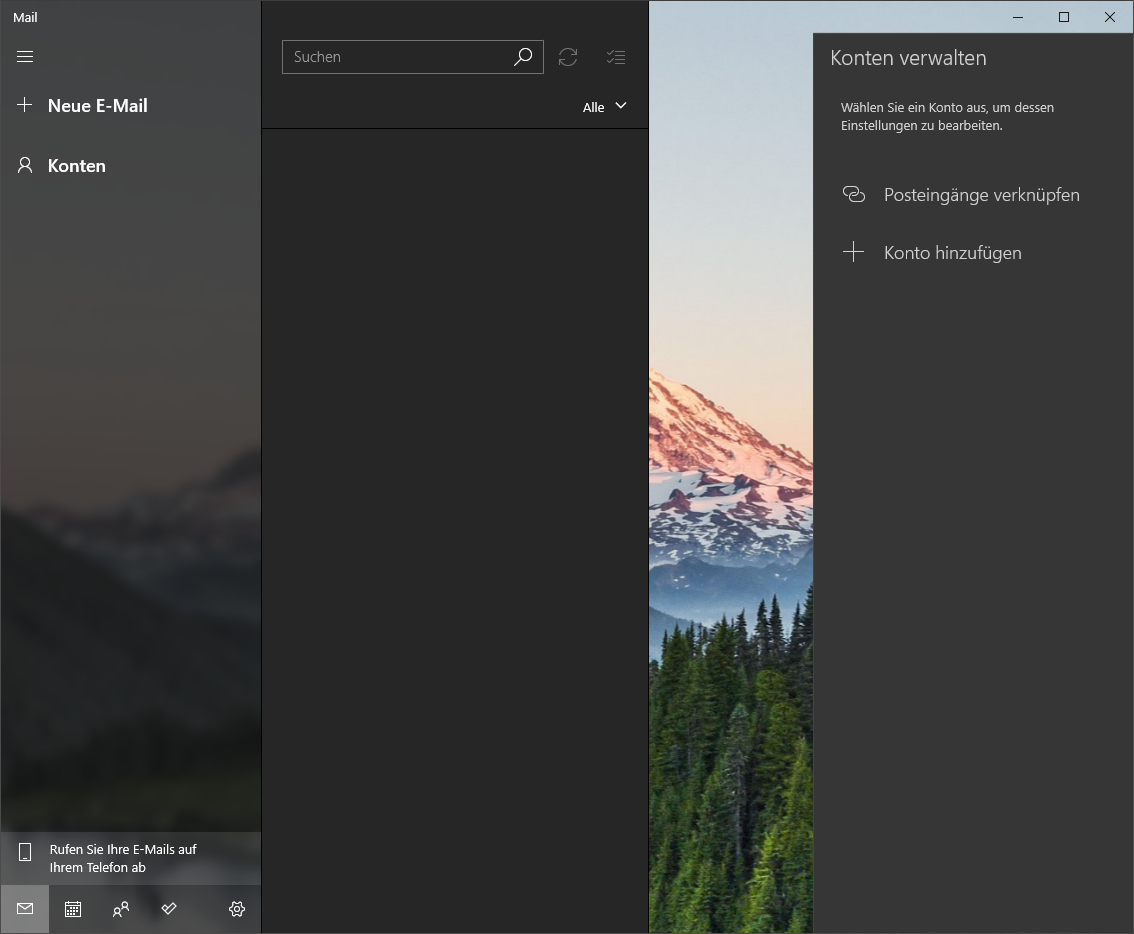
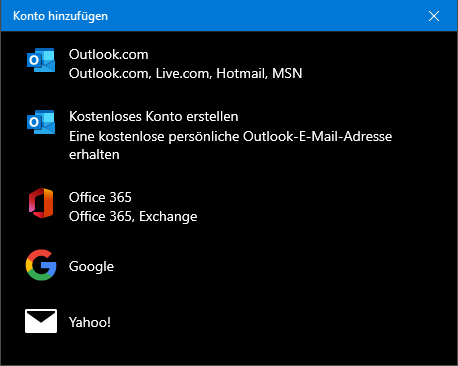
In the following dialog the Microsoft Mail account assistant select
Office
365
account type from the list.
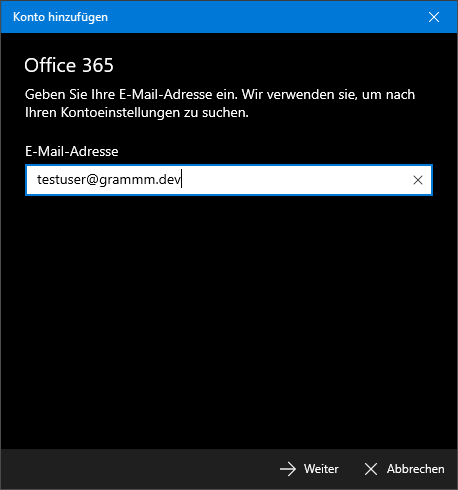
The following dialog requests the entry of the email address, which should be entered here, select
Nextto continue.
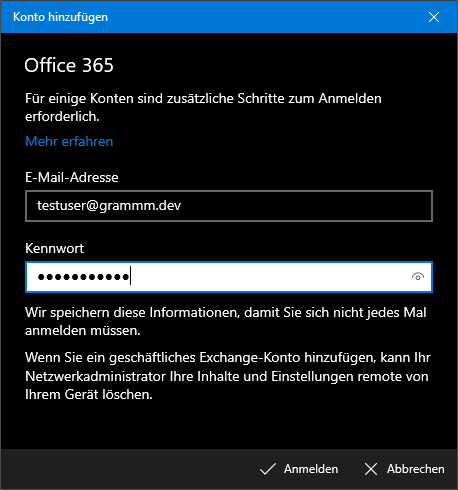
After a few seconds, the next dialog requests the password of the account, select
Logonafter entry.
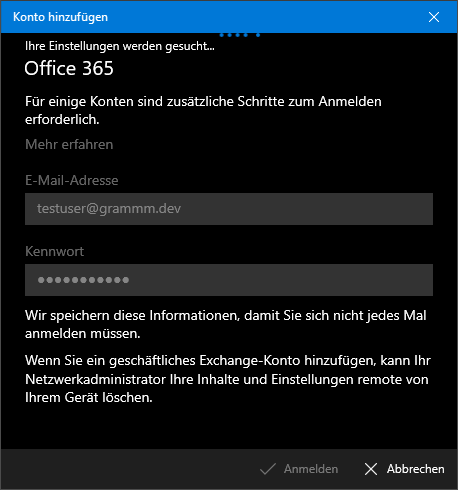
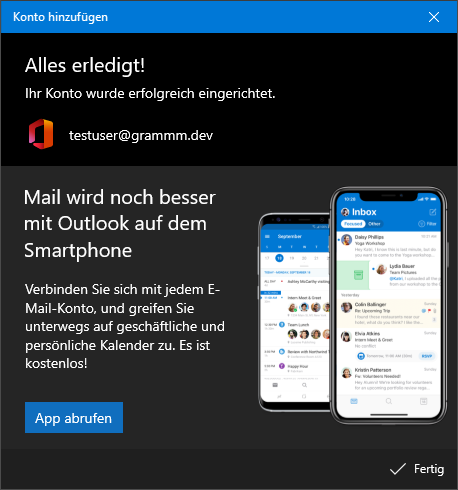
After entering the credentials, Microsoft Mail will automatically (based on AutoDiscover technology) detect your settings after a few seconds.
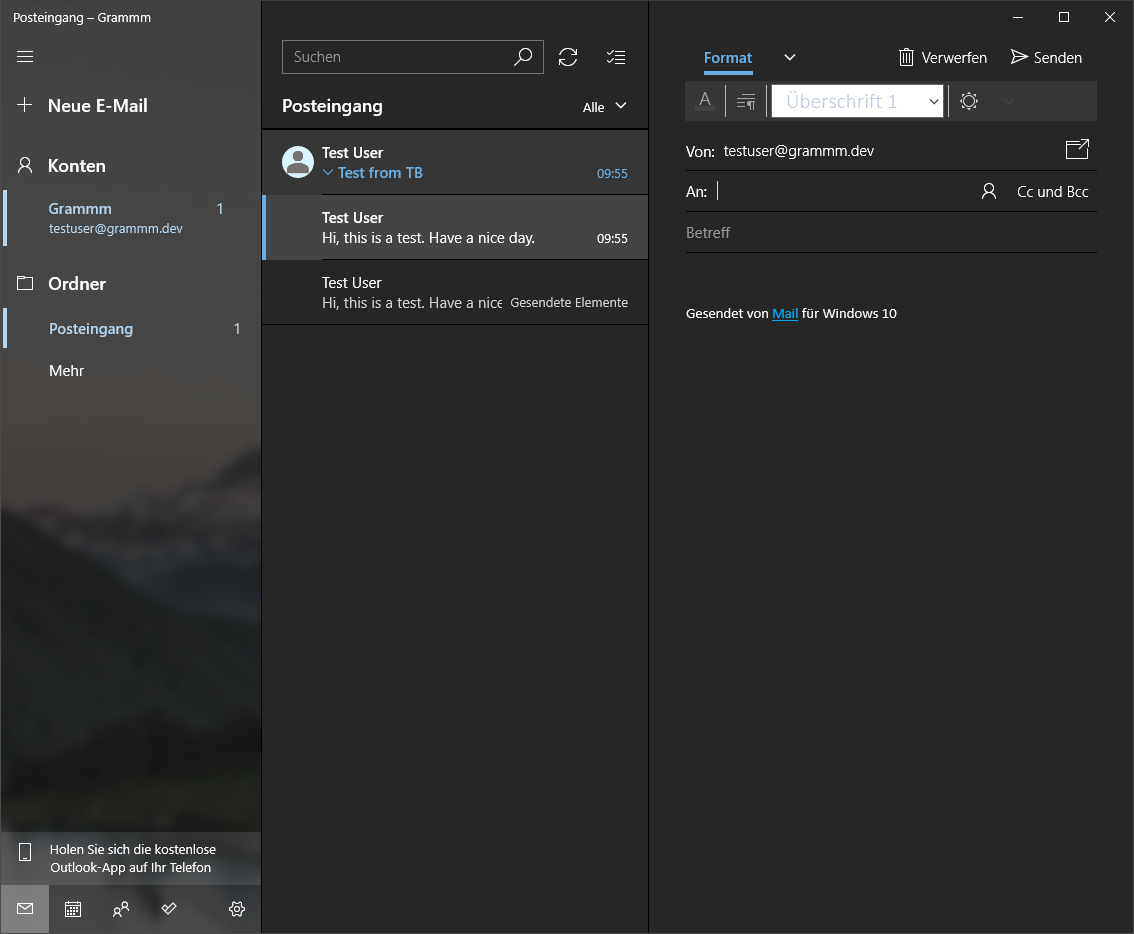
After completed setup of the account, Microsoft Mail will confirm the successful account creation and synchronize all information with your Microsoft Windows device.
Note
Microsoft Mail will automatically store the credentials without the option to deselect this feature. The password hereby is stored in the Microsoft Windows user profile used for the account creation.
Important
With the account creation in Microsoft Mail, the Windows default Apps
People and Calendar automatically have access to the same account
information and automatically synchronize your grommunio account with the
Microsoft Windows device.
Mozilla Thunderbird
Mozilla is a free and open-source cross-platform email and personal information manager. grommunio fully supports Mozilla Thunderbird with its primary protocols, IMAP(s), POP3(s), SMTP(s) as well as CalDAV(s). Additionally, with full support for CardDAV(s) by grommunio, the official Mozilla Thunderbird plugin named "CardBook" can be used for synchronization of contacts.
Thunderbird: E-Mail
To setup an email account with Mozilla Thunderbird, choose
File -> New ->
Existing Mail Account...
and fill in your personal mail account settings:
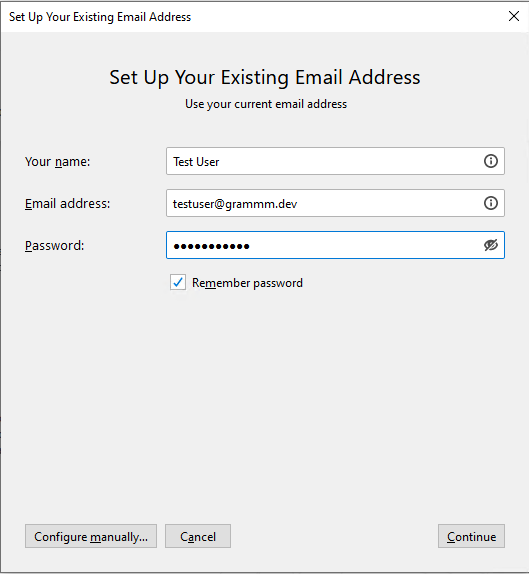
If you want your authentication information to be stored on your system, use
the Remember password option, so it will not prompt you the next times you
open Mozilla Thunderbird.
Press Continue when you have your confirmed your information to be correct.
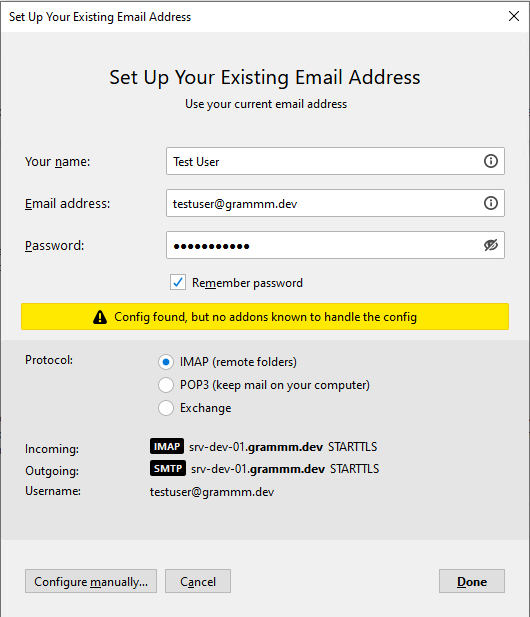
The summary page will provide you with the functionality available for Mozilla Thunderbird. During configuration, the warning
Configuration
found, but no addons known to handle the config
might show up. You can safely ignore this hint, since Mozilla Thunderbird does not understand all protocols available by grommunio, which is the reason for this warning to show up. Mozilla Thunderbird automatically detects the correct mail server information for you and sets the protocol encryption for you. With the choice of your favorite protocol, selectDoneand your account is setup.
Thunderbird: Calendar
To setup a calendar account with Mozilla Thunderbird, choose
File ->
New -> Calendar...
and selectOn the Networkas the location of your calendar.
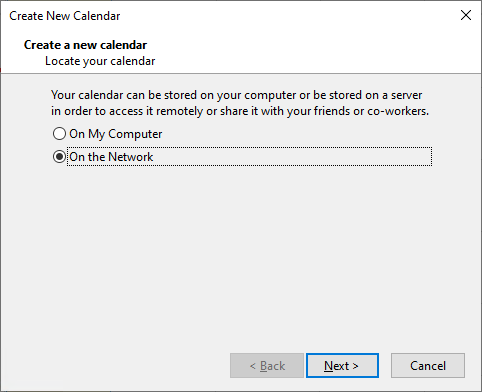
In the upcoming dialog choose
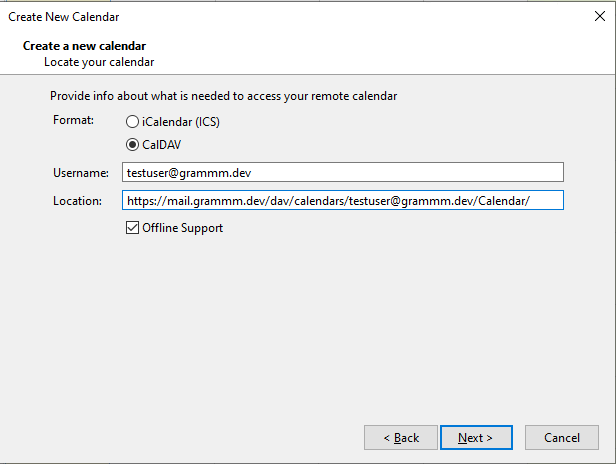
CalDAVas Format, enter your Username and set the location appropriately. Per default, your personal Calendar is reachable under "https://<Server URL>/dav/calendars/<Username>/<Calendar Name>". If you do not have this information, contact your administrator to provide you with this information accordingly. In most cases, the server URL matches your grommunio Web URL. Checking the checkboxOffline Supportwill make sure you can access your calendar information also without an active connection to your provider.
Note
Since grommunio support multiple calendars in a Mailbox, the <Calendar Name>
is needed to be specified explicitly. Note that this URL is sensitive
to correct spelling, which means a users mailbox' calendar is most likely to
be named Kalender in german, for example.
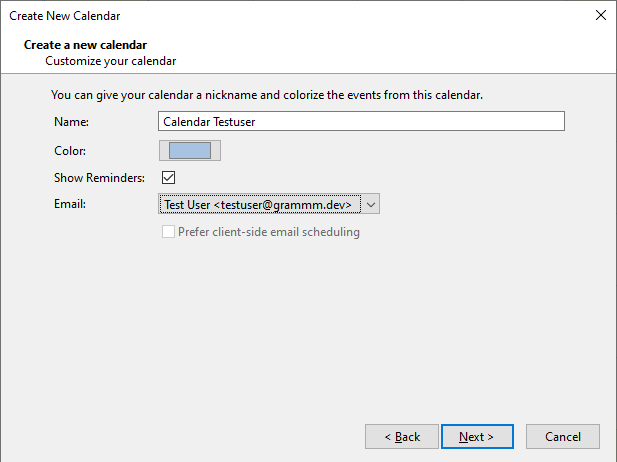
The next dialog in the CalDAV account setup will give you options to setup your Calendar account, such as giving it a specific name, color and activate reminders. It is recommended to choose the corresponding email account correctly - This ensures appointment handling is matching the correct calendar/mailbox pairing.
As final dialog you will be presented to provide your credentials to be able to access your calendar. You can identify being connected to the correct server URL by seeing the prompt:
The site says: "grommunio dav". Use the same credentials as with your email account to access your calendar information.

Thunderbird: Contacts
To setup a contacts account with Mozilla Thunderbird, it is first required to install a plugin with Mozilla Thunderbird. The well-known plugin "CardBook" is fully tested and supported with grommunio, and available at the following location: https://addons.thunderbird.net/de/thunderbird/addon/cardbook/. Download the plugin and install it, to make your Mozilla Thunderbird installation to support contacts management based on the vCARD standard. To install it, you need to download and install the plugin (an XPI archive) or download it directly within Mozilla Thunderbird via
File -> Add-Onsand search for the Add-onCardBookand selectAdd to Thunderbird. It will be automatically installed and with installation it will request you for the necessary permissions, which need to be accepted for proper operation of the plugin.

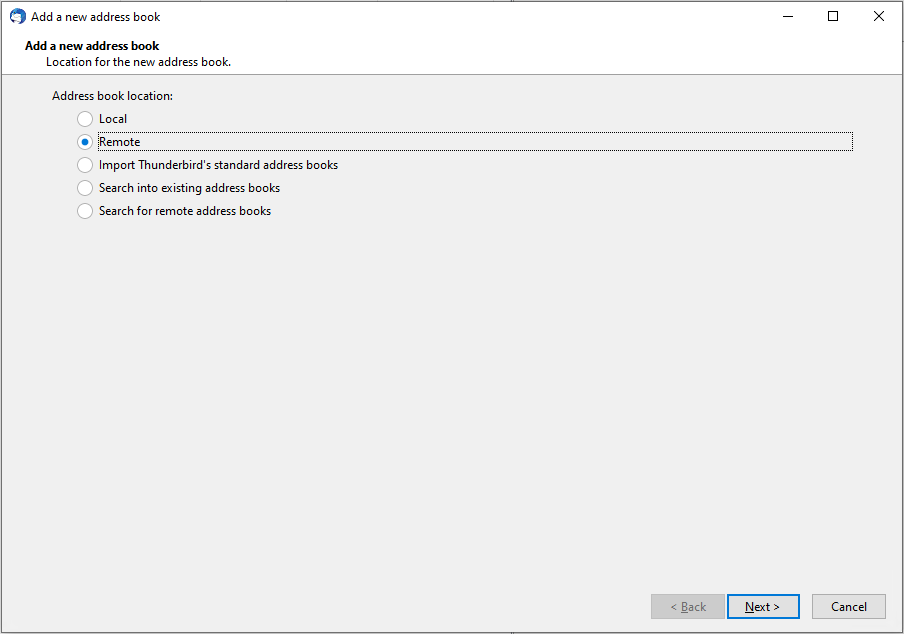
After installation, choose the CardBook Tab from Mozilla Thunderbird, and within CardBook, choose
Addressbook -> New Adressbookand selectRemoteas address book location and selectNext >.
For setting up your grommunio Contacts folder, choose
CardDAVas your remote address book type. Per default, your personal Calendar is reachable under "https://<Server URL>". In most cases, the server URL matches your grommunio Web URL. After entering your credentials (Username and Password) you can validate your correct configuration with the buttonValidate.
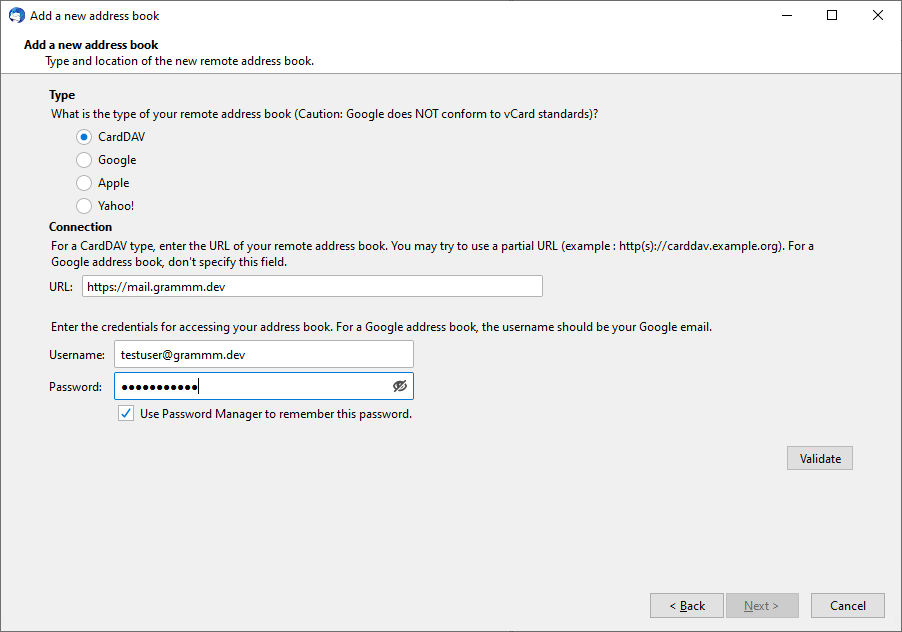
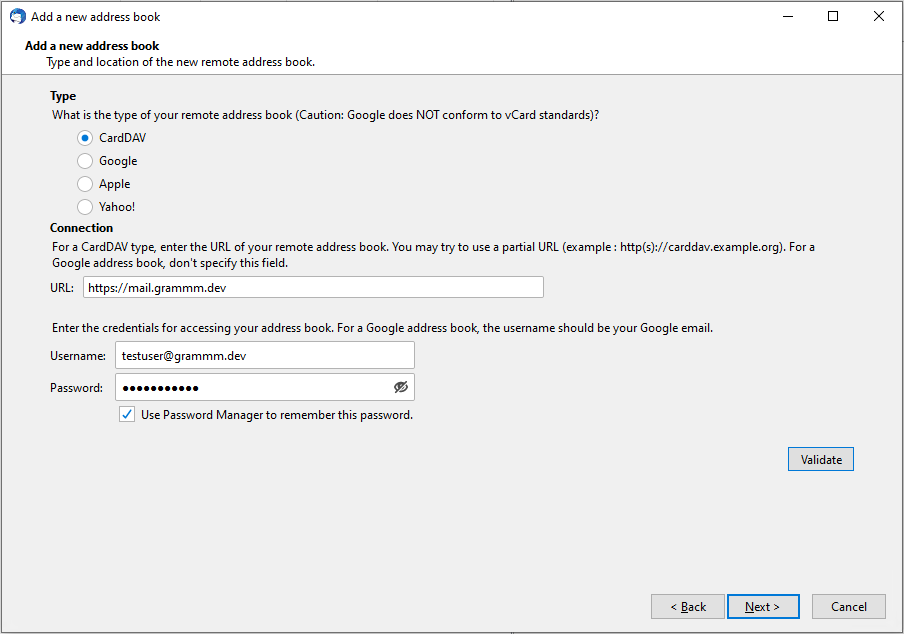
After successful validation, select
Next >to continue your address book configuration.
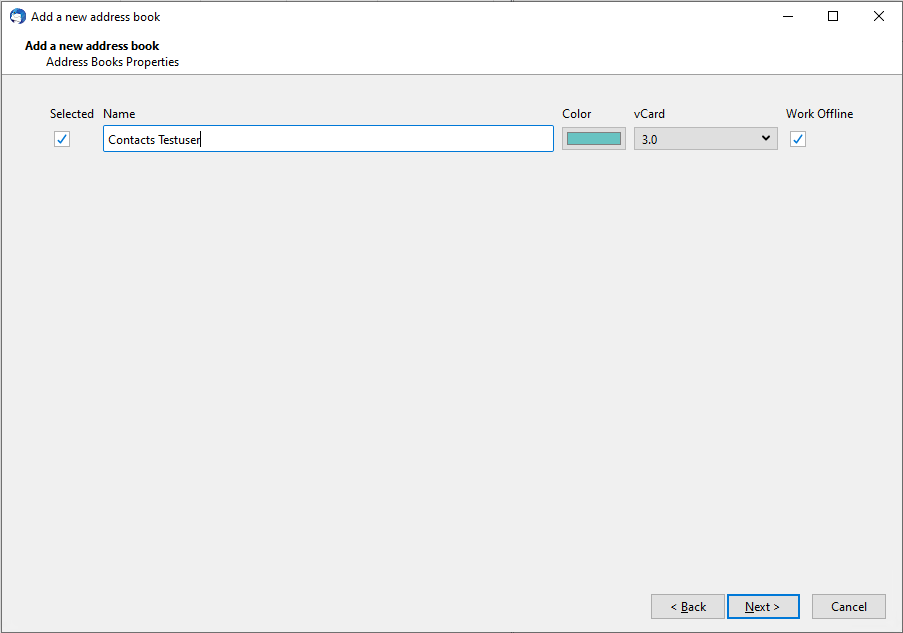
The final dialog will give you options to setup your address book account, such as giving it a specific name and color. Checking the checkbox
Work
Offline
will make sure you can access your calendar information also without an active connection to your provider.
Evolution
grommunio Web
grommunio Web provides the primary web interface for accessing your mailbox and other communication tools with just a browser.
Important
For grommunio Web, we have crafted a dedicated standalone documentation, which you can find here: grommunio Web documentation
Note
This documentation is also referenced directly from grommunio Web, which allows your users to use the most recent version of the documentation online.