Calendar
In this chapter, we guide you how to use Calendar in grommunio Web. After reading through this chapter, you should be able to create appointments, meetings and room bookings.
Calendar Shortcut Bar
Section titled “Calendar Shortcut Bar”The Calendar Shortcut Bar plays an important role in managing appointments and meetings. It provides quick access to commonly used calendar actions, helping users work more efficiently and stay organized.

The Shortcut Bar enables the quick creation of a new appointment or meeting. Additionally, it allows seamless switching between different calendar views, facilitating the review and management of the schedule.
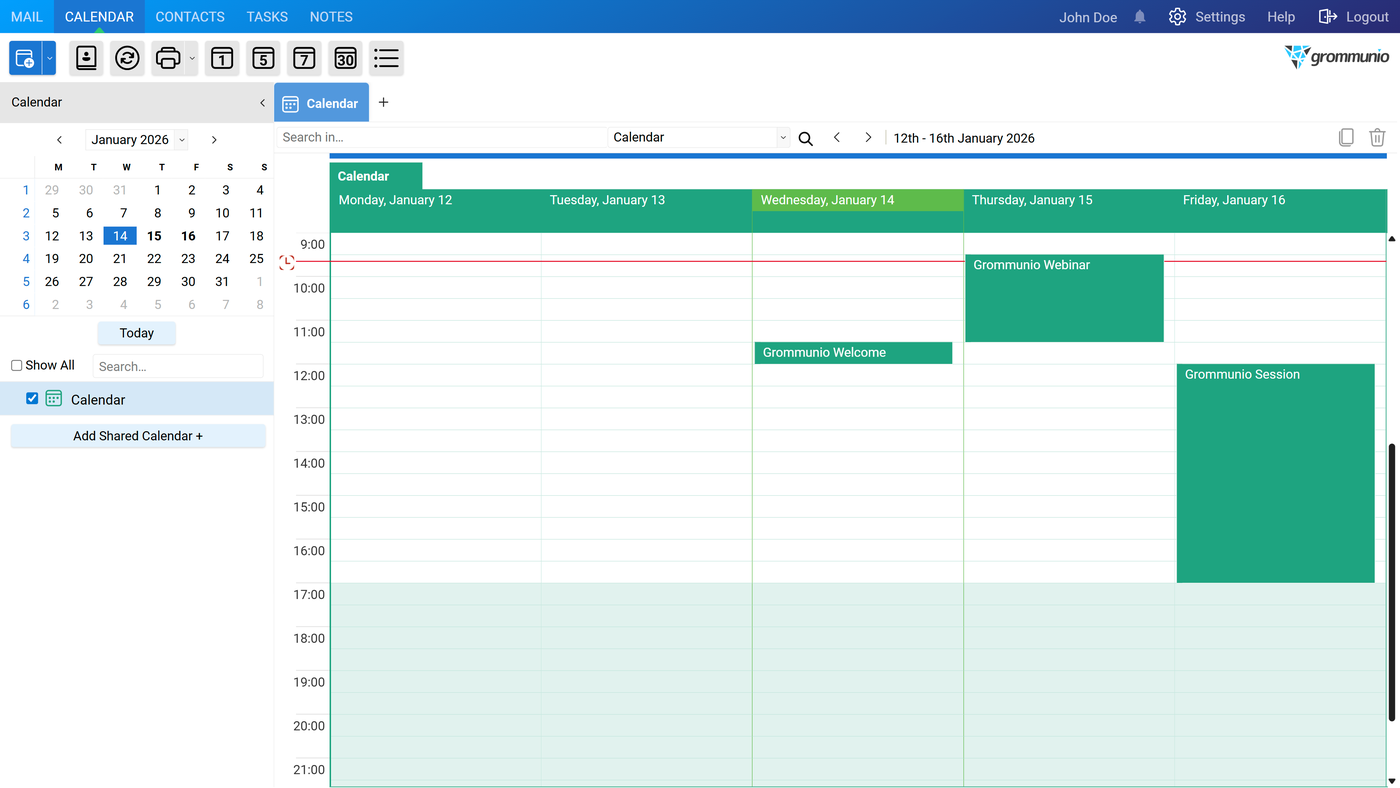
The following calendar views are available from the shortcut bar:
- Day view, for viewing a single day's schedule
- Workweek view, for viewing the standard working week
- Week view, for viewing all days of the current week
- Month view, for an overview of the entire month
- List view, for displaying appointments in a chronological list
The Calendar Shortcut Bar enables efficient creation, viewing, and management of appointments and meetings in the format that best supports the workflow.
Appointment
Section titled “Appointment”A new appointment can be created using one of the following methods:
- Use the Calendar Shortcut Bar to quickly create an appointment.
- Click on the + symbol at the end of the Tab Bar.
- Double-click directly in the calendar using the appropriate view.
- Right-click directly in the calendar using the appropriate view. Choose New Appointment
Appointment creation behavior depends on the selected calendar view:
- In Day, Workday, and Week views, double-click the desired date and time to create an appointment at that specific time.
- In Month view, double-click a date to create an all-day appointment for the selected day. The appointment time can be edited later if needed.
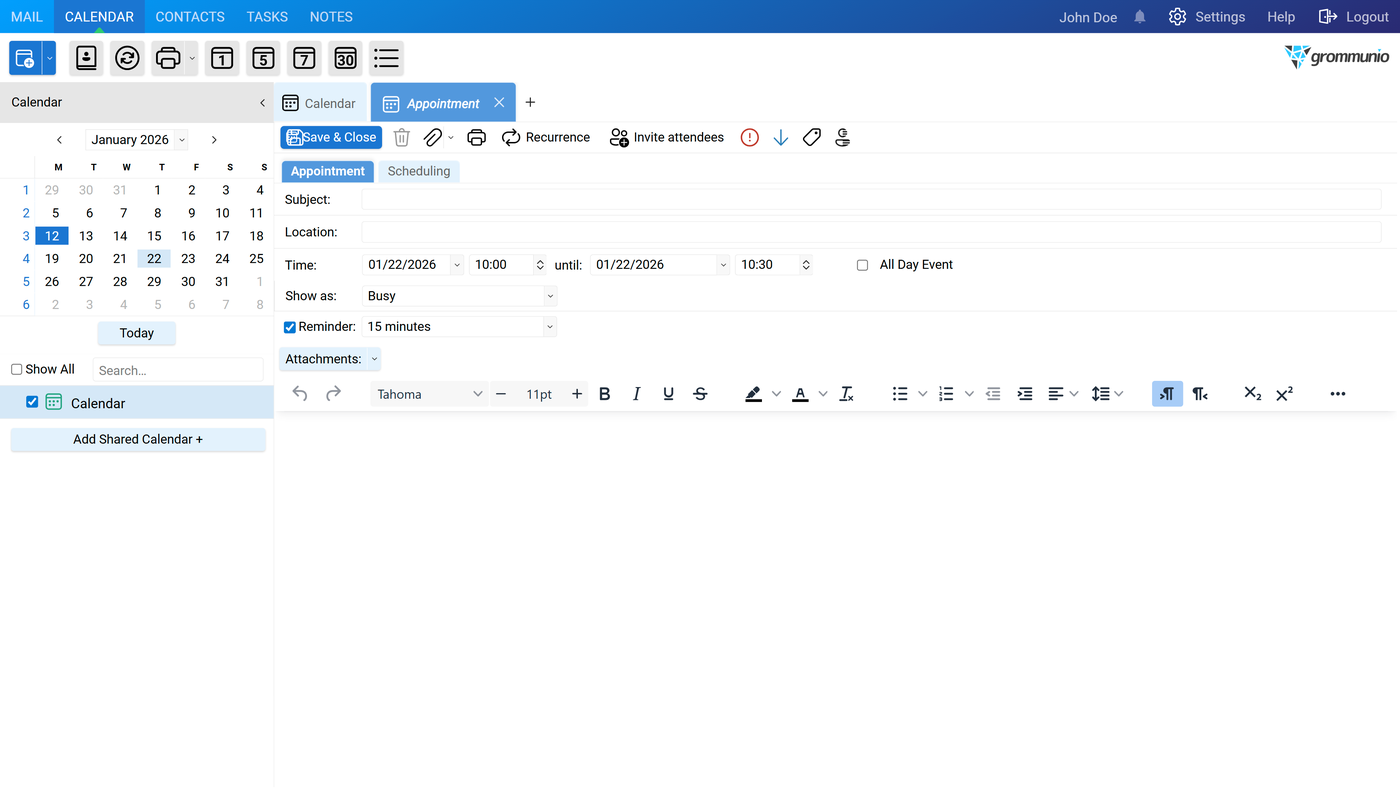
Once created, the appointment editor opens, providing the ability to modify the following details:
Appointment Toolbar
Section titled “Appointment Toolbar”The Appointment toolbar is located at the top of the appointment window and provides quick access to commonly used actions.
- Save & Close - Saves the appointment and closes the editor.
- Delete - Permanently removes the appointment. Moves it into the Deleted Items folder.
- Attachment Dropdown - Provides two methods for adding attachments:
- File Upload: Upload a file directly from the computer.
- Attach Item: Attach an item from the mailbox (email, contact, calendar entry, task, or note) as an attachment or as text only.
- Print - Prints the appointment details.
- Recurrence - Opens the recurrence settings to create a repeating appointment.
- Invite Attendees - Converts the appointment into a meeting and switches from the Appointment tab to the Meeting tab, allowing participants to be invited.
- High Importance - Marks the appointment as high importance.
- Low Importance - Marks the appointment as low importance.
- Categories - Assigns one or more categories to the appointment.
- Mark as Private - Marks the appointment as private so its details are hidden from other users.
Recurrence Settings
Section titled “Recurrence Settings”The Recurrence configuration provides the ability to define the repetition pattern of an appointment, specifying both the frequency and the timing of occurrences.
It is divided into three sections.
- Time This section defines the duration and time of each occurrence. Example:
- Occurrence duration: 30 minutes
- Start time: 14:00
- End time: 14:30
- Recurrence Pattern This section defines how often the appointment repeats. Patterns such as daily, weekly, monthly, or yearly can be selected, with options to configure intervals and specify applicable days.
- Range of Recurrence This section controls the overall timeframe of the recurring appointment, providing options to:
- Specify a start date
- Allow the recurrence to continue indefinitely
- End the recurrence after a specific number of occurrences
- Define an end date
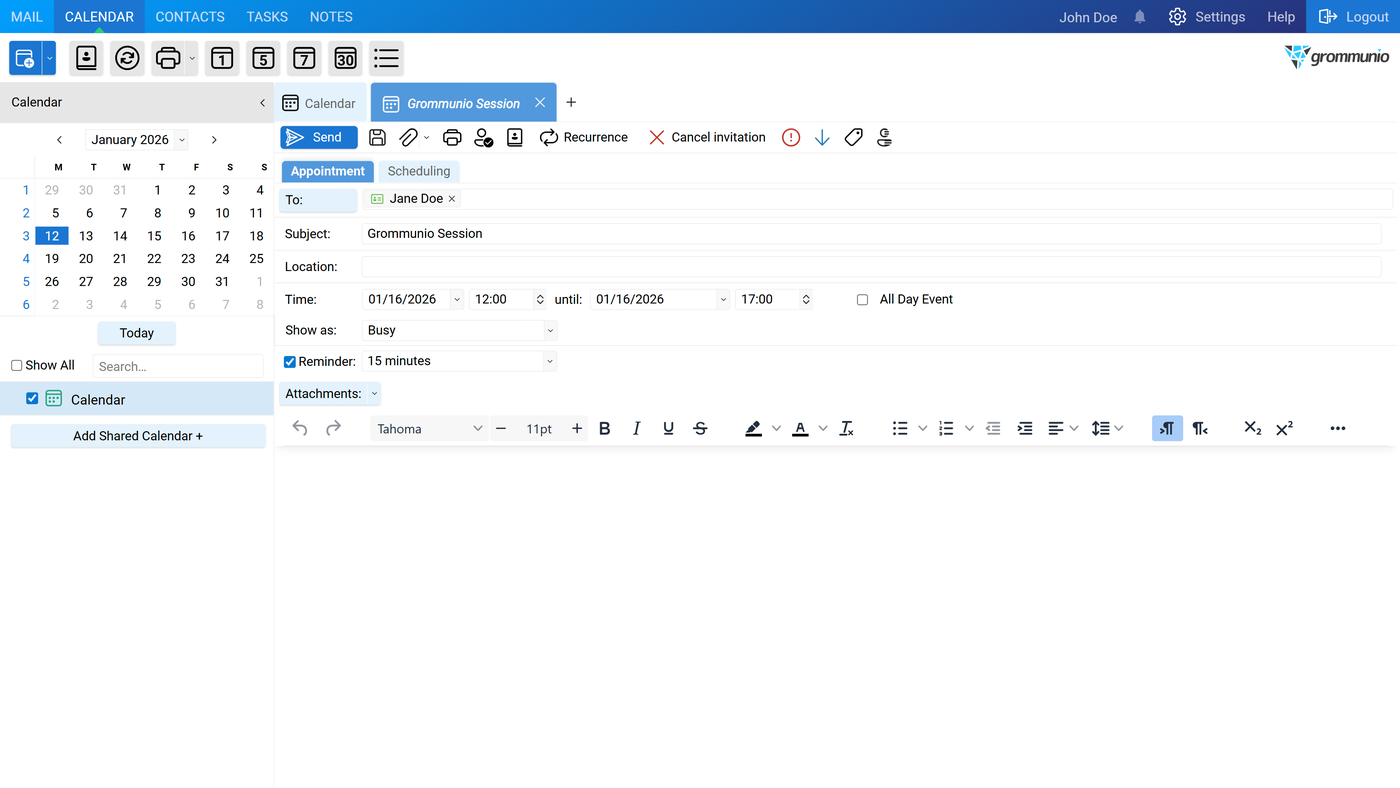
Subject
Section titled “Subject”Enter a brief title or description for the appointment. This text appears in the calendar and helps identify the purpose of the meeting or event.
Location
Section titled “Location”Specify where the appointment will take place. This can be a physical location, such as a meeting room, or a virtual location, such as an online meeting link.
Set the start and end date and time for the appointment. Example:
- Start: 12/16/2026, 11:30
- End: 12/16/2026, 12:00
If the appointment lasts for the entire day, select All Day Event. This automatically schedules the appointment as an all-day entry.
These values can be adjusted to change the duration or schedule the appointment on a different date.
Show As
Section titled “Show As”This option determines how the attendee's availability is presented during the appointment.
- Options: Free, Tentative, Busy, Out Of Office
For example, setting this option to Busy indicates that the user is not available during the scheduled time.
Reminder
Section titled “Reminder”Specifies when a reminder should be received prior to the start of the appointment.
For example, a reminder set to 15 minutes triggers a notification shortly before the event.
Create In
Section titled “Create In”Select the calendar where the appointment will be saved. By default, appointments are created in the Calendar, but another available calendar can be selected if applicable.
A Note can be added to provide additional information related to the appointment. Notes are useful for agendas, preparation details, or any other relevant comments and are saved as part of the appointment.
Meeting
Section titled “Meeting”A Meeting request can be created in one of the following ways:
- By selecting Meeting request from the Shortcut Bar drop-down menu.
- By right-clicking directly in the calendar and selecting New Meeting Request
- By selecting Invite attendees in the Appointment Editor.
- By selecting Scheduling Tab in the Appointment Editor.
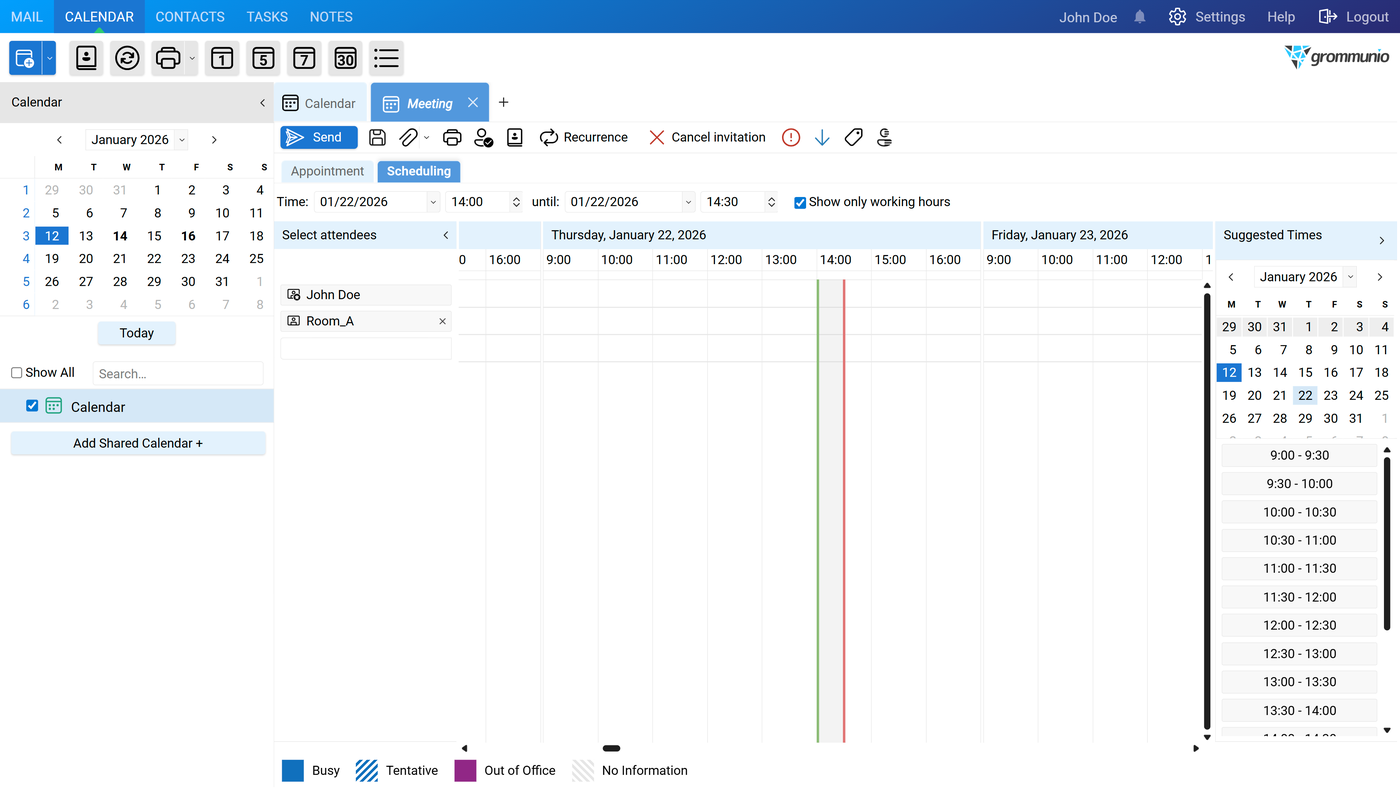
The most convenient way to avoid scheduling conflicts is to use the Scheduling Tab in the appointment editor.
This option enables the following actions:
- Select one or more users
- View their schedules at the same time
- Check their status: Busy/Tentative/Out of Office/No Information
- Choose from Suggested Times
By checking participants' availability before saving the meeting, potential conflicts can be avoided beforehand.
Once Invite attendees is selected in the Appointment Editor, the appointment is converted into a meeting request and generates the To: field.
-
To: Specifies the attendee or attendees of the meeting request.
The field supports the following methods for selecting users:
- Manual entry with autocomplete support
- Recipient validation using Check Names
- User selection via the Address Book
- Opening the Address Book by selecting the To button to choose one or more users
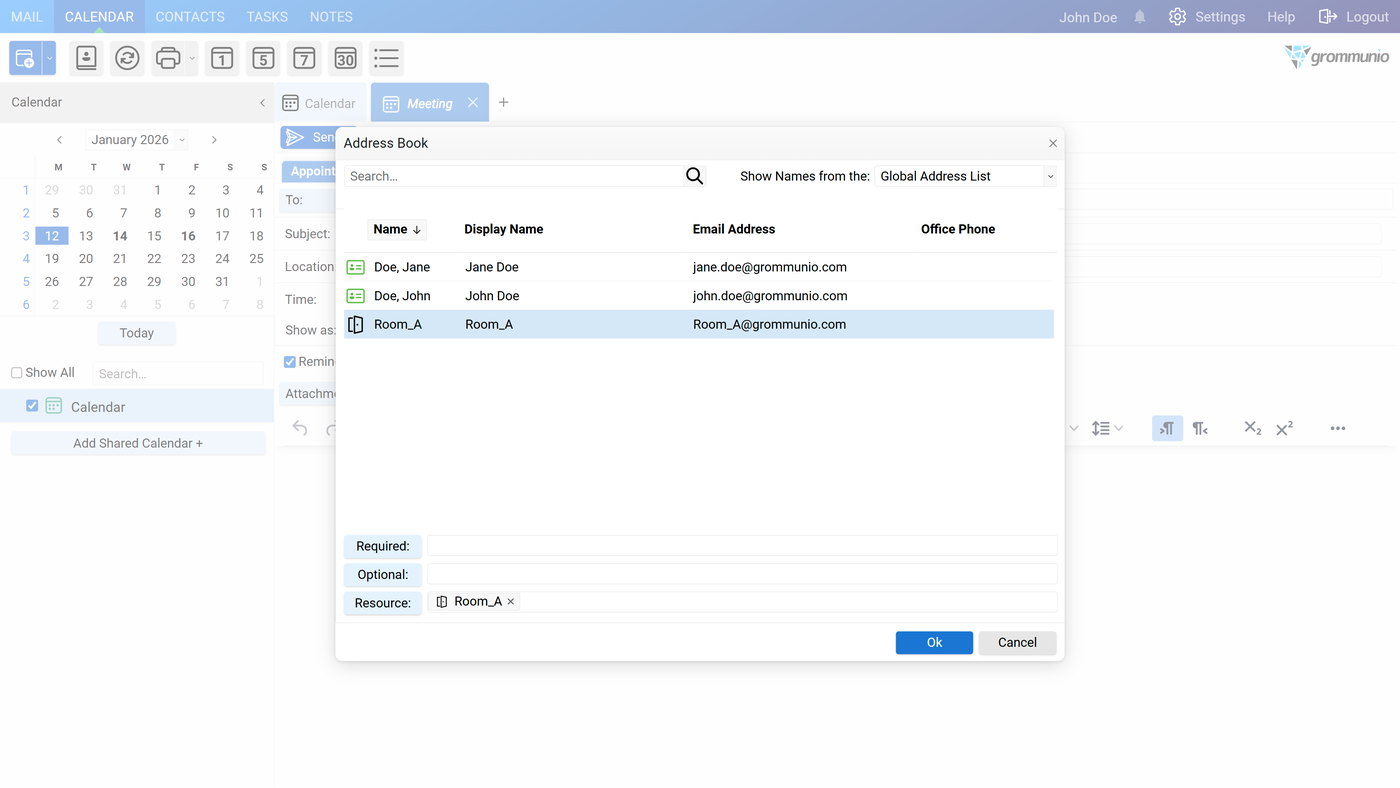
When the Address Book is opened following three fields can be entered:
- Required: Mandatory attendees. They are essential for the meeting.
- Optional: Optional attendees. They are welcome to join but their absence won't stop the meeting
- Resource: Resources such as rooms or equipment
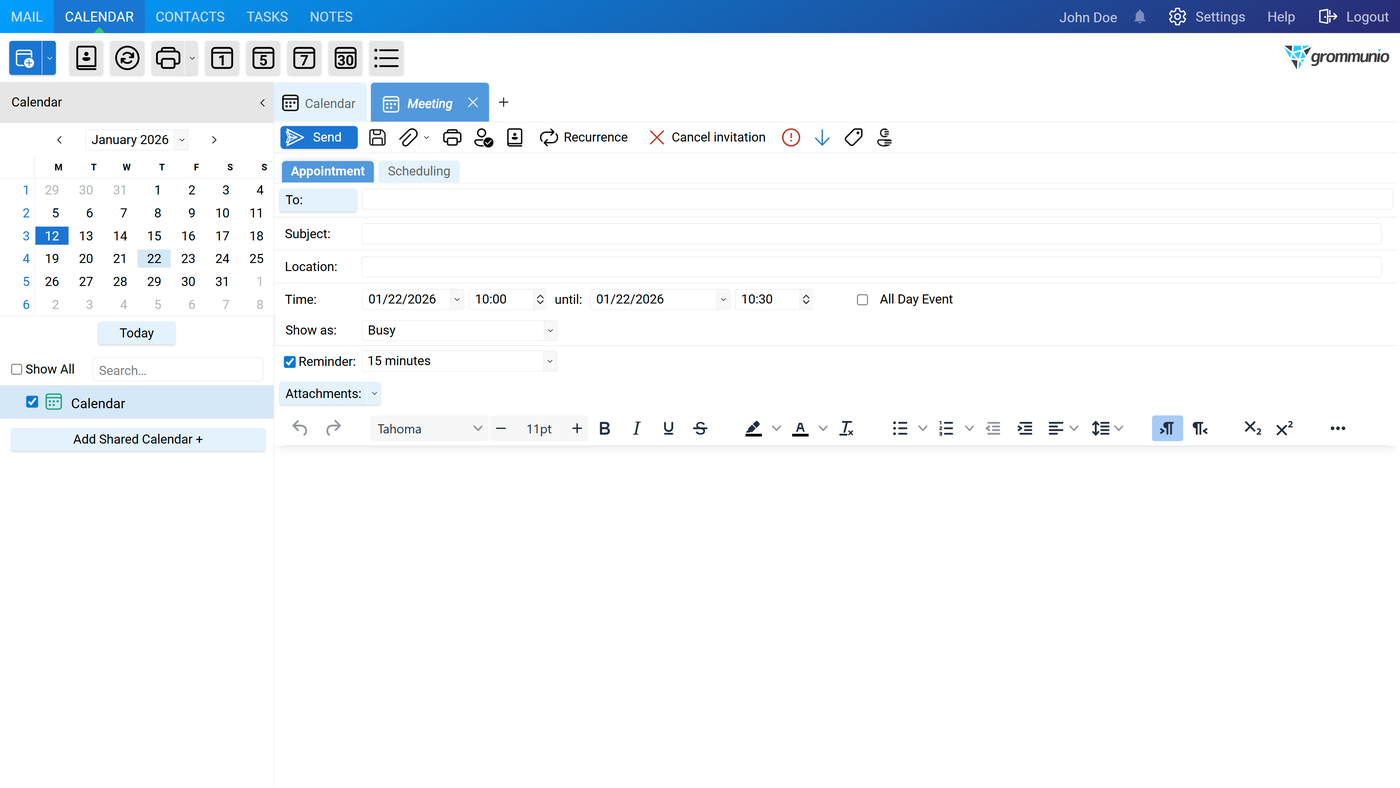
Furthermore the toolbar changes to reflect the available meeting actions.
Toolbar Changes
Section titled “Toolbar Changes”When an appointment becomes a meeting, the toolbar is updated as follows:
- Save & Close is replaced by Send.
- An additional Save button is displayed.
The meeting toolbar provides the following additional options:
- Check Names - Verifies attendee names and resolves them against the address directory.
- Open Address Book - Opens the address book to select attendees from available contacts.
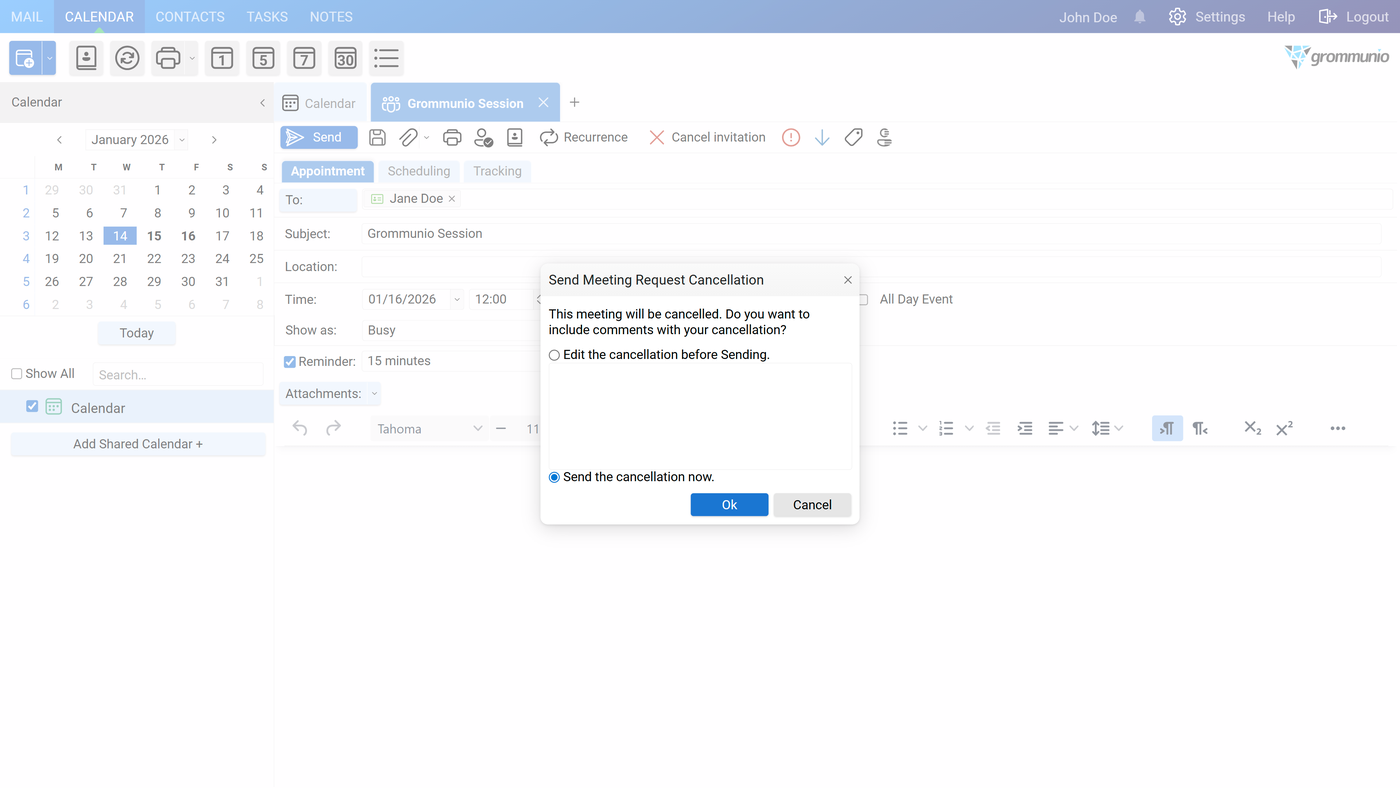
- Cancel Invitation - Cancels the meeting and sends a cancellation notice to all invited attendees.
Tracking
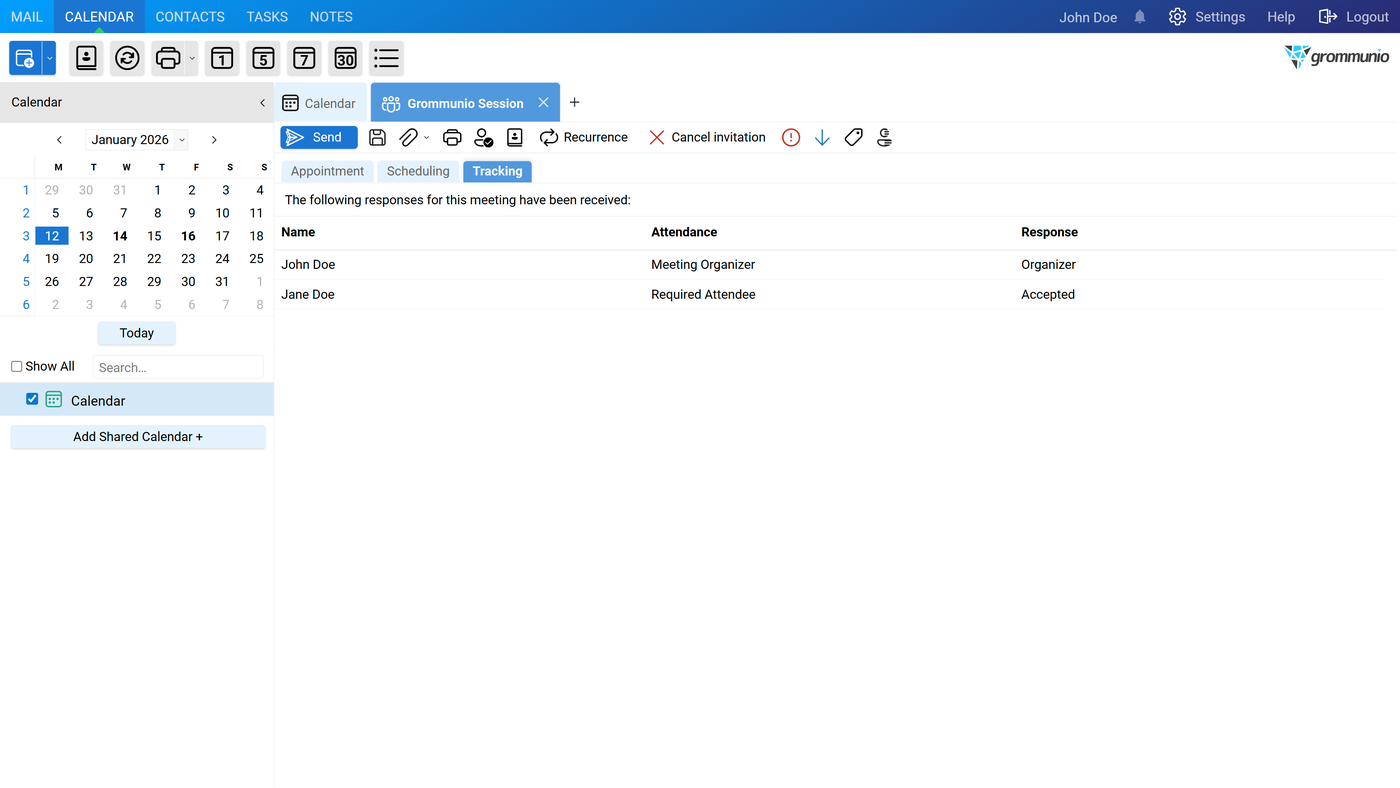
Section titled “Tracking”After a meeting request has been sent, the Tracking tab becomes available in the organizer's meeting editor.

This tab provides an overview of all invitees and their responses to the meeting request.
- Name – Displays the name of each invited participant.
- Attendance – Indicates the participant's role, such as: Meeting Organizer, Required Attendee, Optional Attendee or Resource.
- Response – Shows the current response status for each participant: Accepted, Declined, or No response.
The Tracking tab allows the meeting organizer to monitor attendance and track responses without opening individual replies.
Room Booking
Section titled “Room Booking”In addition to scheduling appointments and meetings, the calendar also allows the booking of rooms. This feature enables the reservation of shared resources, such as meeting rooms or conference facilities, directly within the scheduling workflow.
Before rooms can be booked by users, certain configuration steps must be completed in the Admin UI.
Room Configuration (Admin UI)
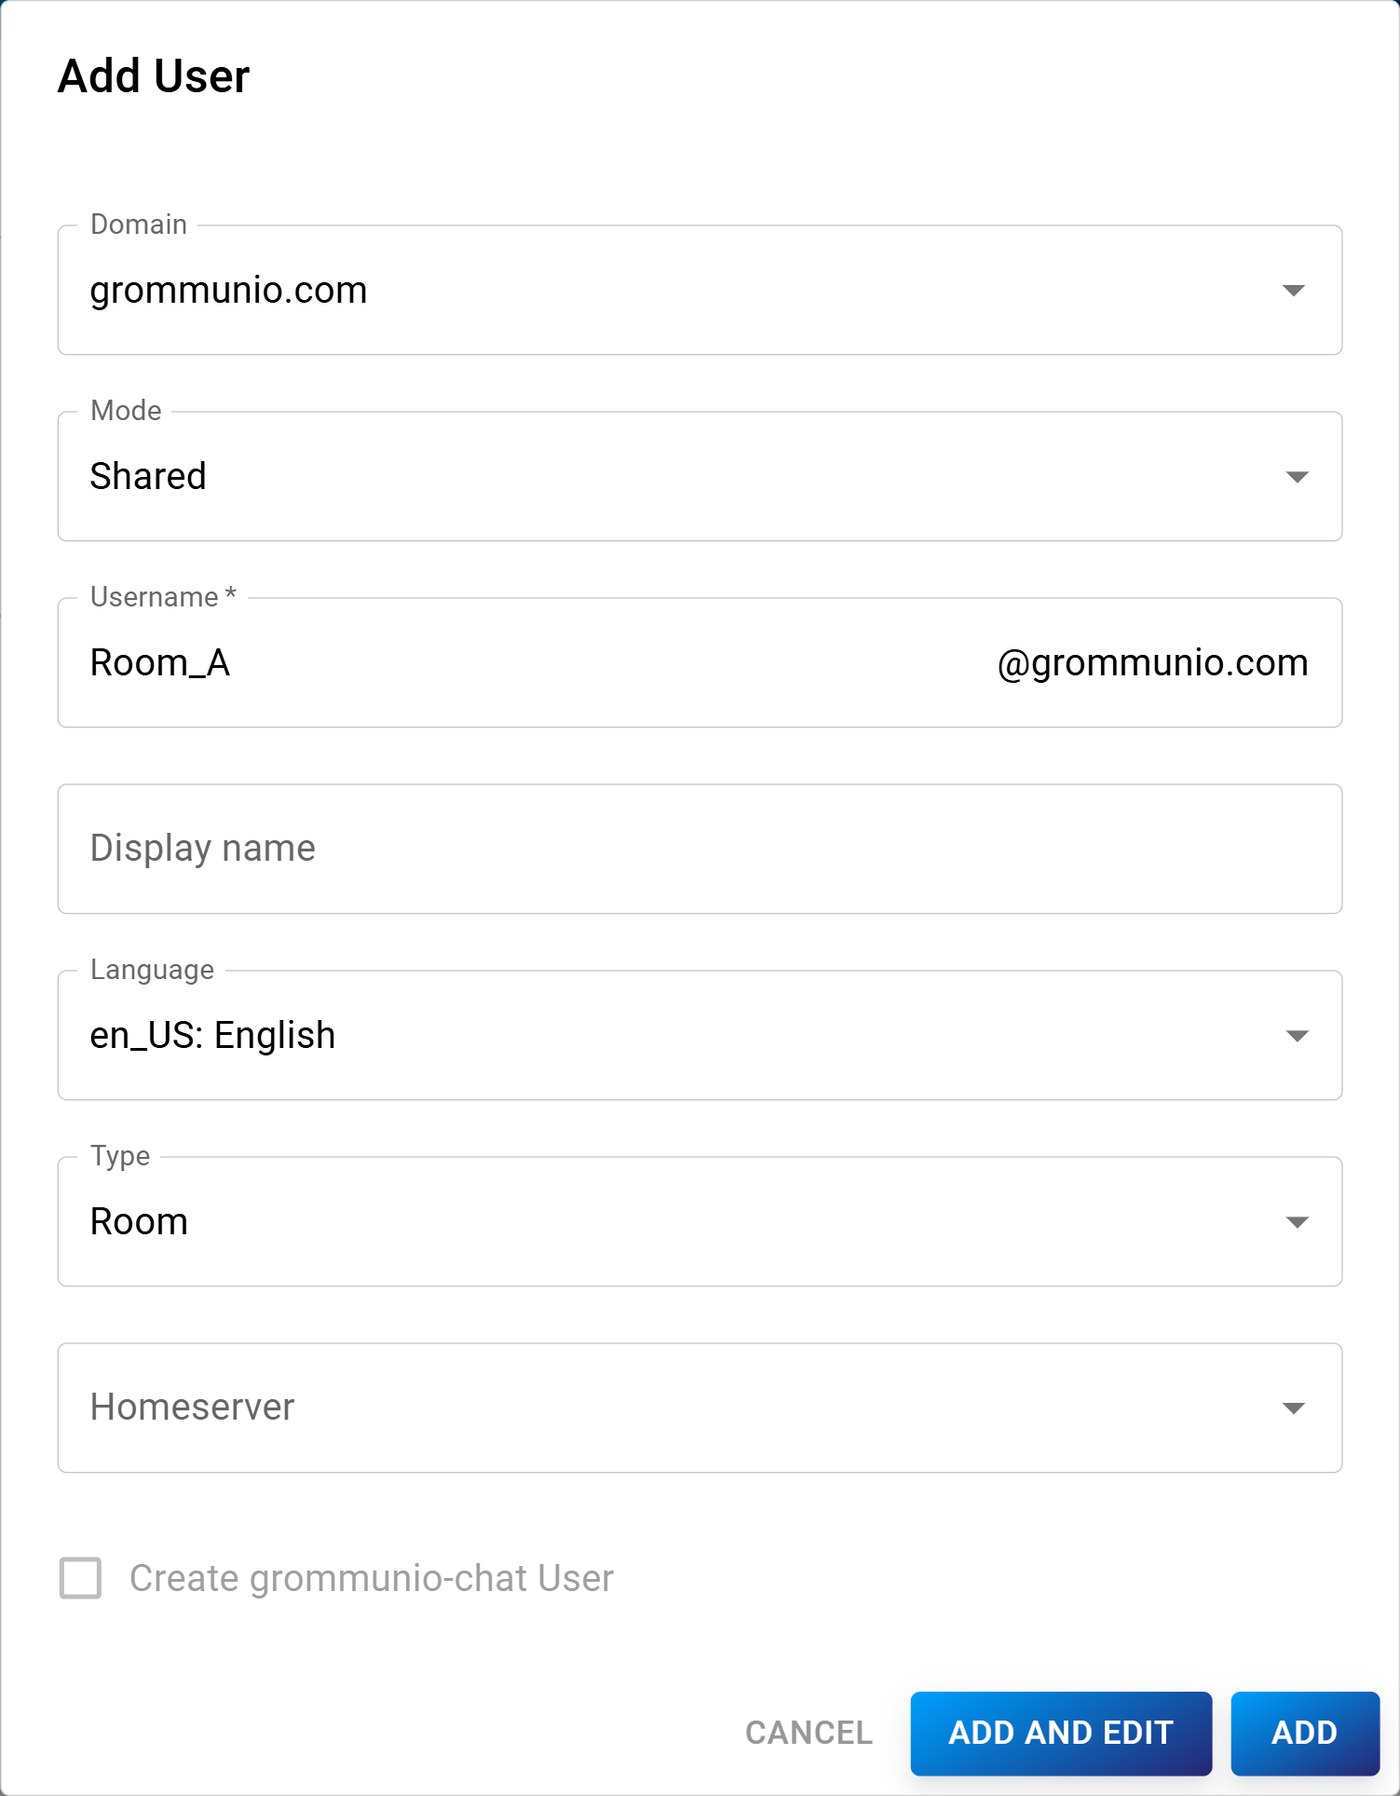
Section titled “Room Configuration (Admin UI)”To enable room booking, an administrator must first create a room resource as a shared user account.
- Open the Admin UI.
- Navigate to the User tab.
- Select New User.
- Choose the appropriate Domain.
- Set the Mode to Shared.
- Enter a descriptive Username for the room (for example, Room_A).
- Set the Type to Room.
- Save the configuration by clicking Add.
After the room has been created, edit the room user and configure the automatic processing of meeting requests:
- Open the room user for editing.
- In the Account Tab locate Automatic processing of meeting requests.
- Enable the following options:
- Decline all recurring meeting requests
- Decline all meeting requests with scheduling conflicts
- Accept conflict-free meeting requests
- Save the settings.
These options ensure that the room automatically accepts valid meeting requests and prevents scheduling conflicts.
Room Usage
Section titled “Room Usage”To book a room in grommunio Web, there are two methods:
Method 1
-
Create a new Meeting.
-
Open the Address Book using one of the following methods:
- Select the To: button.
- Alternatively, click the Open Address Book in the toolbar.
This opens the Address Book, extended with the following fields:
- Required: Mandatory attendees
- Optional: Optional attendees
- Resource: Resources such as rooms or equipment
-
Add the room to the Resource field.
-
If attendees are required, add them to the Required field.
-
Send the meeting request.
Method 2
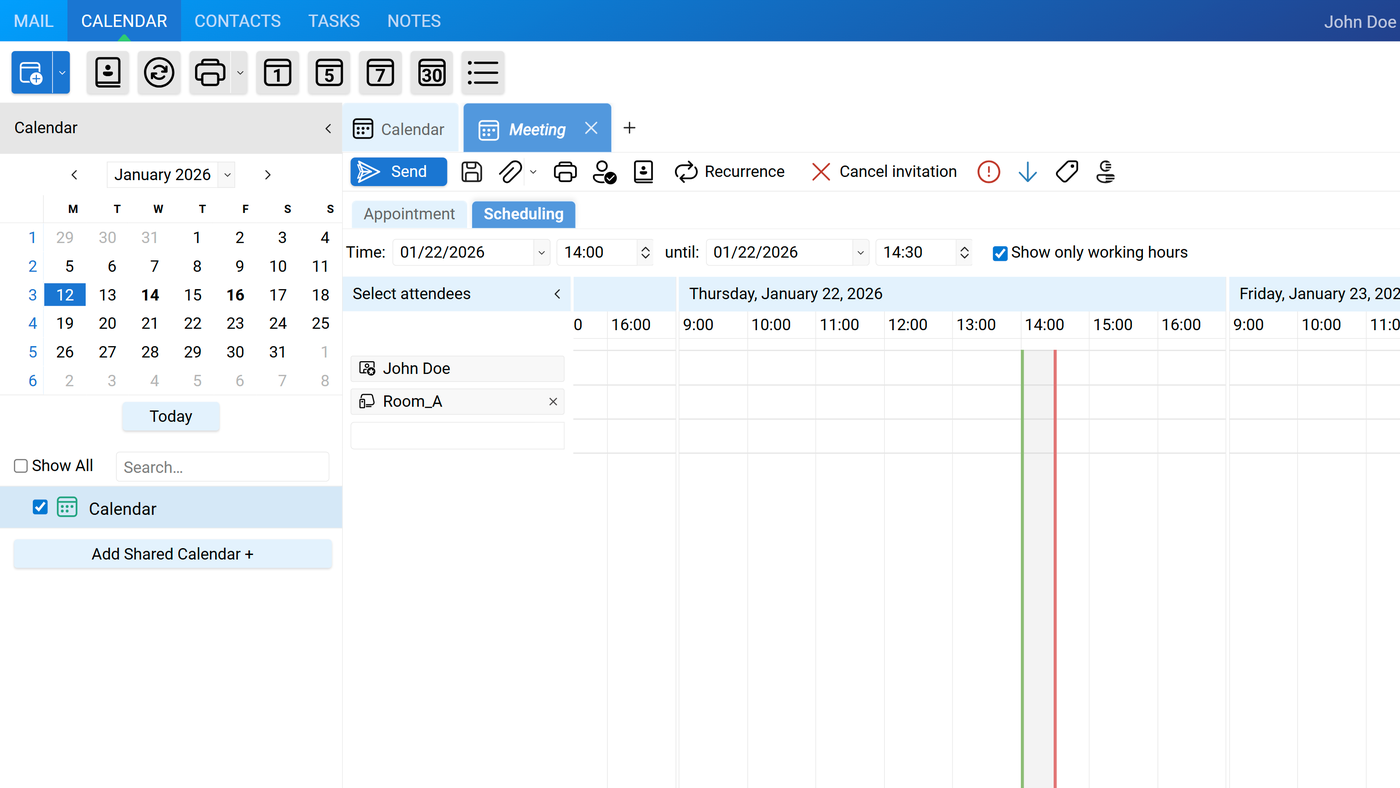
- Open the Scheduling tab in the appointment/meeting editor.
- Add the attendee (for example, Room_A).
- Right-click the added attendee.
- From the context menu, select one of the following options:
- Set as Required
- Set as Optional
- Set as Resource
- Select Set as Resource to designate the attendee as a room.

If the room is available, it is automatically reserved and added to the meeting. If the room is unavailable or a conflict exists, the meeting request is declined according to the configured room settings.
Standard Appointment/Meeting Options
Section titled “Standard Appointment/Meeting Options”When right-clicking on a created appointment or meeting, the following options are available:
- Open - Opens the selected appointment or meeting for viewing or editing its details.
- Copy/Move - Allows to duplicate the appointment or move it to a different date or calendar.
- Delete - Permanently removes the appointment or meeting from the calendar. Moves it into the Deleted Items folder.
- Categories - Assign a category to the appointment for better organization and filtering.
- Show as > - Change the status of the appointment to indicate how it will appear in the calendar. Options: Free, Busy, Tentative, Out of Office
- Send to … - Opens a new email message with the appointment attached as an .ics file. This allows to send the calendar event to other users via email, preserving all event details.
- Export as > - Export the selected appointment in .ics formats for external use or sharing.
- Options - Displays properties such as the Object ID.
Additional Options for Received Meeting Requests
Section titled “Additional Options for Received Meeting Requests”When a meeting request is received from another user, the following actions become available:
- Accept - Confirms attendance and adds the meeting to the calendar.
- Tentative - Marks attendance as tentative, indicating possible participation without full commitment.
- Decline - Rejects the meeting invitation and removes it from the calendar.
- Propose New Time - Suggests an alternative meeting time to the organizer when the proposed time is not suitable.
Calendar Overlay
Section titled “Calendar Overlay”When multiple calendars are selected, they are displayed side by side by default. Each calendar appears in its own column, facilitating a clear comparison of availability across users, rooms, or resources.
- Side-by-side view – Each selected calendar appears in a separate column with its own color, making overlaps and free time easy to identify.
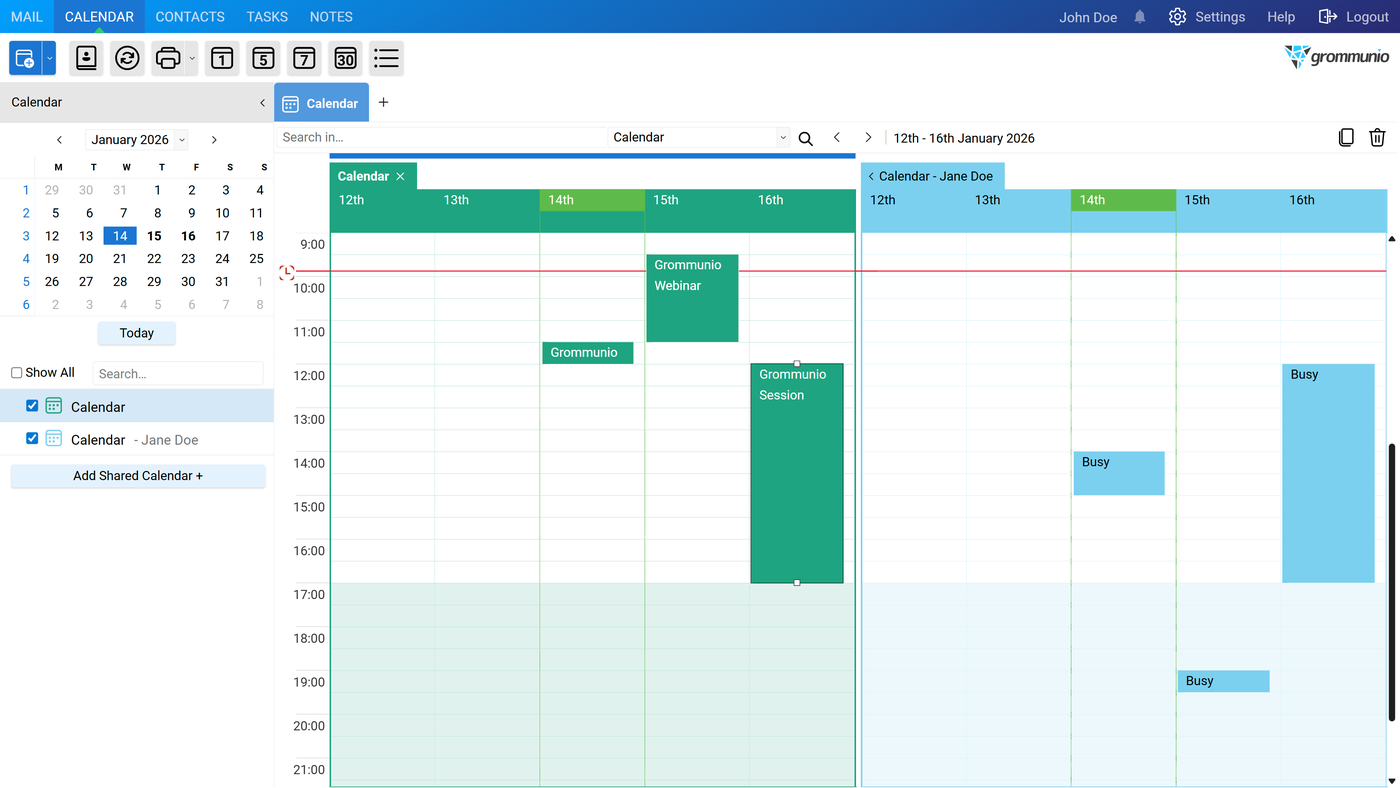
- Overlay view – By clicking the "<" arrow in the calendar header, the selected calendar is overlaid onto the main calendar instead of being shown in a separate column.
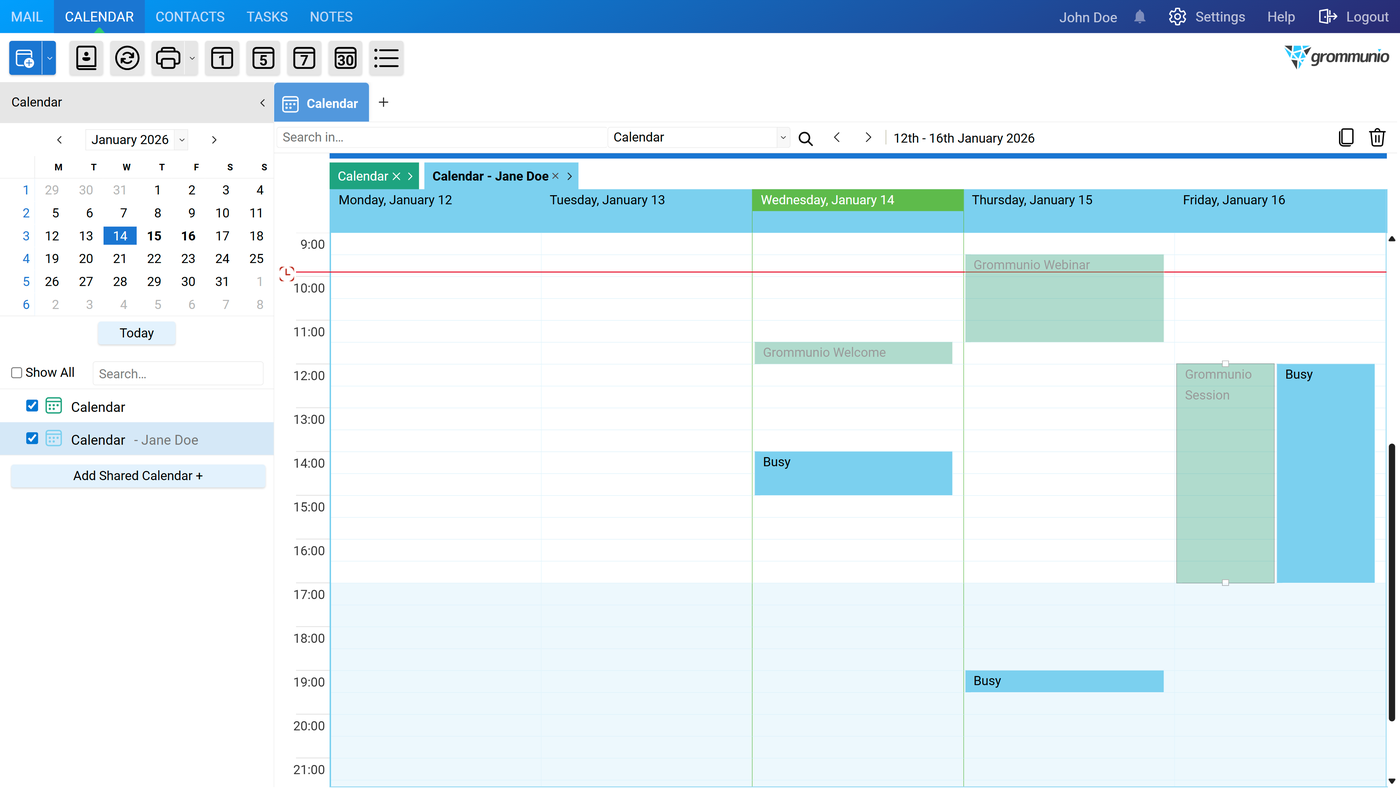
- Return to side-by-side view – To detach an overlaid calendar and display it again in its own column, click the ">" arrow in the calendar header.
In overlay mode, all events are consolidated into a single calendar view. Events retain their color-coding by calendar, enabling distinction between different users or resources while displaying them within the same time grid.
Switching between side-by-side and overlay views is available at any time, allowing the display to be adjusted to suit specific scheduling requirements.
Calendar Basic Meeting Workflow
Section titled “Calendar Basic Meeting Workflow”The following describes a typical meeting workflow between two users.
Meeting request and response
Section titled “Meeting request and response”- John Doe creates a meeting – John Doe schedules a meeting and sends a meeting request to Jane Doe.
- Jane Doe receives the invitation – Jane Doe receives the meeting request as an RSVP message.
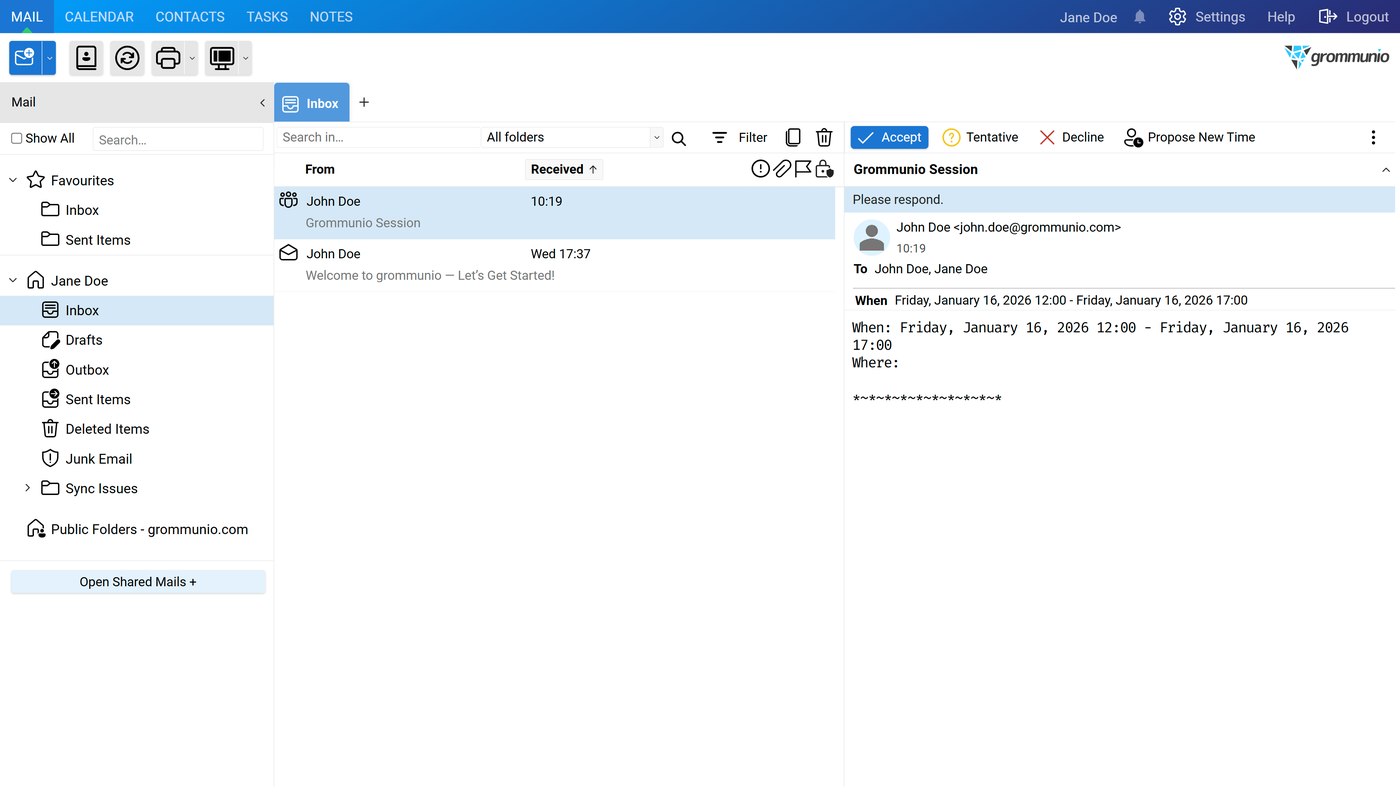
- Jane Doe responds to the invitation – Jane Doe can accept, decline, or tentatively accept the meeting:
- By responding directly to the RSVP email, or
- By right-clicking the meeting entry in the calendar and selecting the appropriate action from the context menu.
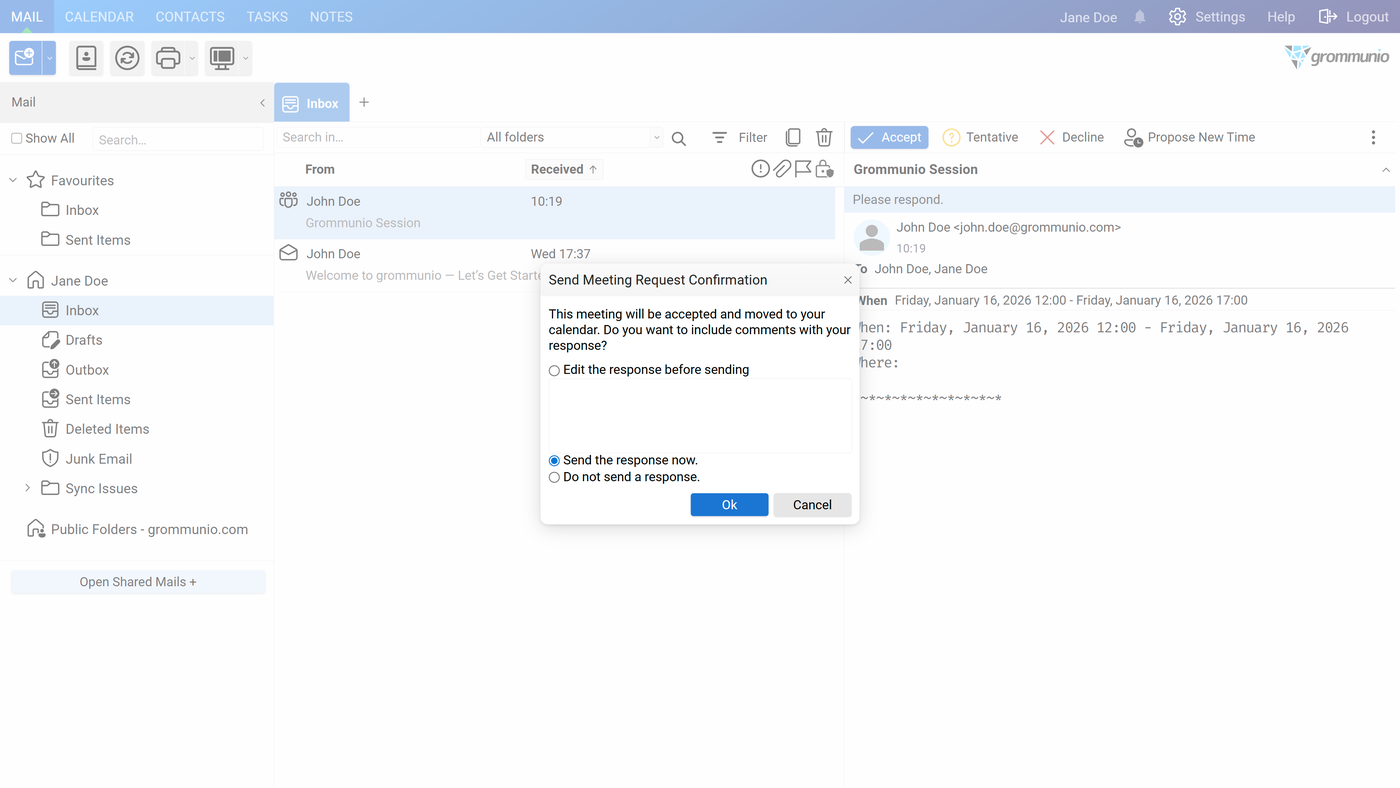
- John Doe receives the response – John Doe receives an email notification informing them of Jane Doe's response.
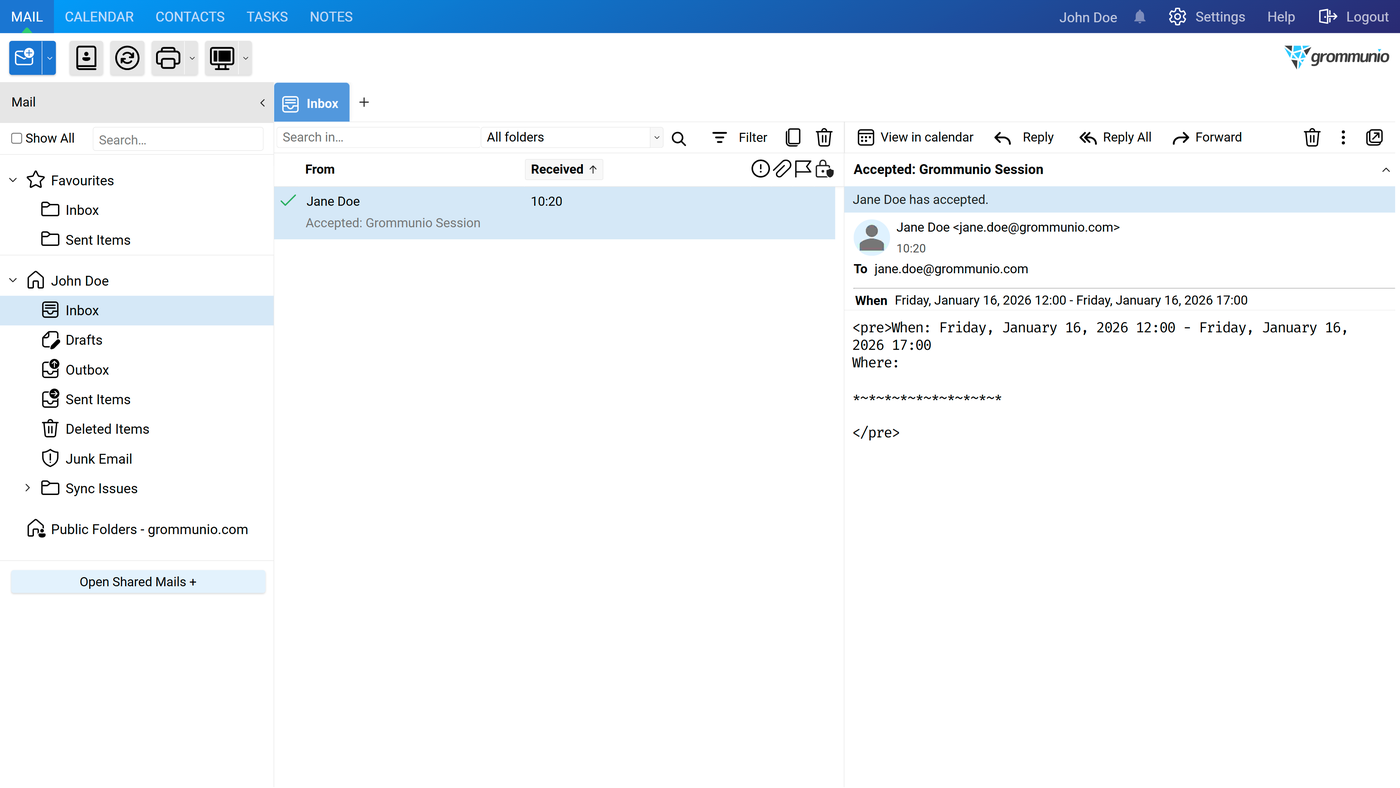
- Tracking responses – Alternatively, John Doe can open the meeting in the meeting editor and view all participant responses in the Tracking tab.
Meeting cancellation
Section titled “Meeting cancellation”- John Doe cancels the meeting – John Doe cancels the scheduled meeting.
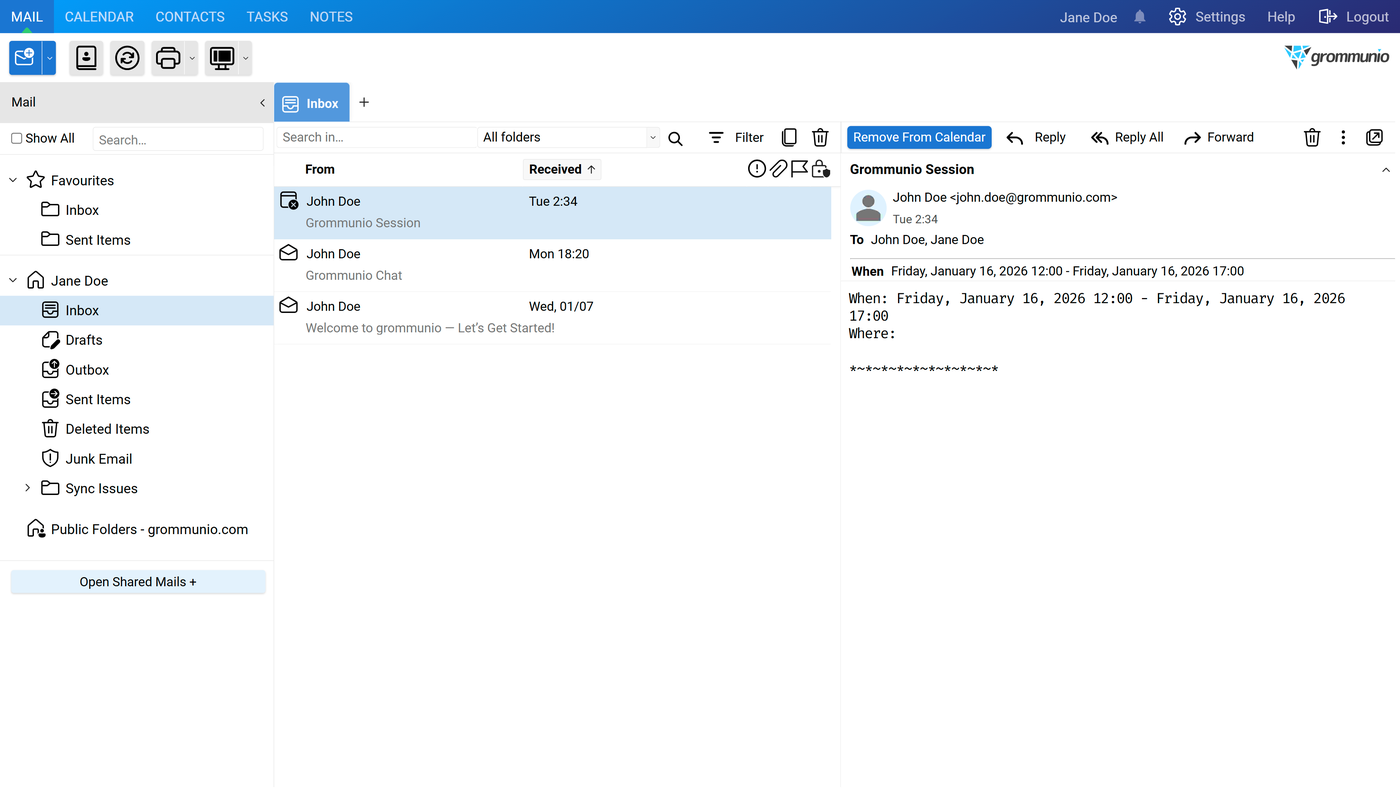
-
Jane Doe is notified – Jane Doe receives a cancellation message.
-
Calendar update – Jane Doe can remove the canceled meeting from their calendar, by confirming the removal via Remove From Calendar.
This workflow ensures that meeting invitations, responses, and changes are clearly communicated and synchronized across all participants' calendars.