Administration
This chapter includes details on how to administrate components of grommunio with the available toolset.
grommunio admin UI (AUI)
Section titled “grommunio admin UI (AUI)”After successfully installing the grommunio Appliance, you can access the UI through your browser on port 8080 (8443 with https soon).
Since you most likely set a password for admin UI while installing the Appliance, you can immediately use these credentials to login.
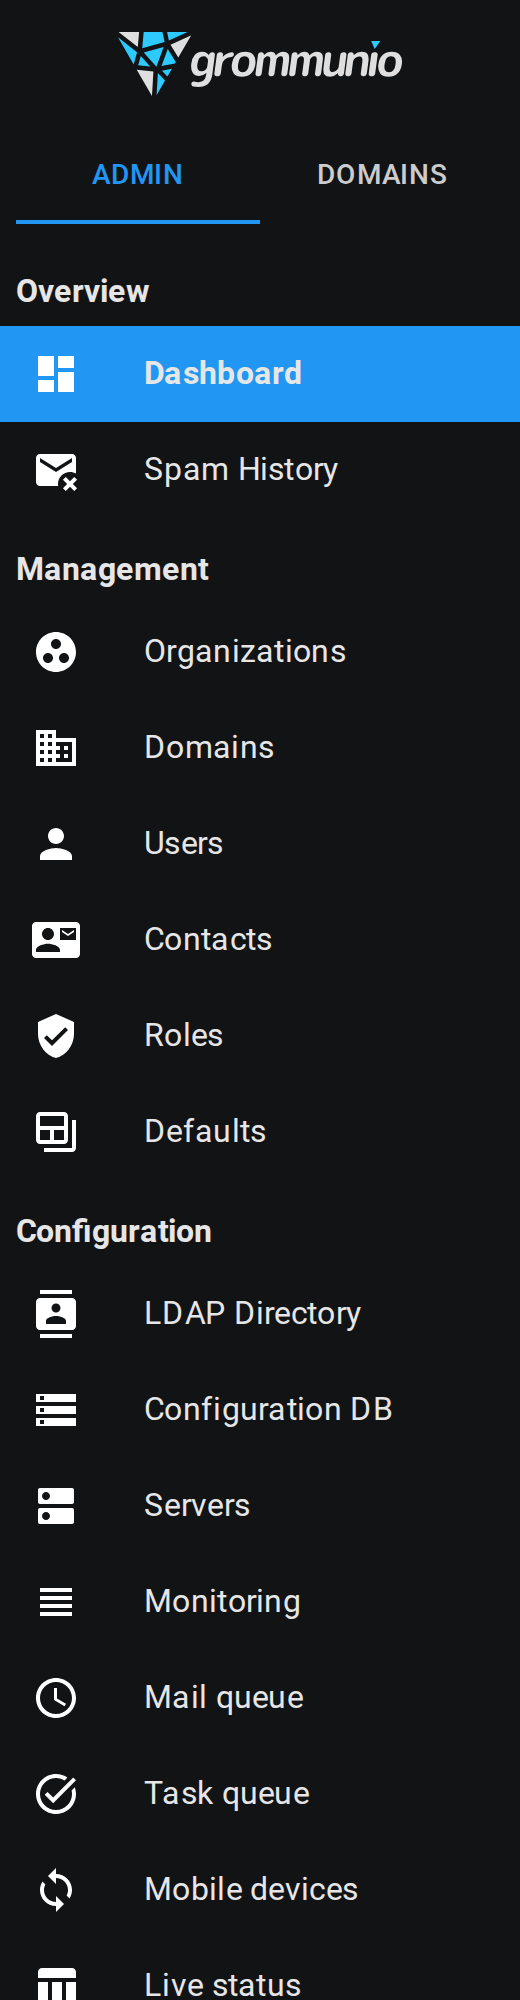
To navigate through the UI, simply use the drawer on the left side of the page.
Dashboard
Section titled “Dashboard”After a successful login, you can see the dashboard with live data of the machine grommunio runs on.
Antispam
Section titled “Antispam”Since grommunio has its own antispam service, according data can be displayed in the Dashboard.

Services
Section titled “Services”Antispam isn't the only grommunio service, in fact there are lots more. The current state of these services can be seen on the left side of the dashboard.
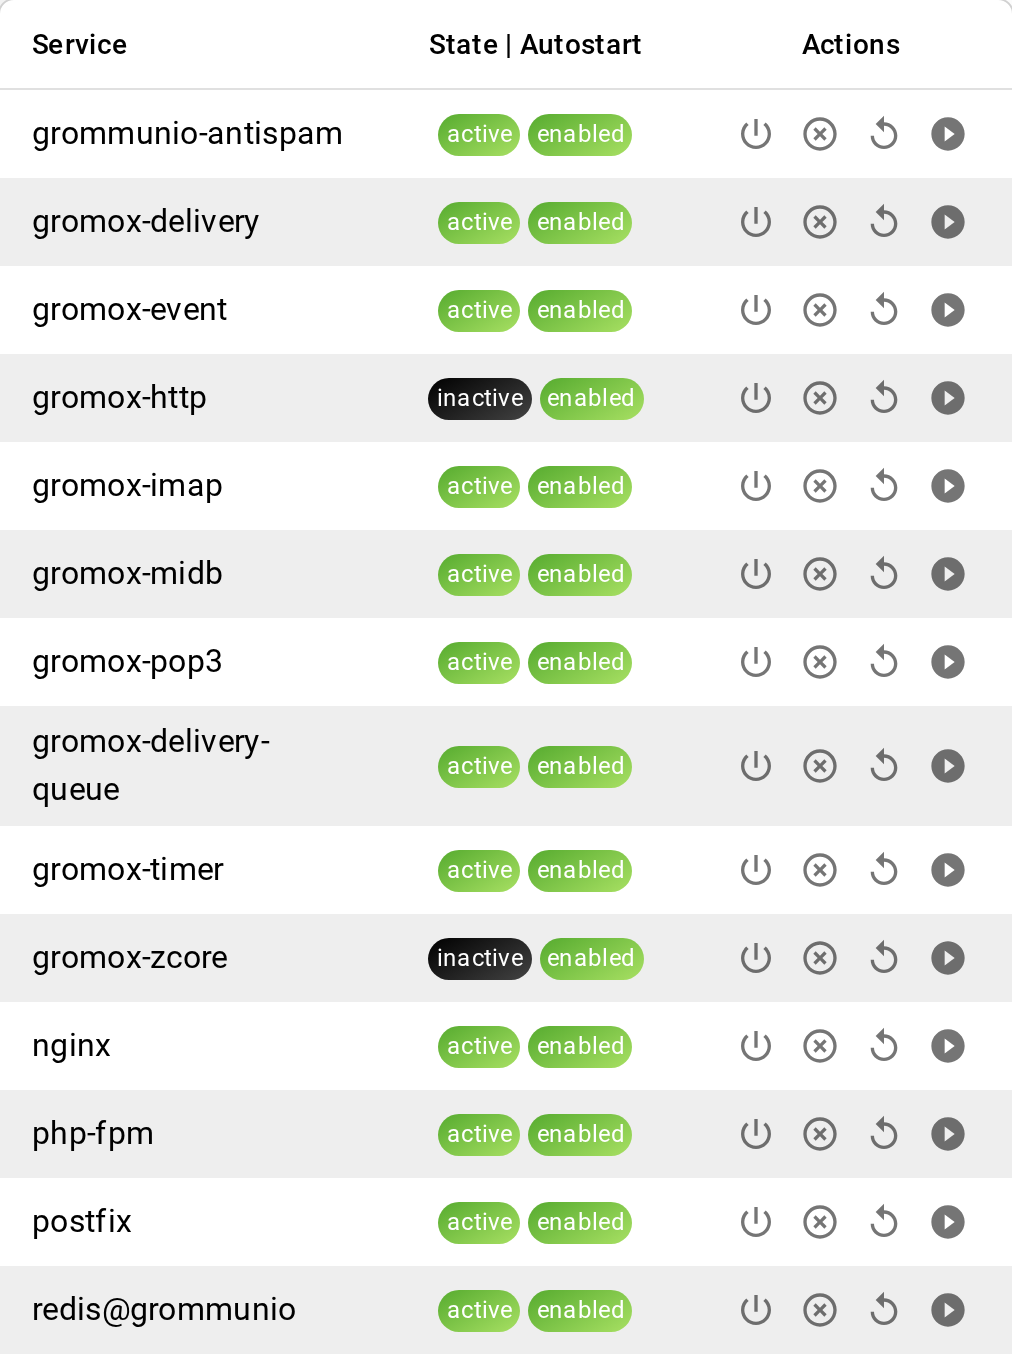
You can stop, restart or start these services from here by clicking the action buttons of a service in the list.
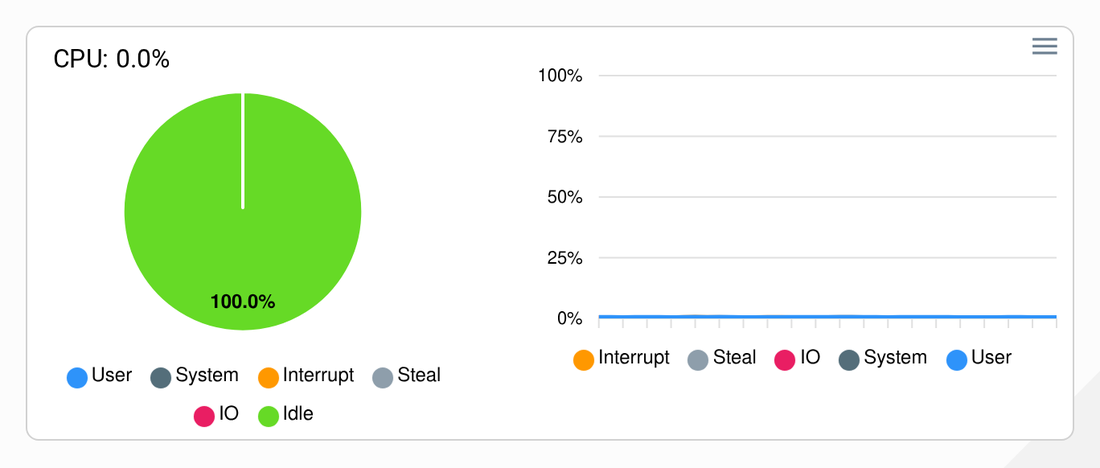
A live and history display of the CPU usage.
Memory
Section titled “Memory”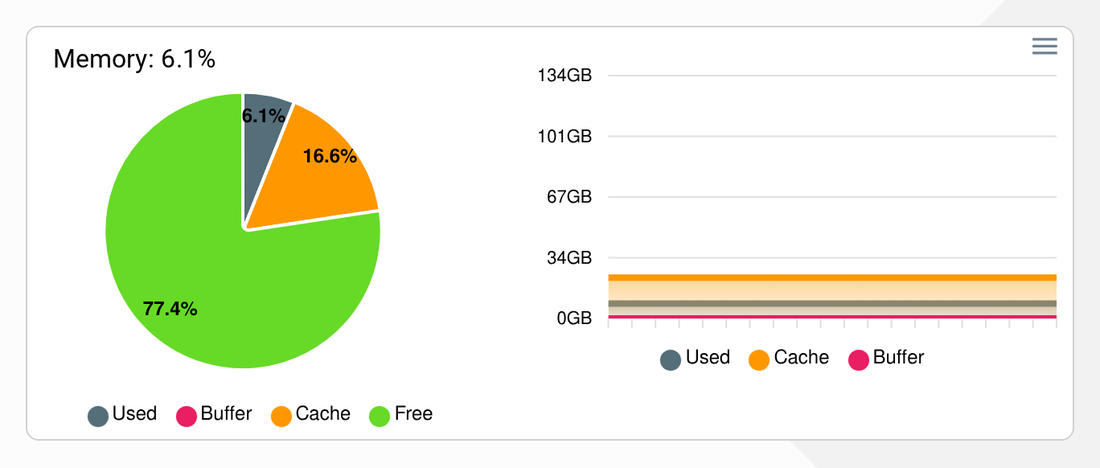
A live and history display of the memory usage.
Versions
Section titled “Versions”
A display of installed component versions.
Domains
Section titled “Domains”Click on Domains in the drawer, which will redirect you to the list view of existing domains. If you just set up grommunio, the table will be empty. If you want to show currently deactivated domains check the checkbox show deactivated.
Adding a domain
Section titled “Adding a domain”To add a new domain, click the blue NEW DOMAIN button to open the form dialog:
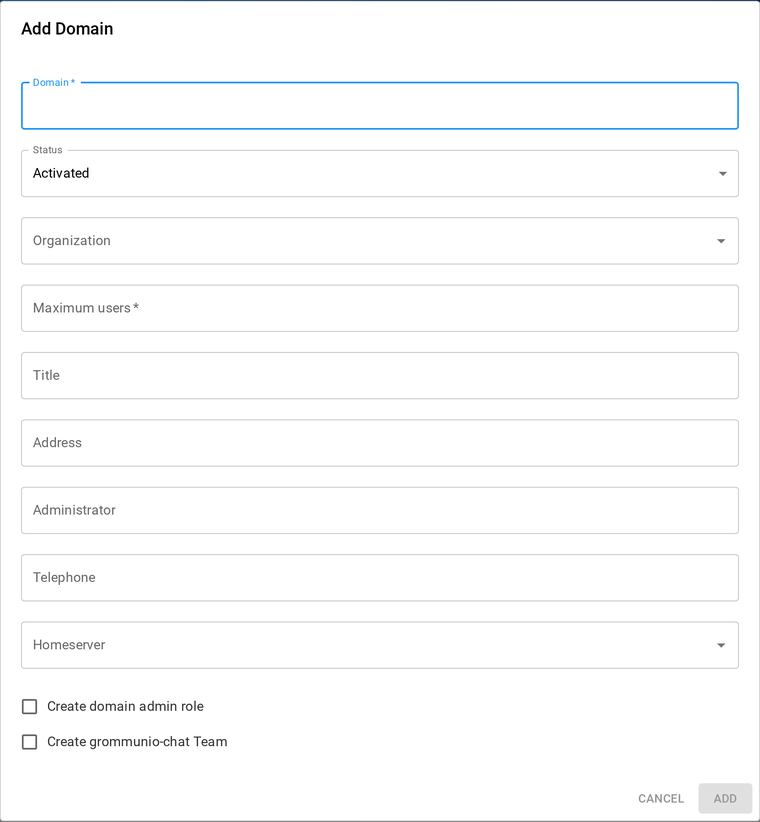
The following properties can be set:
- Domain (required): The name of the domain (cannot be changed afterwards)
- Status: Whether the domain should be currently activated or deactivated
- Organization: Organization of the domain
- Maximum users (required): The maximum amount of users (e-mails) of this domain
- Title: Title of the domain
- Address: Address of the domain
- Administrator: Administrator of the domain
- Telephone: Hotline for problems
- Homeserver: The server on which the domain's data is stored
- Create domain admin role: Creates a role for users, who will be admins for this domain
- Create grommunio-chat team: Creates a new grommunio-chat team for this domain. If you want users of this domain to be able to log into grommunio-chat, this has to be checked.
Click Add to confirm or Cancel to cancel.
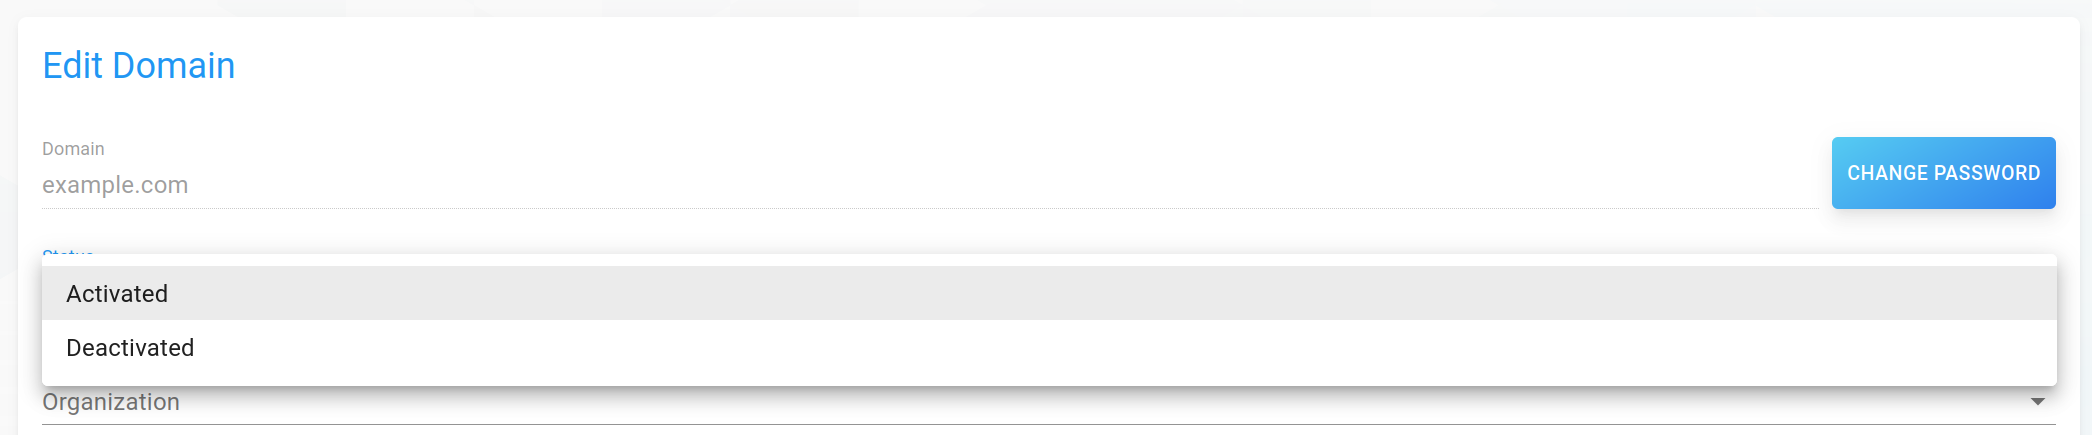
Editing a domain
Section titled “Editing a domain”To edit an existing domain, click on a domain in the list to open the detailed view of a domain.
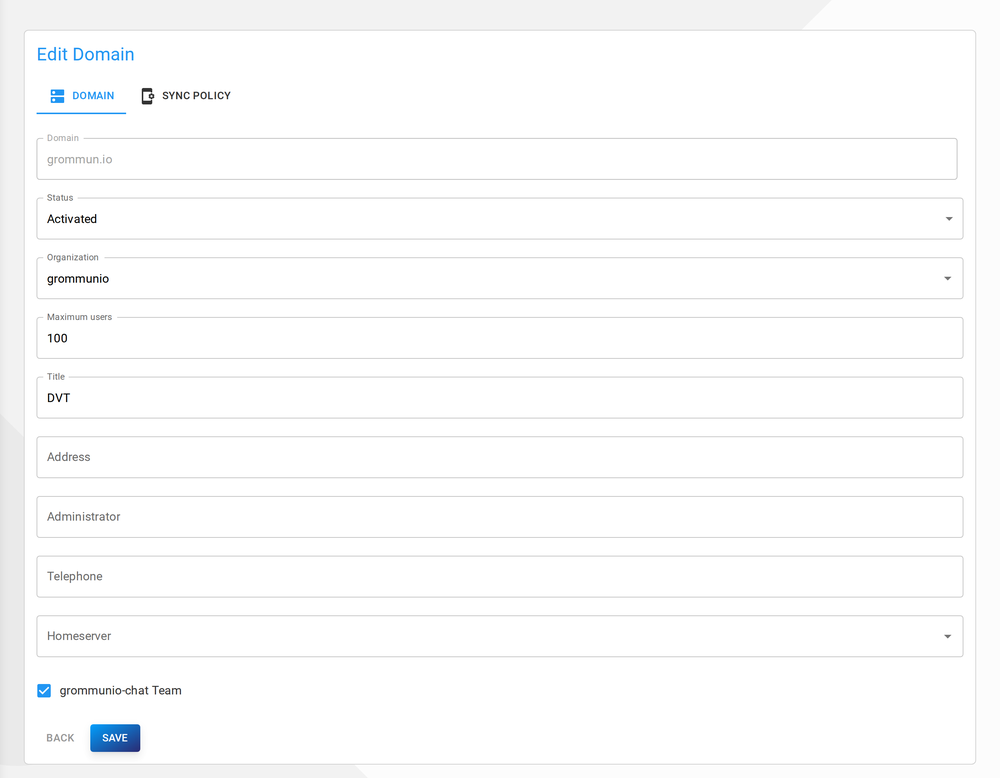
Simply change attributes to your needs, then click Save on the bottom to save your changes.
To change the current password of the domain, click Change password next to the domain name. You will be prompted to set and repeat your new password.
Deleting a domain
Section titled “Deleting a domain”To delete a domain, click on the trash icon of a domain in the domain list view.
The following flags can be set:
- Delete permanently: Checking this, will completely remove the domain out of the database, not just deactivate it
- Delete files: Only available if permanently deleting, will delete all files of this domain
Click Confirm to confirm or Cancel to cancel
Reactivating domains
Section titled “Reactivating domains”If you didn't delete a domain permanently, it will automatically be set to deactivated. To reactivate a domain, click on a domain in the list to get to the detailed view. Now change the status from deactivated to activated.
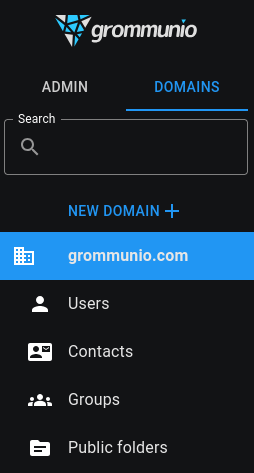
If at least one domain exists in the database, users can be added to a domain. To show existing users of a domain, navigate to the domain view in the drawer (Domains tab).
Click on a domain to expand available sub-pages and click on Users, which will redirect you to the list of users of this domain. If you just installed grommunio or added the domain, the list will be empty.
Alternatively, to see all users across all domains, click on Global users in the drawer.
Adding a user
Section titled “Adding a user”To add a new user, click the blue NEW USER button to open the form dialog:
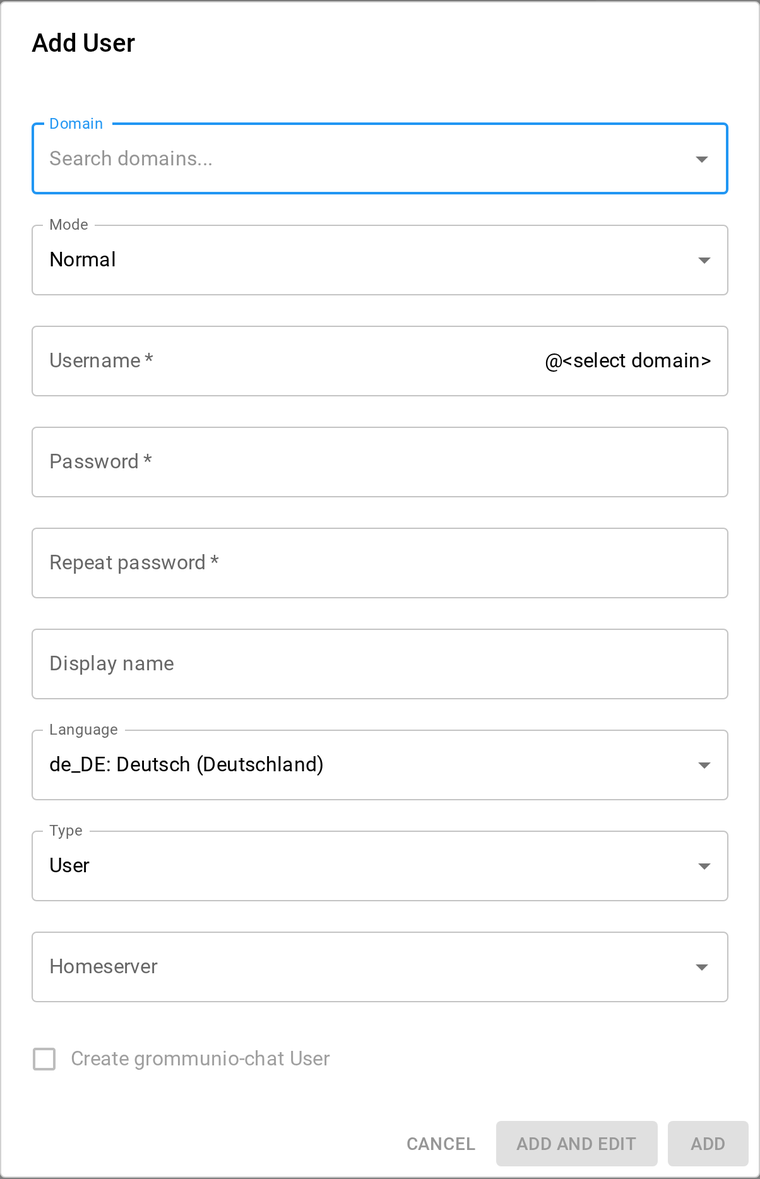
The following properties can be set:
- Mode: Normal or shared user
- Username (required): Username of the user
- Password (required): Password of the user
- Display name: Name to be displayed for this user
- Storage quota limit: Storage limit of the user
- Type: Type of user
- Homeserver: The server on which the user's data is stored
Click Add to confirm or Cancel to cancel. If you need to further specify user properties, click Add and Edit to open the detailed view of this user.
Editing a user
Section titled “Editing a user”To edit an existing user, click on a user in the list to open the detailed view of a user.
There are 10 main categories of user properties:
- Account: RPC/HTTP (Outlook Anywhere), MAPI/HTTP, IMAP, POP3 etc. configuration
- Alt names: Alternative usernames to log into mail-clients with (does not have to be an e-mail address)
- Details: MAPI props
- Contact: Additional MAPI props
- Roles: Roles of the user
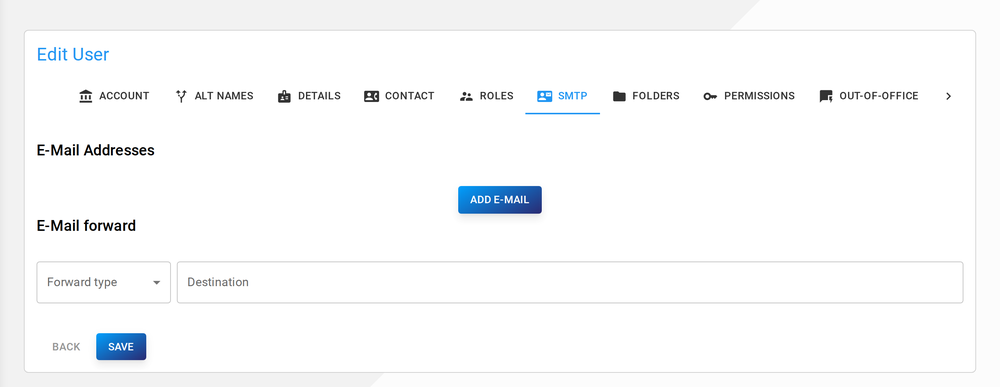
- SMTP: Additional e-mails for this user (aliases) and forwarding rules
- Permission: Select users which have special permissions for this user's mailbox
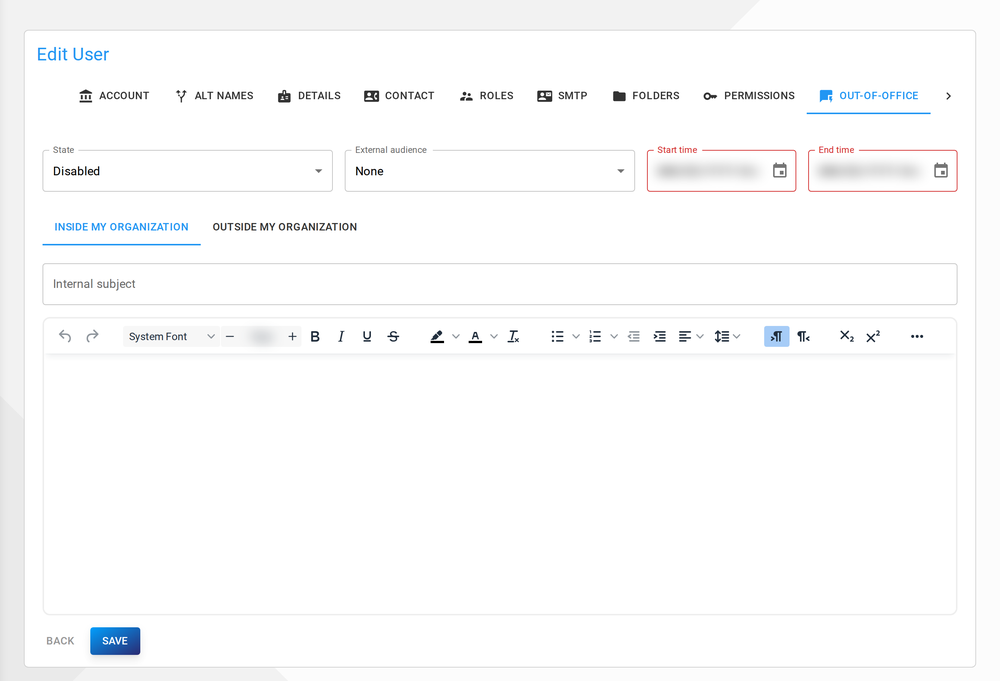
- OOF: Out of office settings
- Fetchmail: Configuration to fetch mails from other servers via fetchmail
- Mobile devices: List of user's mobile devices (via MDM)
- Sync policy: MDM sync policy (specifically for this user)
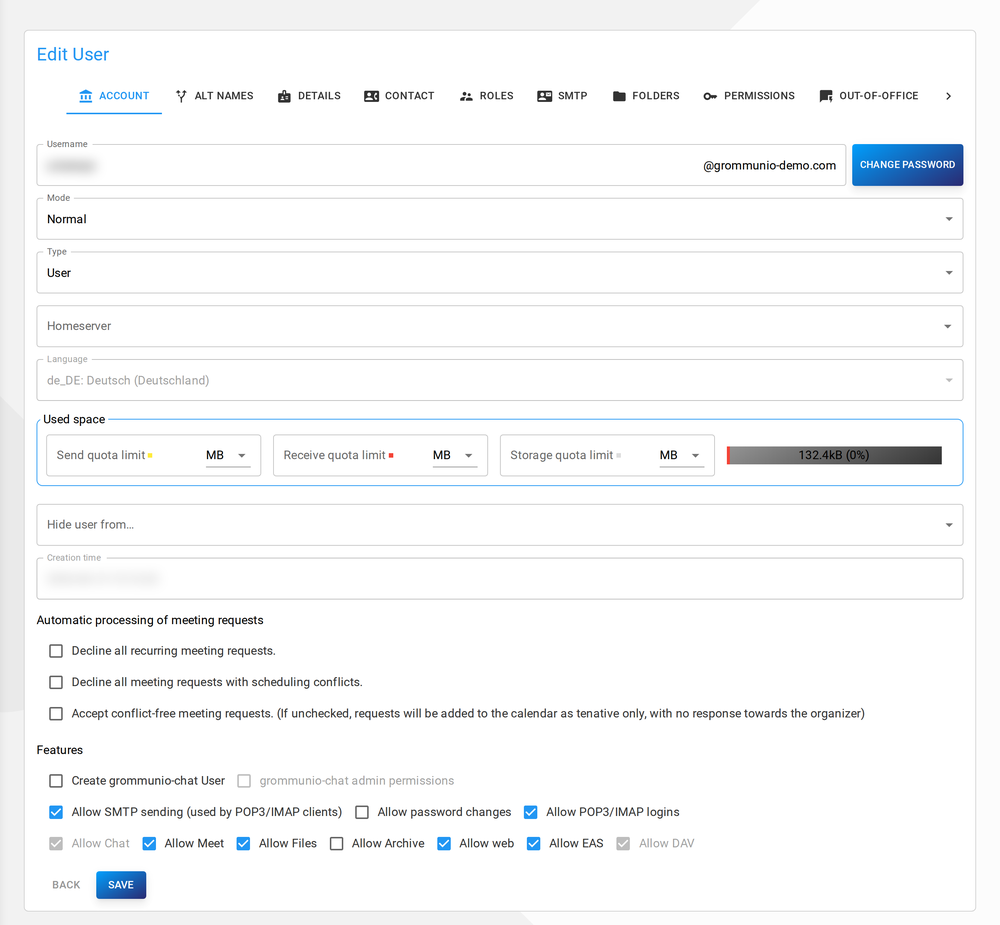
Account
Section titled “Account”The following properties can be edited:
-
Username
-
Mode: Mailbox mode, select between a normal user, a suspended user and a shared mailbox
-
Type: Type of user
-
Homeserver: Server on which the user's data is stored
-
Language: Store language of the user (does not effect the language of the UI)
-
Used space
- Send quota limit: Maximum size of the mailbox before sending messages is blocked
- Receive quota limit: Maximum size of the mailbox before message reception is blocked
- Storage quota limit: Maximum size of the mailbox before storing (any kind of) objects is blocked
-
Hide user from: Hide user from specific user lists (e.g. the global address list)
-
Automatic processing of meeting requests: Trivial
-
Create grommunio-chat user: Creates a grommunio-chat account for this user. If this checkbox is disabled, there is no grommunio-chat team for this domain.
-
grommunio-chat admin permission: Gives administrative permissions for grommunio-chat to this user's grommunio-chat account.
-
grommunio-chat permissions: Grants grommunio-chat admin permissions
-
Allow SMTP sending: Allows the user to send e-mails via SMTP
-
Allow password changes: Allows the user to change his/her password
-
Allow POP3/IMAP logins: Allows logins via POP3 or IMAP
-
Hide from GAL: Hides the user from the Global Address List
-
Allow Chat/Meet/Files/Archive: Allows access to respective feature
Note that, because a message needs to exist internally before it can be sent, the storage quota limit is also relevant for sending. Conversely, for reception, the storage quota limit must allow storing messages. (Thus, the storage quota should always be more than receive quota, and more than send quota.)
To change the current password of the user, click Change password next to the username. You will be prompted to set and repeat the new password.
User & Contact
Section titled “User & Contact”Common MAPI props. These are self-explanatory.
Roles of the user, which can be edited with the autocompleting textfield

User aliases: The textfield(s) can be used to set aliases for the current user. Use the "Add E-Mail" button to add, or the trashcan icon to delete an alias.
E-Mail forward: This can be used to enforce a redirect or message cloning action irrespective of the Inbox Rules configured by a mailbox owner. The mail transfer agent used in your mail system must support this and must be configured accordingly to evaluate the SQL table where the forward info has been stored (see below).
Configuration fragments to implement CC mode (forward_type 0) for e.g. Postfix:
- File
/etc/postfix/main.cf: settingrecipient_bcc_maps = mysql:/etc/postfix/grommunio-bcc-forwards.cf - File
grommunio-bcc-forwards.cf: settinguser = ...,password = ...,hosts = localhost,dbname = grommunio,query = SELECT destination FROM forwards WHERE username='%s' AND forward_type = 0
Redirect mode (forward_type 1) is left as an exercise to the administrator.
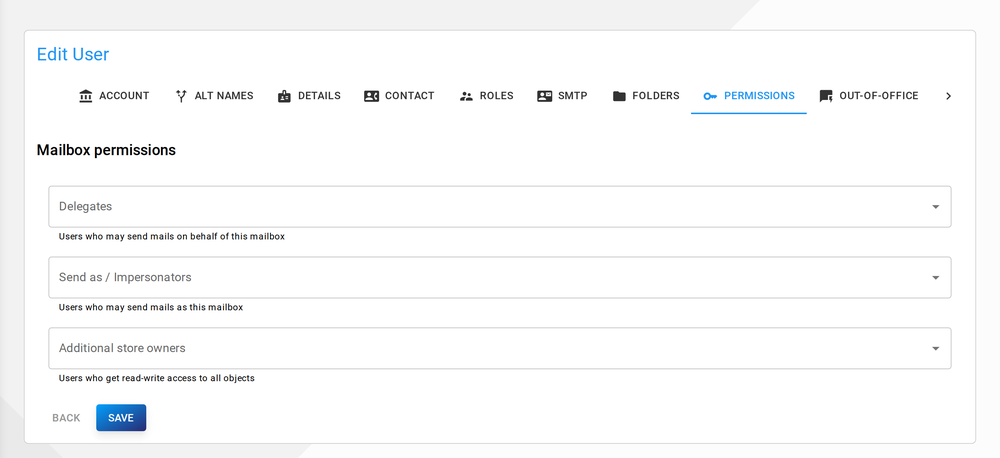
Permissions
Section titled “Permissions”This dialog allows giving other user identities certain permissions at the mailbox level.
- Delegates: Users in the delegate list may exercise the "send on behalf" feature, i.e. send messages with a
From:line containing the delegator's identity. The use of delegation is recorded in messages. - Send As (also known as Impersonation): Users in the send-as list may send messages with a
From:line containing the delegator's identity. It is similar to delegation, but the use of delegation is not recorded in messages. Send-As overrides and masks Send-On-Behalf, because SA/SOB permission is only known server-side and MAPI clients have no way to choose between the two. - “Full permissions”: Users in this list will be treated like the mailbox owner and not be subject to permission checks when reading or writing folder or message objects.
Out of office settings (auto-reply messages).
Fetchmail
Section titled “Fetchmail”It is possible to fetch e-mails from other mailserver via fetchmail. To configure this feature, you can add several e-mail servers and/or users to fetch mails from.

To add new fetchmail entry, click the circled plus icon, which will open the following input form:
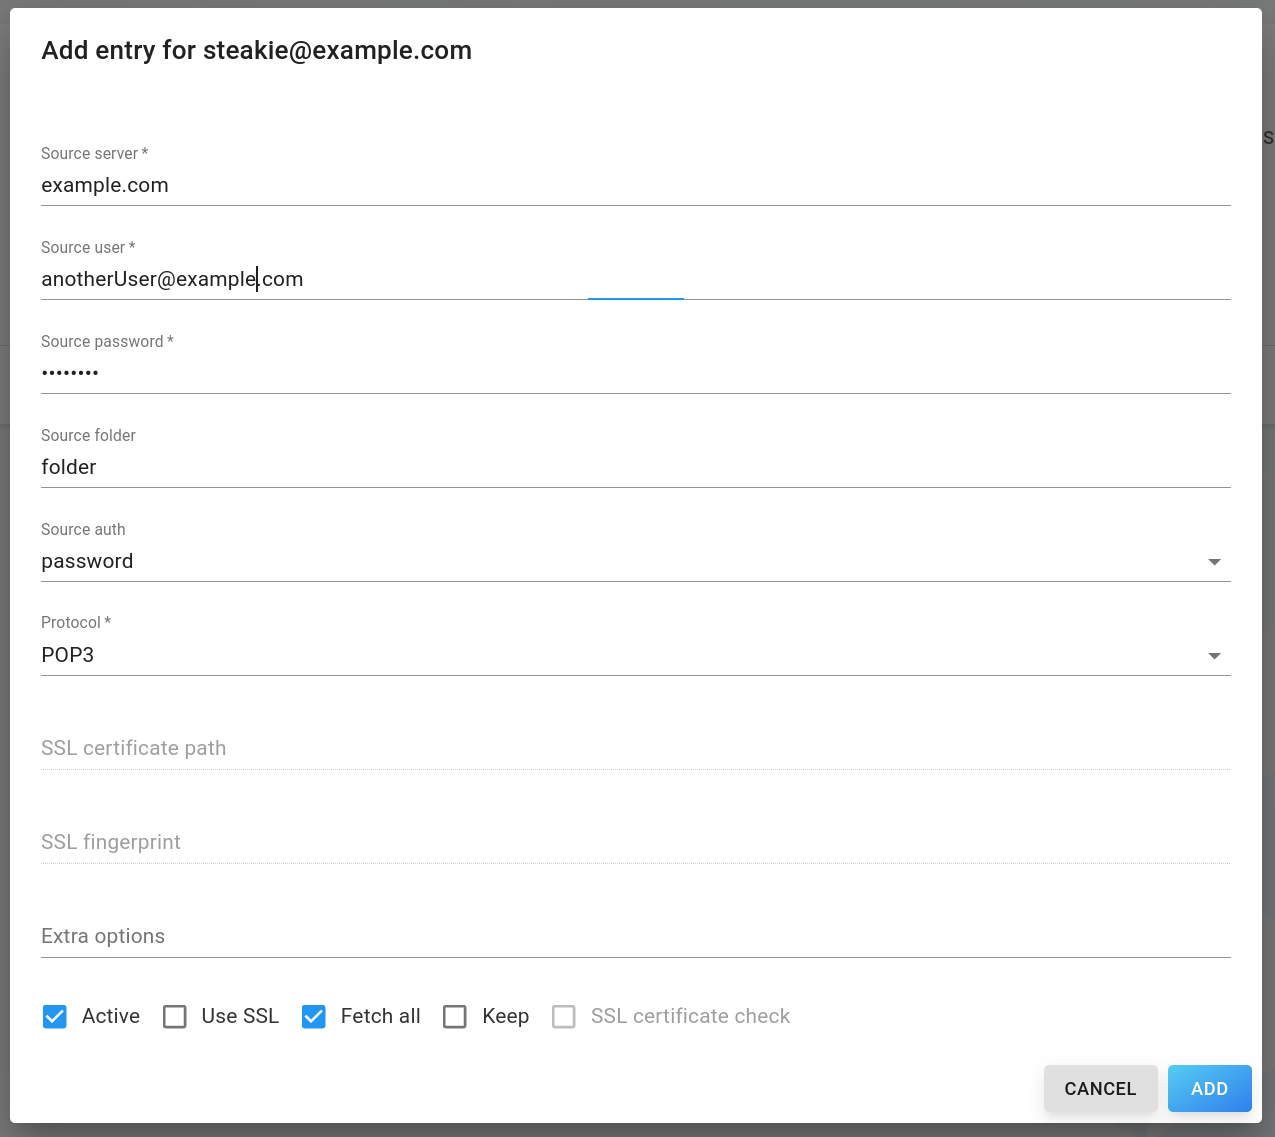
- Source server (required): E-Mail server to fetch from
- Source user (required): E-Mail address to fetch from
- Source password (required): Password to the source users account (Hint: Single or double quotes are not supported)
- Source folder (required): Source folder to sync from
- Source auth: Type of authentication to use
- Protocol (required): Protocol to use
- SSL certificate path (if Use SSL is checked): Path to local certificate directory or empty to use local default
- SSL fingerprint (if Use SSL is checked): Fingerprint of the server certificate
- Extra options: (if Use SSL is checked): Additional fetchmail options
- Active: Whether fetchmail is currently activated
- Use SSL: Whether to use SSL
- Fetch all: Whether to fetch seen mails
- Keep: Keep original e-mails
- SSL certificate check: Check ssl certificate
To edit these properties, click on a row in the table. To delete an entry, click the trash icon of a table row.
Mobile Devices
Section titled “Mobile Devices”Synchronized mobile devices of this user
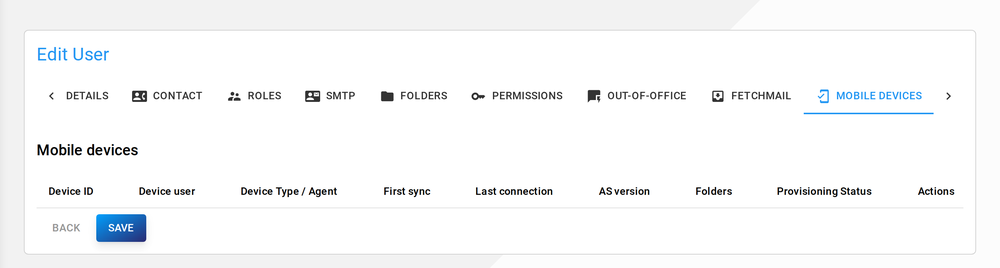
Actions:
Section titled “Actions:”- Remote wipe: Engages a remote wipe for a device via MDM (Mobile Device Management)
- Cancel remote wipe: Cancel above action
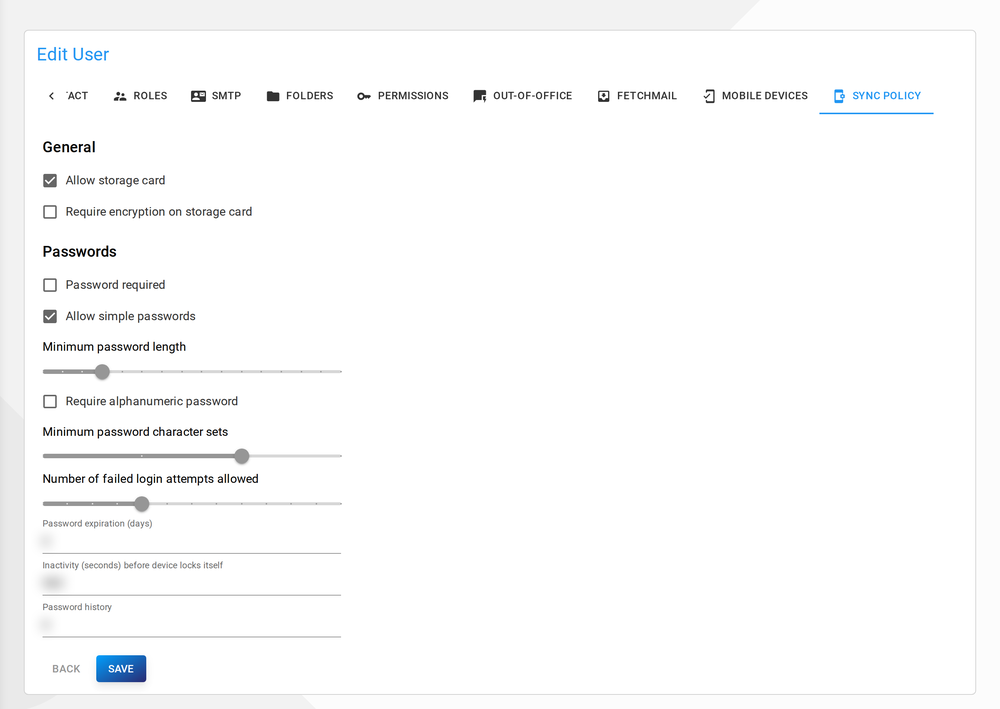
Sync policy
Section titled “Sync policy”Specific MDM rules for this user. Unedited rules (greyed out) are adopted from the domain's policy.
Deleting a user
Section titled “Deleting a user”To delete a user, click on the trash icon of a user in the user view.
The following flags can be set:
- Delete files: Will delete all files of this user
Click Confirm to confirm or Cancel to cancel.
Public folders
Section titled “Public folders”If at least one domain exists in the database, public folders can be added to a domain. To show existing public folders of a domain, navigate to the domain view in the drawer.
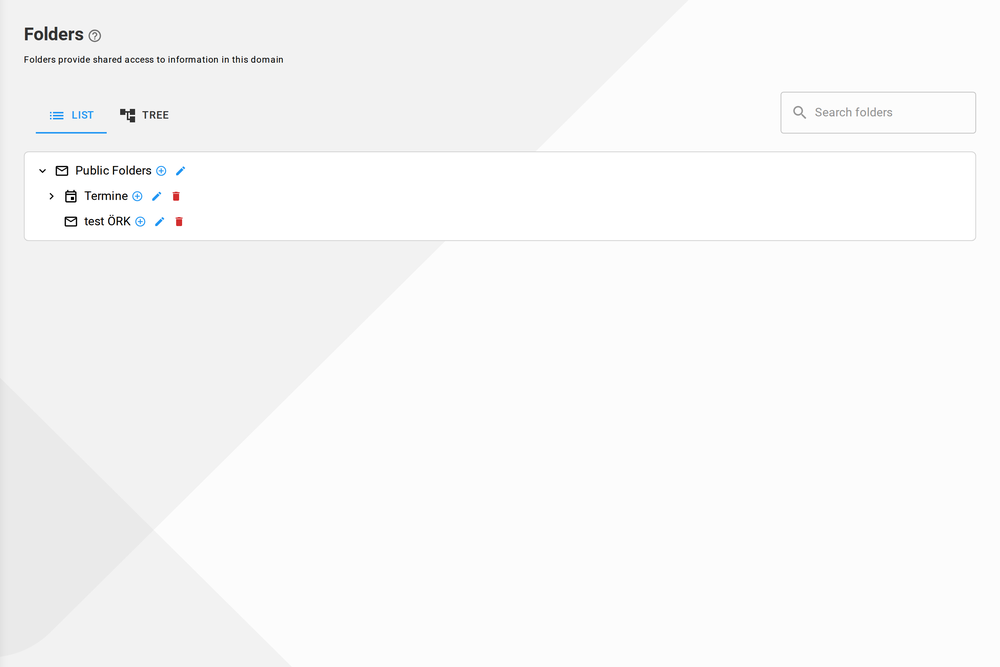
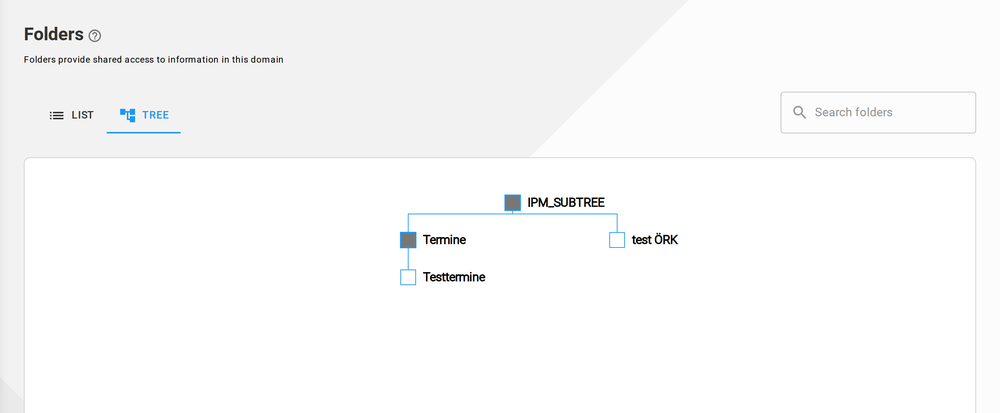
Click on a domain to expand available sub-pages and click on Public folders, which will redirect you to the list of folders of this domain. There are two views: A hierarchical view, like a common folder structure and a tree-like graph view.
Adding a folder
Section titled “Adding a folder”To add a folder, click the Plus Circle icon of the folder's parent folder. Public Folders is the root folder, all other folders are put into. Thus the first folder is always within Public Folders (IPM_SUBTREE).
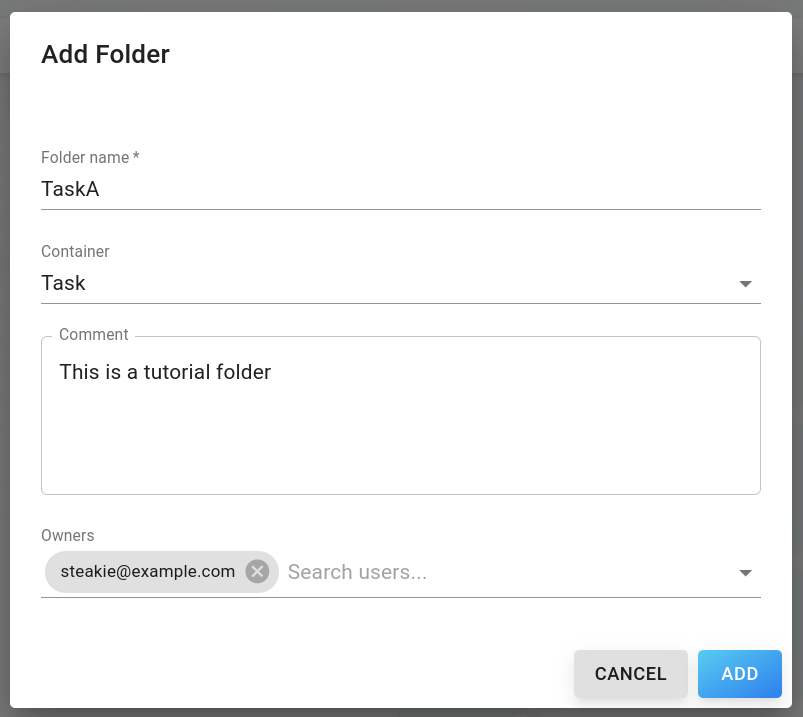
The following properties can be set:
- Folder name (required): Name of folder
- Container: Type of folder container
- Comment: Comment
- Owners: Owners of this folder (Multi-select of users in the database)
Click Add to confirm or Cancel to cancel.
Editing a folder
Section titled “Editing a folder”To edit an existing folder, click on the right Edit icon inside the hierarchy view to open the folder details.
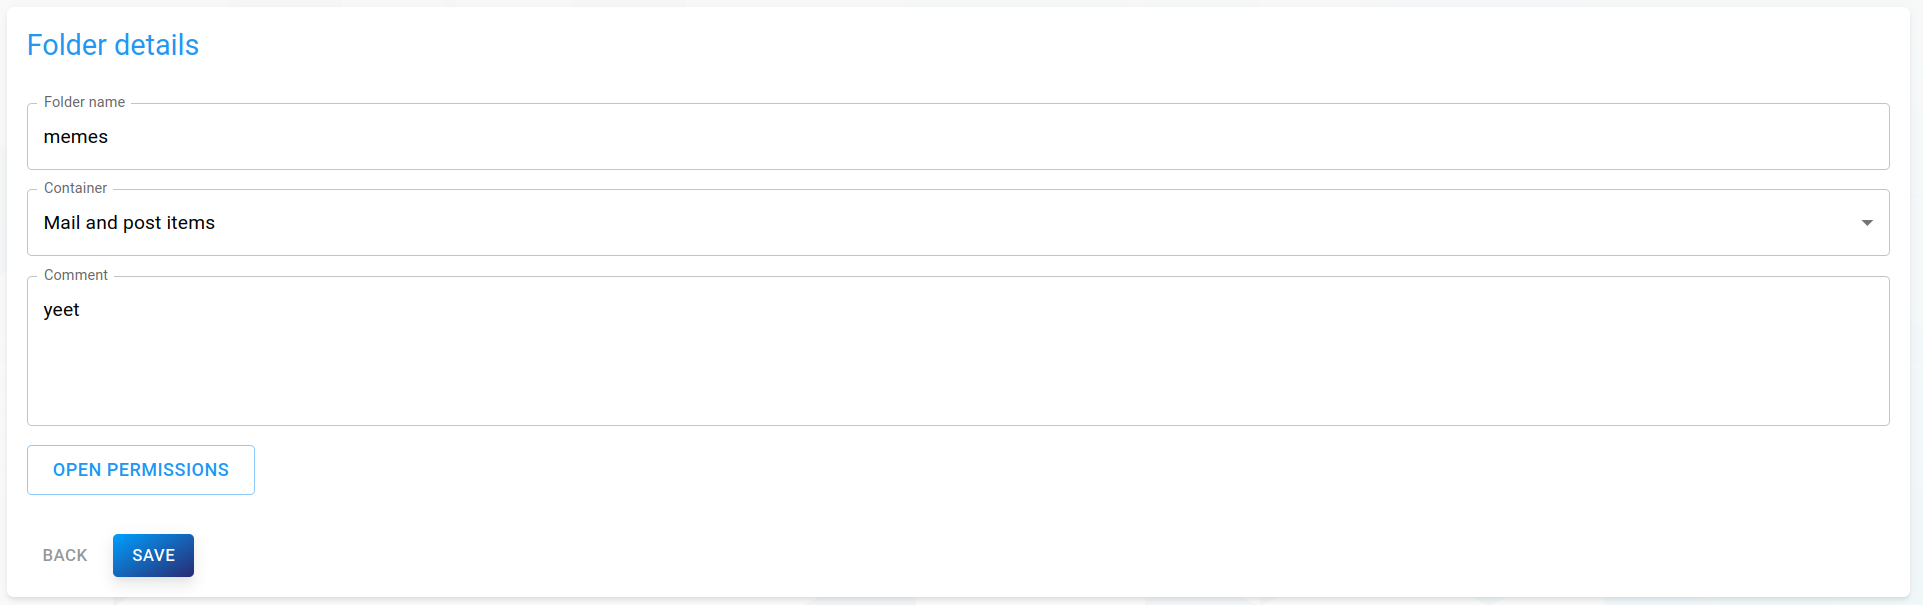
Simply change attributes to your needs, then click Save on the bottom to save your changes.
Folder permissions
Section titled “Folder permissions”To edit folder permission click on Open permissions to open the permissions dialog.
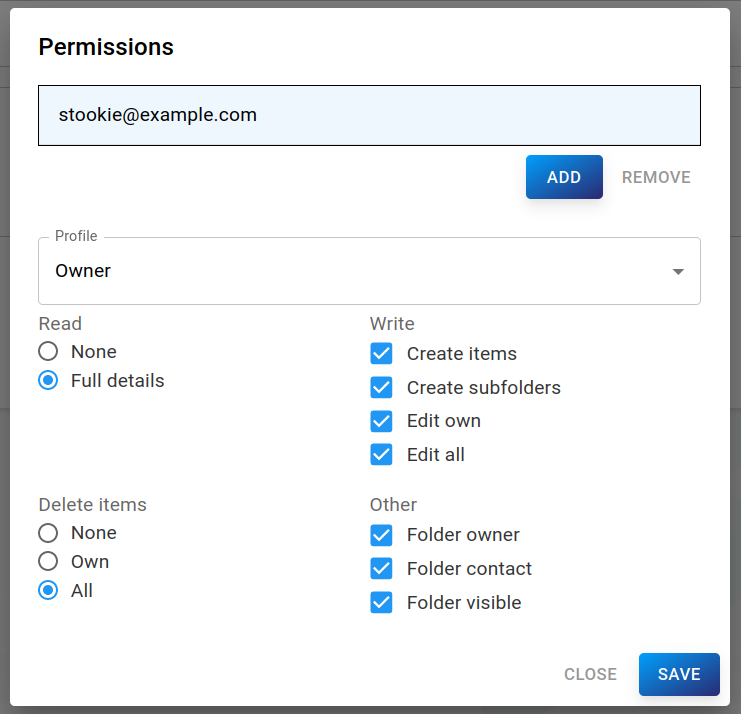
This form is a direct replica of grommunio-web's and outlook's folder permission settings. Select users to grant permissions at the top and set their permissions at the bottom.
Deleting a folder
Section titled “Deleting a folder”To delete a folder, click on the trash icon of a folder in the folder view. Click Confirm to confirm or Cancel to cancel.
Groups
Section titled “Groups”If at least one domain exists in the database, groups can be added to a domain. To show existing groups of a domain, navigate to the domain view in the drawer.
Click on a domain to expand available sub-pages and click on Groups, which will redirect you to the list of groups of this domain. If you have just installed grommunio or added the domain, the list will be empty.
Adding a group
Section titled “Adding a group”To add a new group, click the blue NEW GROUP button to open the form dialog:
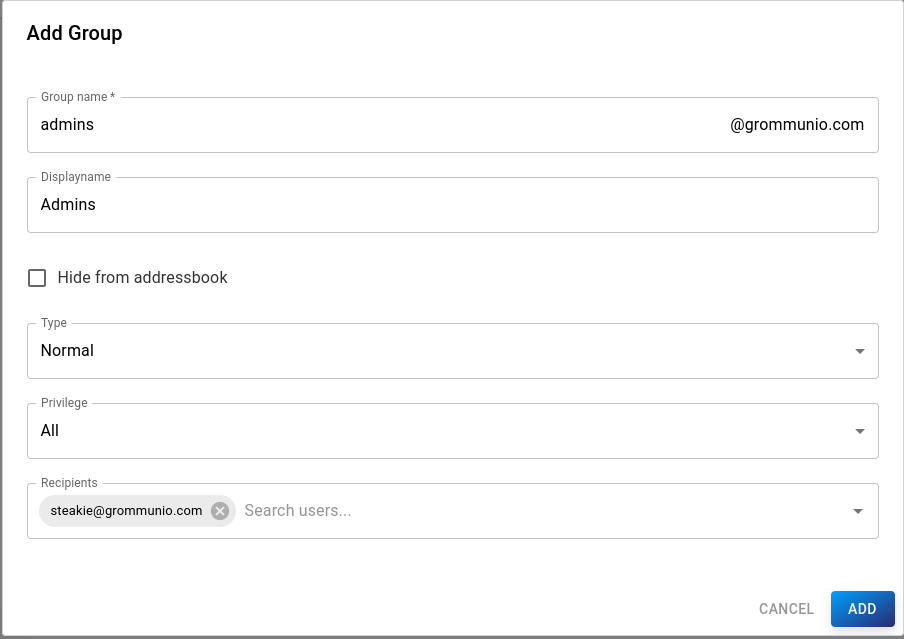
The following properties can be set:
-
Group name (required): E-Mail address of the group
-
Displayname: Displayed name of the group
-
Hide from addressbook: If selected, the mailing list won't be visible in the Global Address Book
-
Type:
- Normal: Select users as recipients
- Domain: All users of the domain will be recipients
-
Privilege: Users who are allowed to send E-Mails to the group
- All: Everyone
- Internal: All users of the group
- Domain: All users in the domain
- Specific: Specific users (Senders)
-
Recipients: Users of the domain, who are part of the group (not available if type=Domain)
-
Senders: Users, who are allowed to send e-mails to the group (only available if privilege=Specific)
Click Add to confirm or Cancel to cancel.
Deleting a group
Section titled “Deleting a group”To delete a group, click on the trash icon of a group in the list view. Click Confirm to confirm or Cancel to cancel.
Click on Roles in the drawer, which will redirect you to the list view of existing roles. If you have just set up grommunio, the table will be empty.
By default, every time a domain is added, a new role with rights for the new domain will be added. Additionally, you can create your own roles to specify access rights for multiple domains.
Adding a role
Section titled “Adding a role”To add a new role, click the blue NEW ROLE button to open the form dialog:
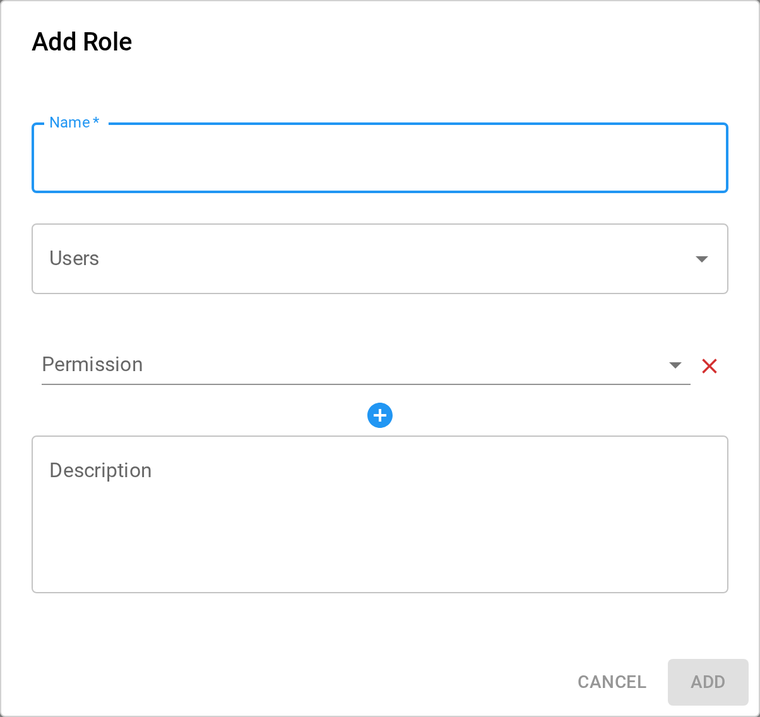
The following properties can be set:
-
Name (required): Name of the role
-
Users: Users to which this role will be assigned to
-
Permissions:
- SystemAdmin: Permits any operation
- SystemAdminRO: Grants read-only permissions to system settings
- DomainAdmin: Permits operations on for specific domain
- DomainAdminRO: Grants read-only permissions to specific domain
- DomainPurge: If present, grants permission to purge any writable domain
- OrgAdmin: Grants DomainAdmin permission to any domain with matching orgID
- Params: Domain/Organisation to get access to with this role
-
Description: Role description
Click Add to confirm or Cancel to cancel.
Editing a role
Section titled “Editing a role”To edit an existing role, click on a role in the list to open the detailed view of a role.
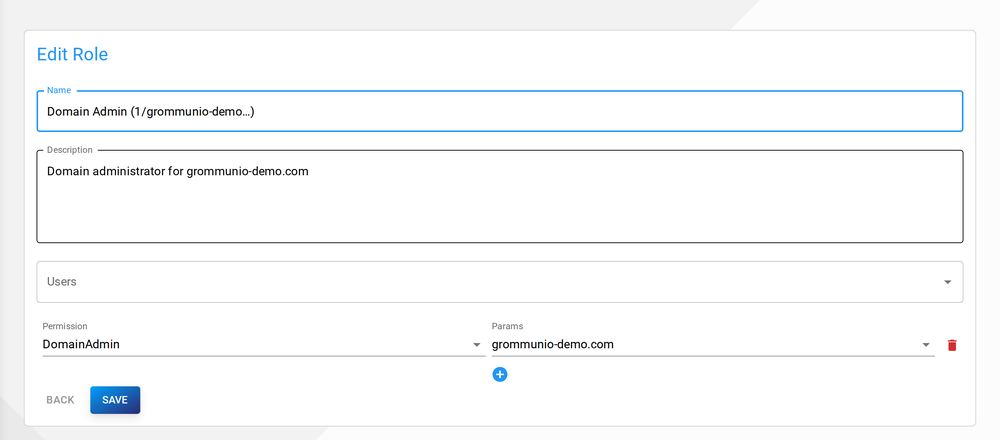
Simply change attributes to your needs, then click Save on the bottom to save your changes.
Deleting a role
Section titled “Deleting a role”To delete a role, click on the trash icon of a role in the list view. Click Confirm to confirm or Cancel to cancel.
Organizations
Section titled “Organizations”Click on Organizations in the drawer, which will redirect you to the list view of existing organizations. If you have just set up grommunio, the table will be empty.
Organizations are used to group domains, and give access to multiple domains in the system by using the OrgAdmin role. Every domain can be associated with at most one organization.
Adding an organization
Section titled “Adding an organization”To add a new organization, click the blue NEW ORGANIZATION button to open the form dialog:
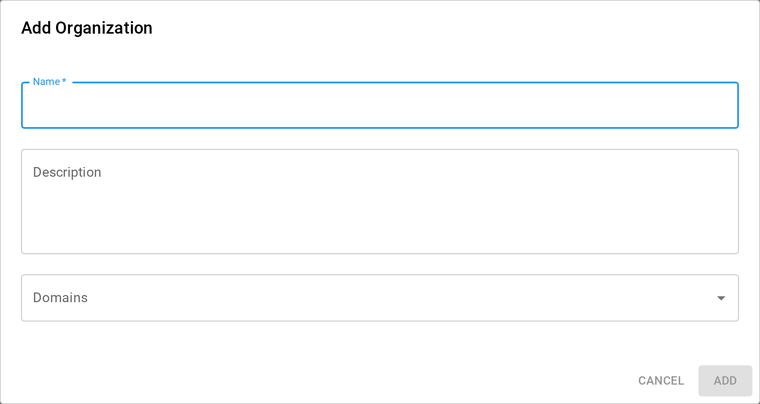
The following properties can be set:
- Name (required): Name of the organization
- Description: Detailed description of the organization
- Domains: Domains which are part of this organization
Click Add to confirm or Cancel to cancel.
Editing an organization
Section titled “Editing an organization”To edit an existing organization, click on an organization in the list to open the detailed view of an organization.
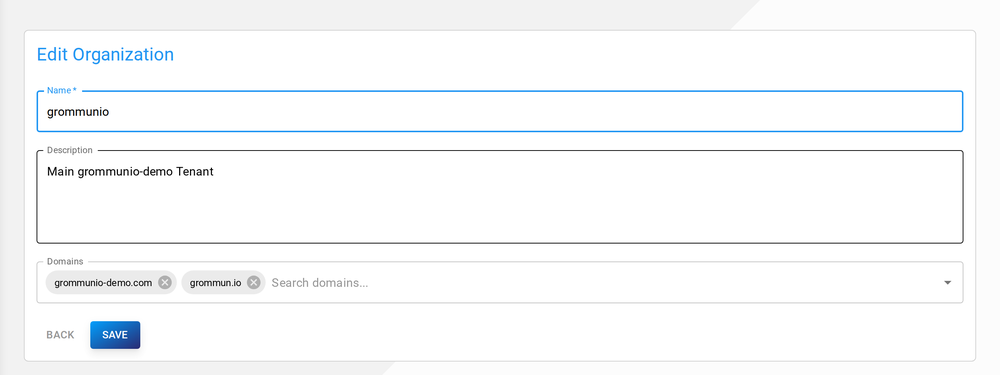
In this view, it is also possible to override the global LDAP configuration for domains in this organisation. To get more information about creating an LDAP config, see the LDAP section of this documentation.
Deleting an organization
Section titled “Deleting an organization”To delete an organization, click on the trash icon of an organization in the list view. Click Confirm to confirm or Cancel to cancel.
Defaults
Section titled “Defaults”To simplify the creation of domains and especially users, it is possible to set default create parameters. If set, the input masks for adding a domain or user will automatically be filled with these values.
Users with SystemAdmin permissions, can set global defaults by clicking on Defaults in the drawer.
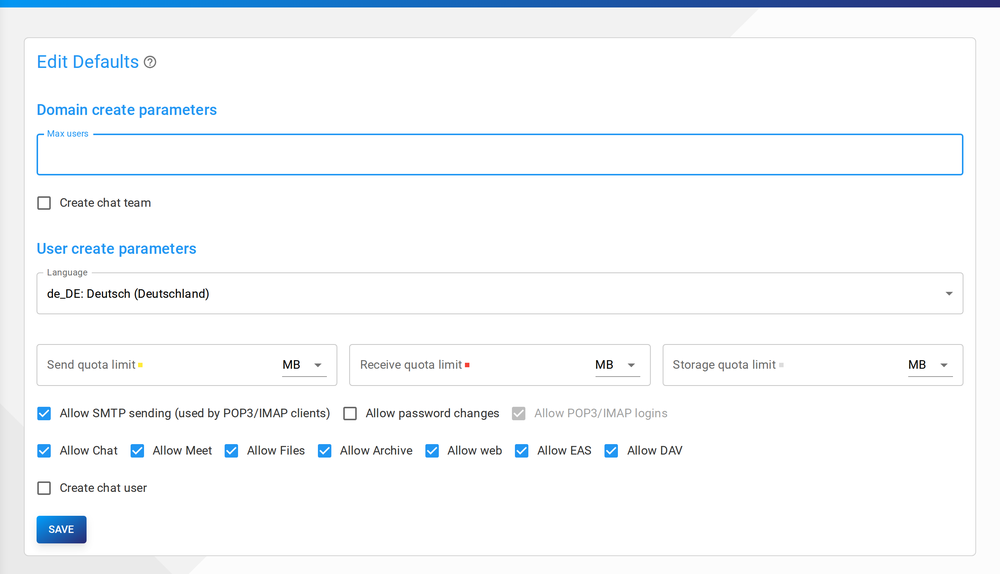
These values can be overwritten for each domain in the domain overviews:

Settings
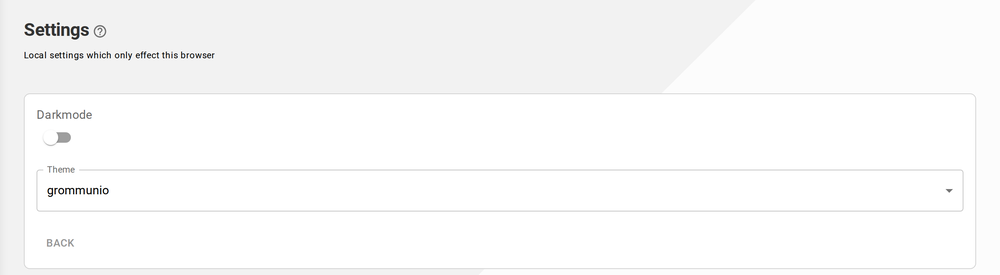
Section titled “Settings”Two kinds of settings are reachable from the top bar:
- Local settings — per-browser preferences (dark mode and the colour theme) on the Settings page. The language and light/dark toggle are also in the top bar.
- grommunio settings — the server-wide configuration page, with License, Design and Updates tabs (described below).
License
Section titled “License”On the License tab you upload your license (click Upload and select your purchased license; Reactivate license re-applies it). The following properties are shown:
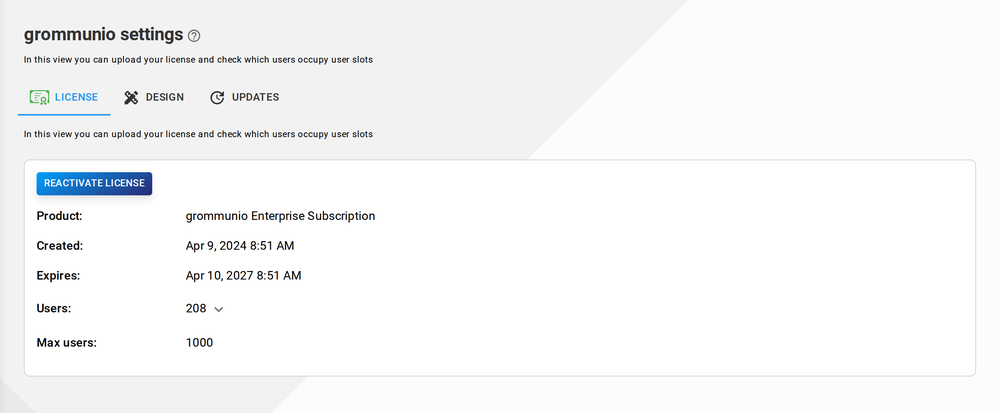
- Product — type of grommunio subscription (Community, Enterprise, …)
- Created — date the license was issued
- Expires — last day the license is valid
- Users / Max users — current and maximum number of users
Expanding the users count shows which users occupy the license's user slots.
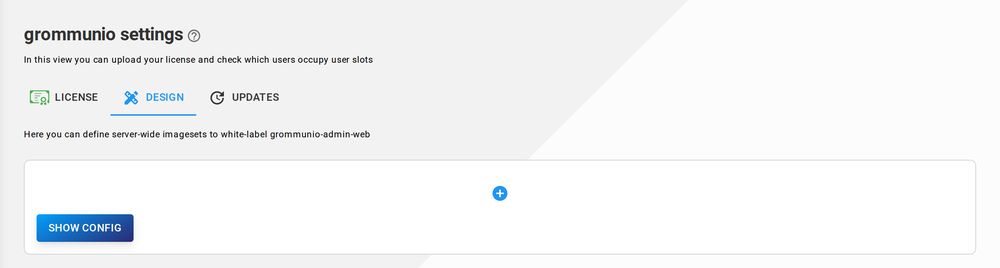
Design
Section titled “Design”The Design tab white-labels the Admin UI server-wide. Click the plus icon to add an image set for a hostname; each key is a URL to an image file:
logo— logo in the login formlogoLight— logo in the expanded drawericon— icon in the collapsed drawerbackground/backgroundDark— background image in light / dark mode
You only need to override the images you want to change. Show config displays
the resulting customImages object to copy into
/etc/grommunio-admin-common/config.json.
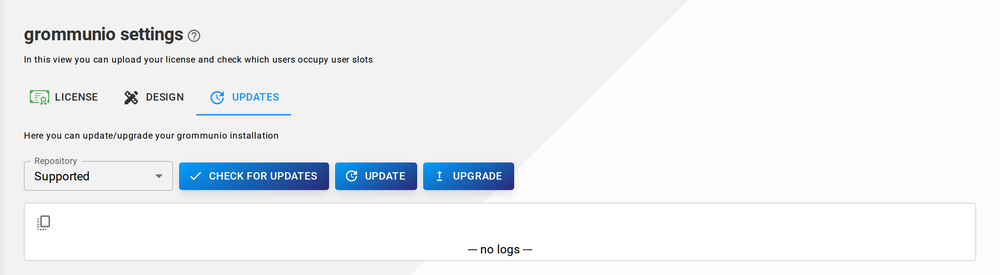
Updates
Section titled “Updates”The Updates tab updates and upgrades the grommunio installation from the Admin UI:
- Choose the repository — Community (public) or Supported (license required).
- Check for updates, then Update or Upgrade the packages with the respective buttons.
Application links and server-side configuration
Section titled “Application links and server-side configuration”The external application links in the top-bar app launcher are set
server-side in /etc/grommunio-admin-common/config.json (each a URL, empty by
default): rspamdWebAddress, mailWebAddress (grommunio Web), chatWebAddress
(Chat), videoWebAddress (Meet), fileWebAddress (Files) and archiveWebAddress
(Archive).
The same file holds further behaviour:
tokenRefreshInterval— token refresh interval in seconds (default86400, 24 h)defaultDarkMode/defaultTheme— default appearance (themes: grommunio, green, purple, magenta, teal, orange, brown, bluegrey)loadAntispamData— load antispam data on the dashboard (defaulttrue)searchAttributes— possible LDAP search attributes (default: all attributes)
It it possible to synchronise users from external user directories using LDAP. To configure LDAP, click on LDAP in the drawer, which will redirect you to the LDAP form to define a global LDAP configuration. This config can be overwritten for each individual organisation. To do so, navigate to Organisations and open the detailed view of an organisation. Flip the Override global LDAP config switch and set a config according to the following specification.
After applying a new LDAP configuration, the services are intentionally not automatically restarted as this would result into possibly inconvenient downtime if existing internal users are already used by the authentication manager (authmgr). Services can either be restarted through admin UI in the dashboard section or via systemd directly:
systemctl restart gromox-{http,zcore,pop3,delivery,delivery-queue,midb,imap}
Availability
Section titled “Availability”LDAP not available means the LDAP config isn't set up correctly or the server can't be reached. If you want to disable LDAP manually, flip the LDAP enabled switch.
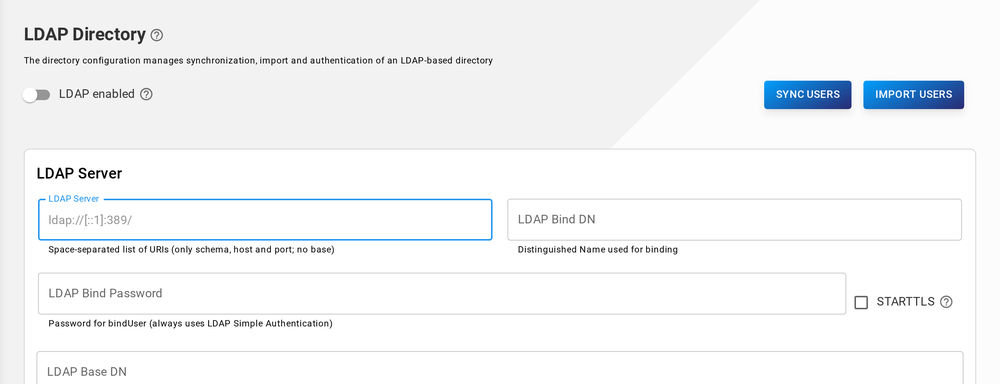
Configuration
Section titled “Configuration”Through this form, you create a ldap.yaml file, which configures an LDAP connection.
Properties are split into the following categories:
- LDAP Server
- Attribute Configuration
- Custom Mapping
To save a configuration, click Save at the bottom or click Delete Config to delete the current configuration.
LDAP Server
Section titled “LDAP Server”The following properties are available:
- LDAP Server (server): Address of the LDAP server to connect to
- LDAP Bind User (bindUser): DN of the user to perform initial bind with
- StartTLS: Whether to utilize the StartTLS mechanism to secure the connection
- LDAP Base DN (baseDn): Base DN to use for user search
Authentication manager
Section titled “Authentication manager”Primary authentication mechanism
- Always MySQL (default): MySQL authentication
- Always LDAP: LDAP authentication
- Automatic: The choice between LDAP/MySQL occurs dynamically, depending on whether the user was imported from LDAP originally.
Attribute Configuration
Section titled “Attribute Configuration”The following properties are available:
- LDAP Templates (templates): Template to prefill any fields below. Available are: - OpenLDAP - ActiveDirectory
- LDAP Filter (filters): LDAP search filter to apply to user lookup
- Unique Identifier Attribute (objectID): Name of an attribute that uniquely identifies an LDAP object
- LDAP Username Attribute (username): Name of the attribute that corresponds to the username (e-mail address)
- LDAP Default Quota (defaultQuota): Storage quota of imported users if no mapping exists
- LDAP Display Name Attribute (displayName): Name of the attribute that contains the name
LDAP Search Attributes
Section titled “LDAP Search Attributes”Controls which attributes the "Search in LDAP" functionality will look at when searching using an arbitrary search string.
Custom Mapping
Section titled “Custom Mapping”LDAP attribute -> PropTag mapping to use for LDAP import. Any mappings specified take precedence over active templates.
You can create a list of (Name, Value) pairs
- Name: Name of the PropTag the attribute maps to
- Value: Value of the PropTag the attribute maps to
User import and synchronisation
Section titled “User import and synchronisation”To import/sync users from all domains, you have to have SystemAdmin permissions. If you do, click on IMPORT USERS or SYNC USERS. This will import/sync all users of all domains.
If you don't have these permissions, you can import/sync users for your domain. To do that, navigate to the user list(s) of your domain(s).
Importing users will synchronise all already imported users and also import new ones. Synchronising will only do the first.
Domain user import and synchronisation
Section titled “Domain user import and synchronisation”In the users list, you can either import/sync all users of this domain by clicking Import/Sync ldap users. If you want to import specific users, you can do the following:
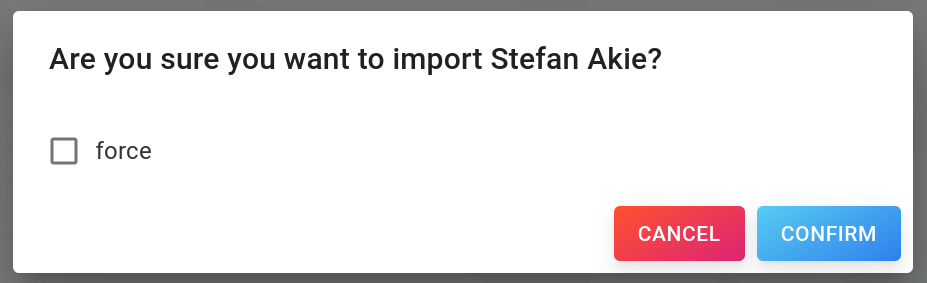
User import
Section titled “User import”Click on Search in ldap to open a list view of ldap users. Simply enter a username at the searchbar and click the import icon of a user to import.

There is the option to force the import. If checked, an existing user with this username in the grommunio database will be overwritten.
You can sync these specific users by clicking on them in the list view and clicking the Sync button in the detailed view (only for LDAP users).
Detaching a user
Section titled “Detaching a user”If you want to modify an ldap user, you need to detach it from ldap. You can achieve this by clicking Detach in the detailed user view. This essentially removes the synchronisation until forcefully overwriting the user via another import.
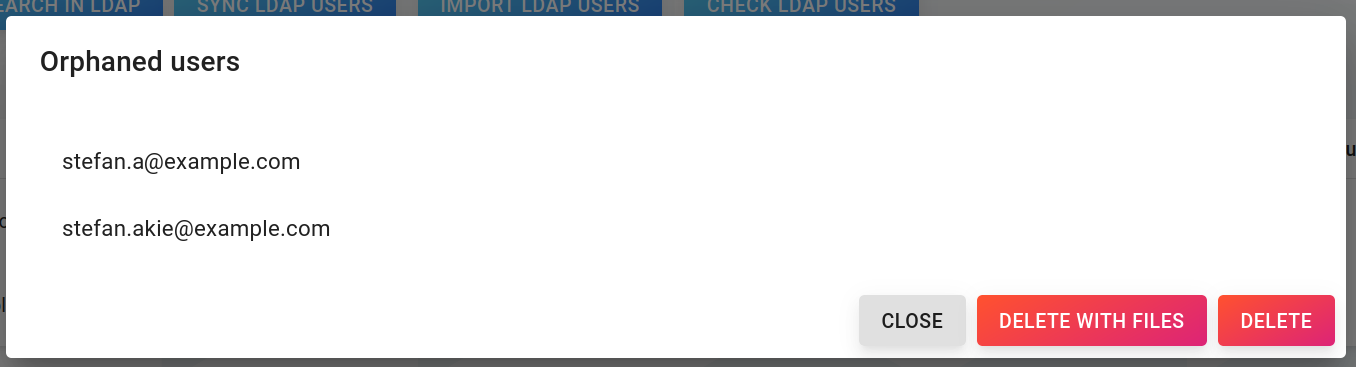
Removing orphaned users
Section titled “Removing orphaned users”If a user was removed from the ldap directory, the imported user will be orphaned. To show and/or delete currently orphaned users, click on Check ldap users.
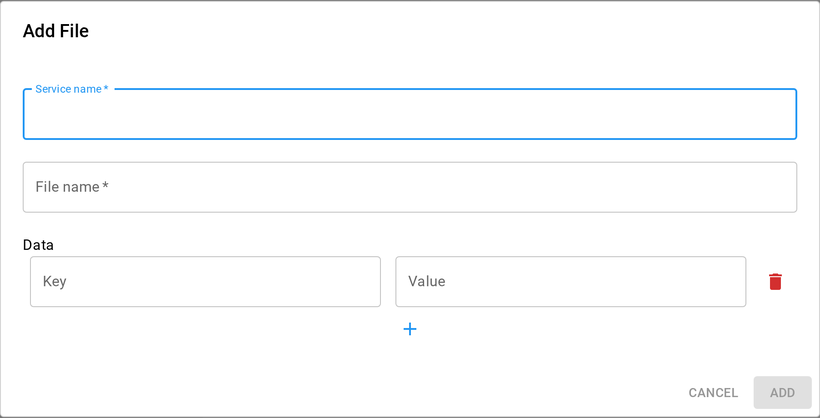
DB Configuration
Section titled “DB Configuration”It is possible to create config files in the database to manage services. Every config file manages exactly one file and includes lines of (key, value) pairs.
This creates a hierarchical structure:
-
ServiceA
-
FileA
- foo=bar
-
FileB
- test=example
- test2=example2
-
-
ServiceB
- FileC
- key=value
- FileC
Adding a file
Section titled “Adding a file”A useful example would be to configure a relayhost in postfix:
Editing a file
Section titled “Editing a file”To edit a file, click on the service the file belongs to. This will open a detailed view of the service with a list of its files. Click on a file to open its detailed view and edit the (key, value) pairs to your needs.

Click Save to confirm or Cancel to discard your changes.
Deleting a file
Section titled “Deleting a file”To delete a file, click on the service the file belongs to. This will open a detailed view of the service with a list of its files. Click on the trash icon of a file to delete it and confirm.
Configuring grommunio-dbconf
Section titled “Configuring grommunio-dbconf”grommunio-dbconf is an internal service, that will execute actions/commands when configs change. These actions can be specified for every service separately.
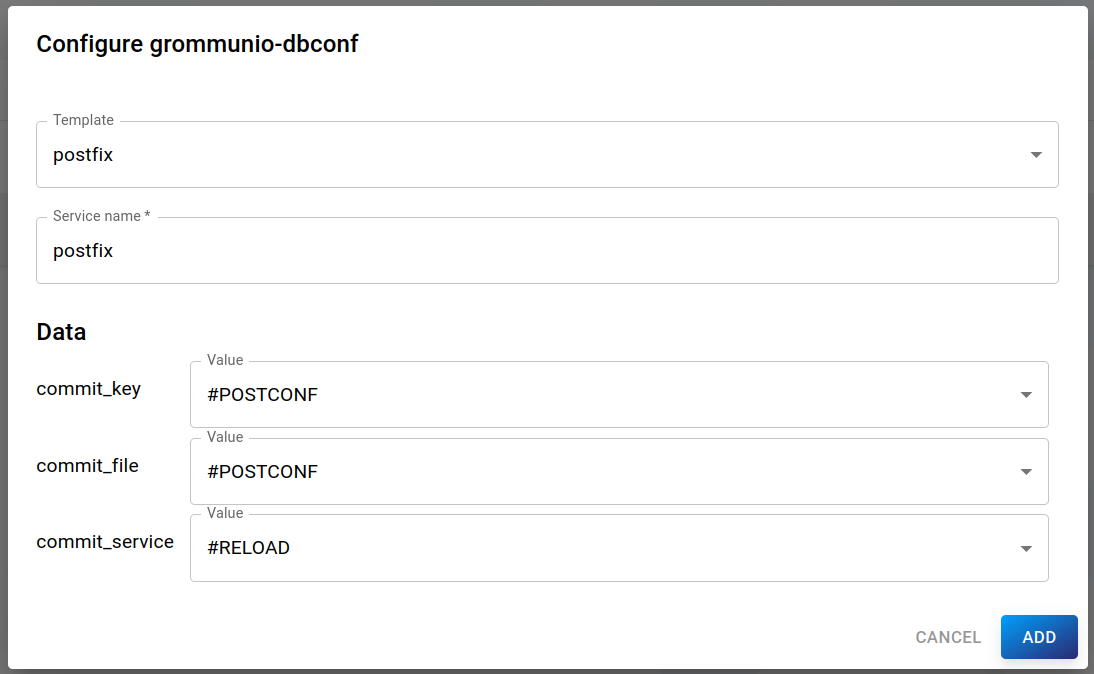
Adding a grommunio-dbconf file
Section titled “Adding a grommunio-dbconf file”Actions to be executed when a config of a service
There are pre-made commands to set for either key, file or service changes. Those can be found on the Commands tab.
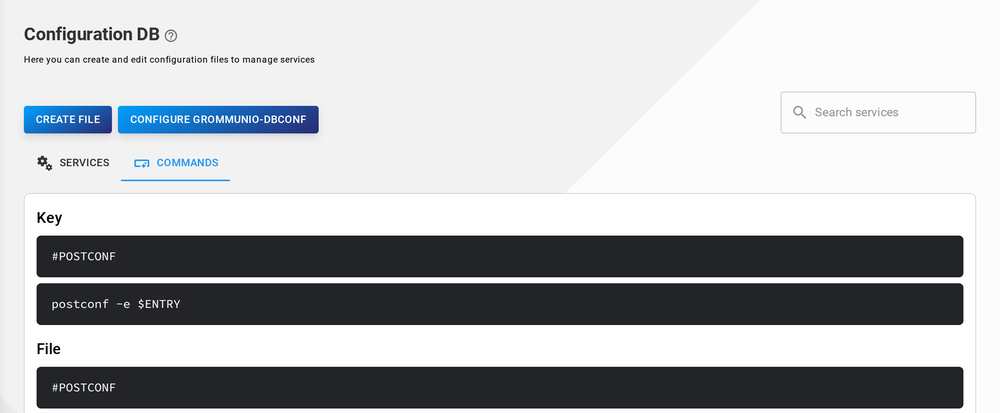
If a command doesn't exist, the next lower level command will be executed (service -> file -> key).
For example, you could configure postfix changes like this:
This will, among else, restart the service if the service config changes.
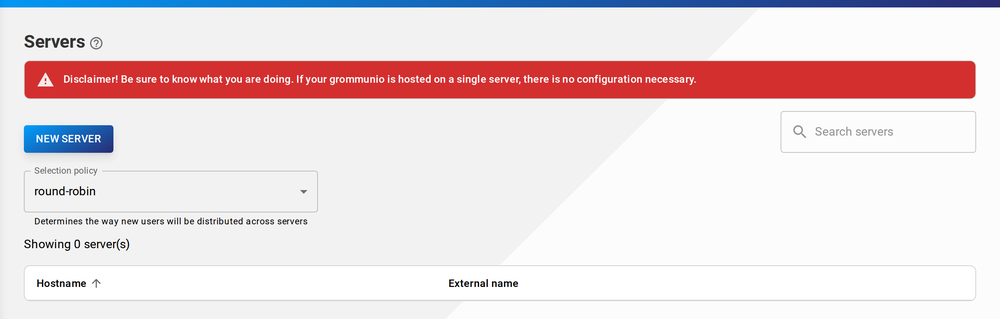
Servers
Section titled “Servers”If grommunio is running on a distributed system, the list of servers can be added in this view. It is possible to specify the selection policy for user distribution. You can select from:
- round-robin: Always use the server on which a user has not been added for the longest time (in a circle-like manner).
- balanced: Put new user on server with least workload
- first: Always use the first server
- last: Always use the last server
- random: Pick a random server
Adding a server
Section titled “Adding a server”To add a new server, click the blue NEW SERVER button to open the form dialog:
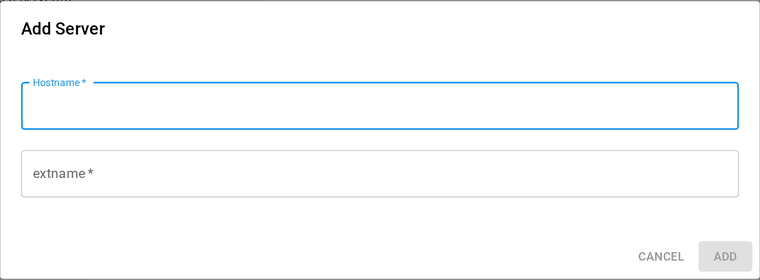
The following properties can be set:
- Hostname (required): Internal server hostname
- Extname (required): Hostname for external access (DNS-Name)
Editing a server
Section titled “Editing a server”To edit an existing server, click on a server in the list to open the detailed view.
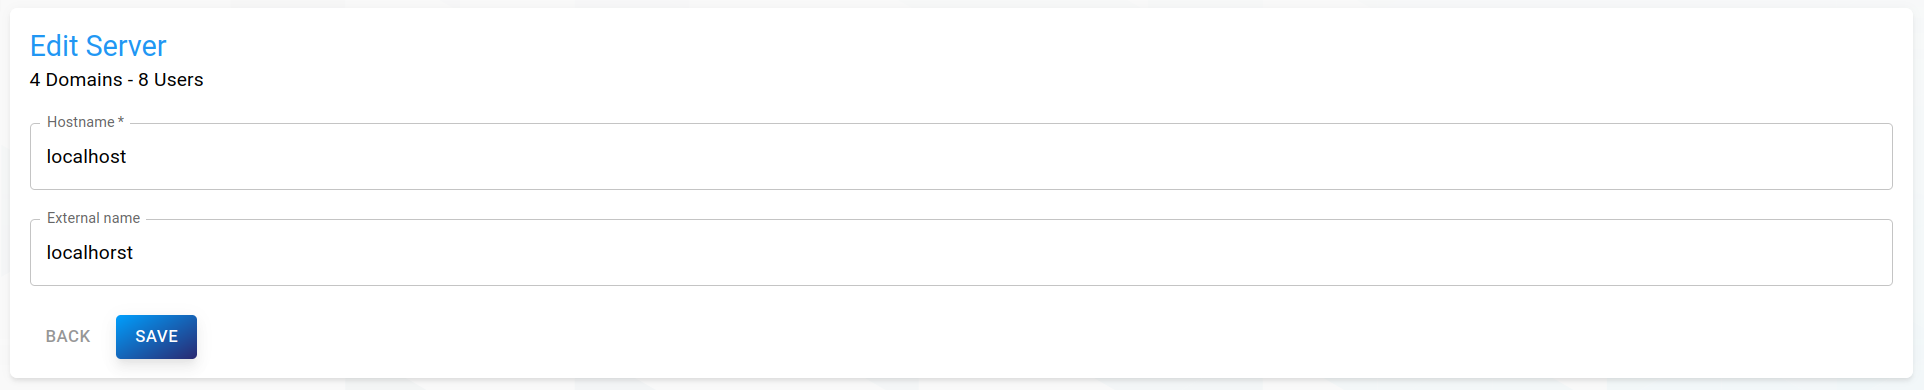
Simply change attributes to your needs, then click Save on the bottom to save your changes.
Click on Logs in the drawer, which will redirect you to the list of available logs. Usually, you will see a list of grommunio/gromox services, which journalctl logs you can view here.
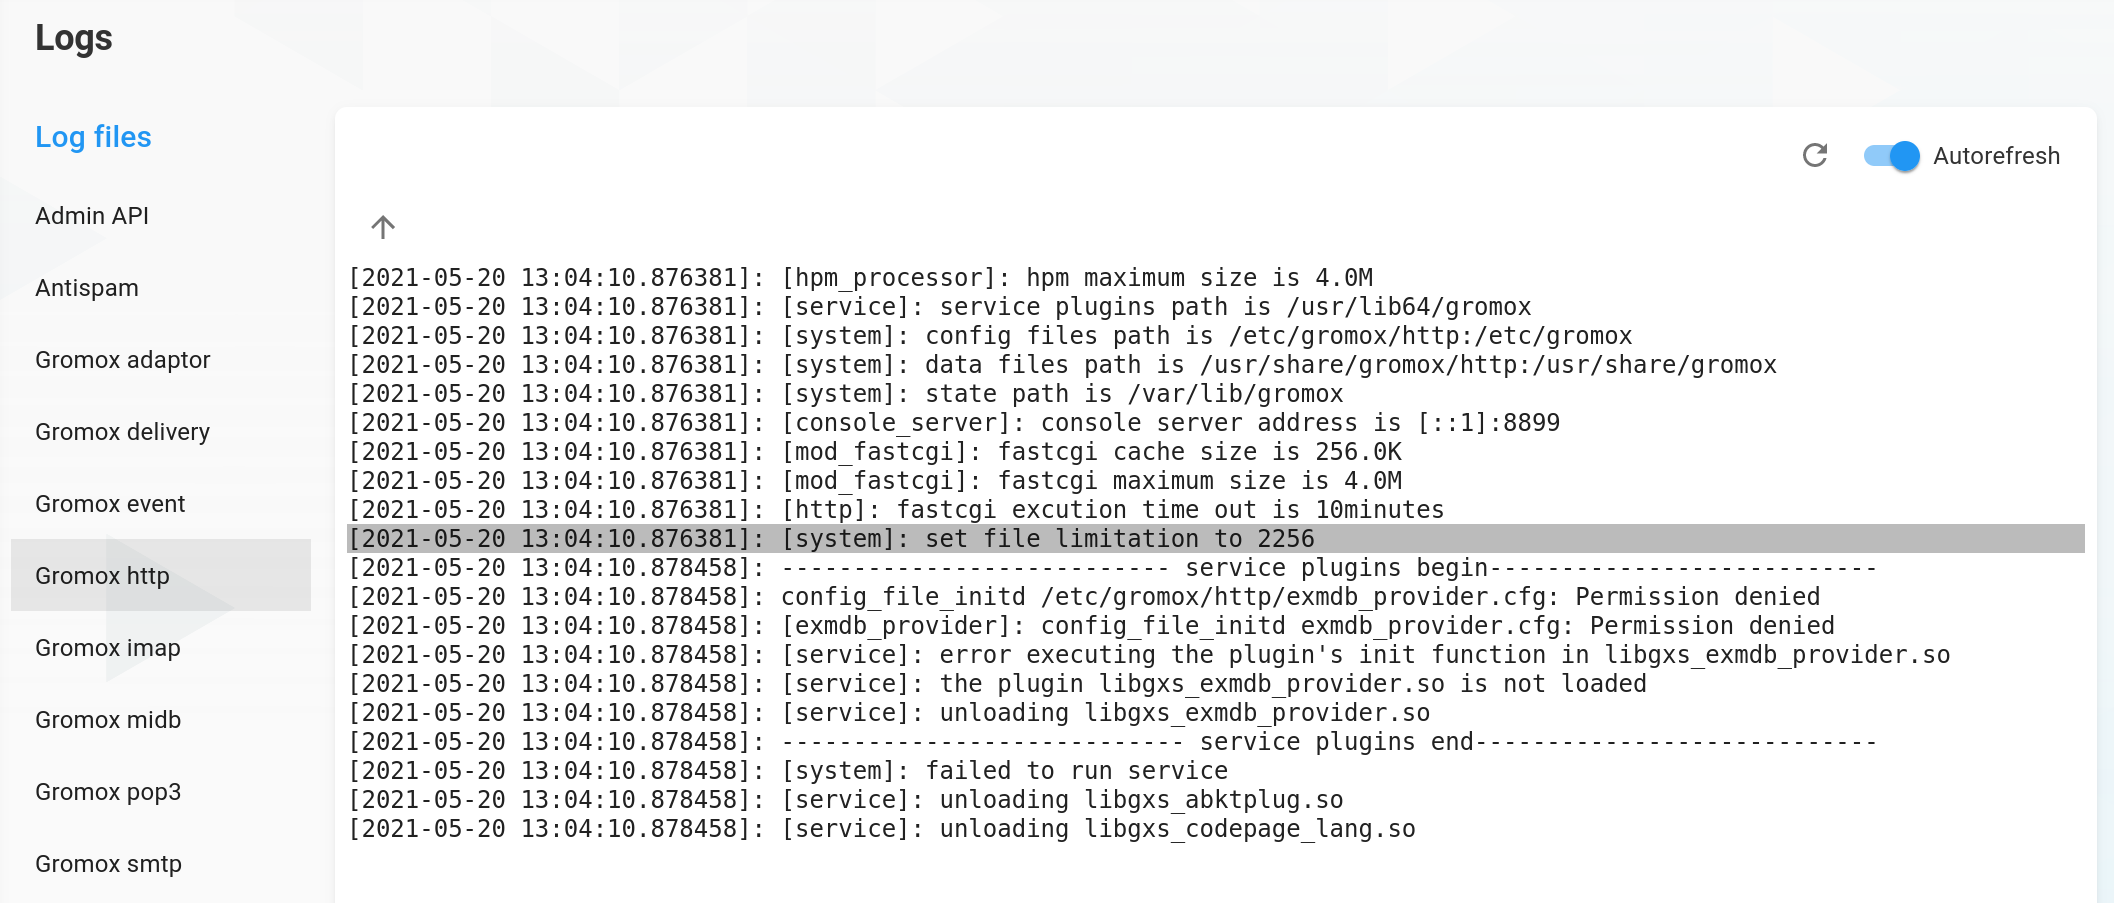
Click on the uparrow to show previous logs. Click on the the refresh button to fetch new logs or toggle the autorefresh switch to automatically refresh logs of the selected service every 5 seconds. Click on a log line to fetch every log after the timestamp of the clicked line.
Mail queue
Section titled “Mail queue”Click on Mail queue in the drawer, which will redirect you to the view of the current postfix and gromox mail queue.
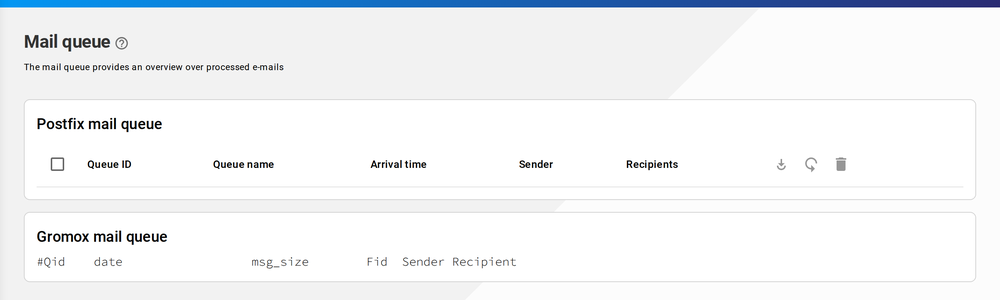
These lists will update automatically every 10 seconds.
Actions
Section titled “Actions”Select table rows by clicking the checkboxes. Mail queue actions will be used on the selected entries.
The actions are:
- Flush: Try to continue mail processing
- Requeue: Remove mail from queue and add queue the same mail as new entry
- Delete: Permanently remove mail from queue
Click on Tasks in the drawer, which will redirect you to the Tasks view.
Tasks are created for operations which could potentially take a long time. Currently, this includes LDAP sync and folder deletion. If one of these operations take too long, a background task is created, which can be viewed in this table.
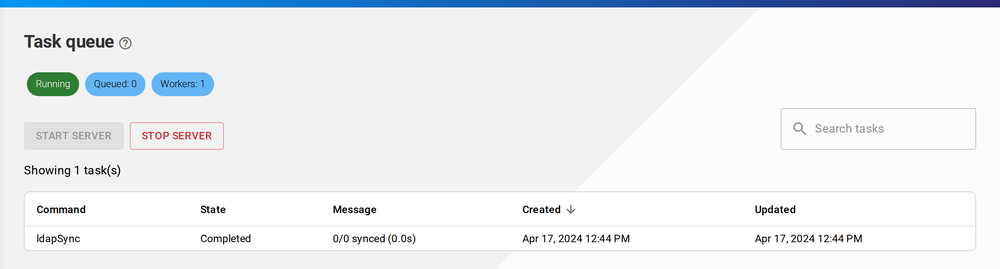
In case the internal task processor is not running, it can be started manually by clicking the Start server button.
Further task details can be seen in the task details view, by clicking on a task in the table.
Mobile devices
Section titled “Mobile devices”Click on Mobile devices in the drawer, which will redirect you to the list of synchronised mobile devices. This view is a recreation of the grommunio-sync-top CUI.
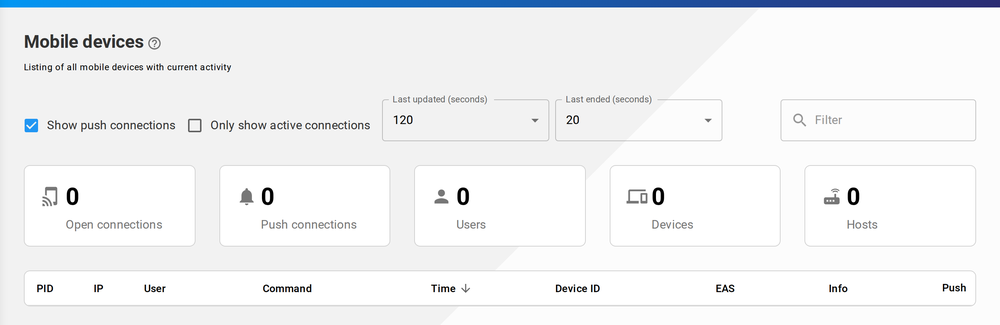
The view will update the devices every 2 seconds. On the top, you can specify filters for the table, like text-based search or activity of devices.
Sync policies
Section titled “Sync policies”The synchronisation behavior of devices is specified by the sync policies, which are a set of rules. When a user logs into an account, these policies will be applied to the device and updated as soon as the policy is changed. It is not possible to change the policies globally, but per domain (all users of a domain) or per user. To change the policy for all users of a domain, navigate to the list of domains and click on the domain for which you want to change the policy. Under the Sync policy tab, you can see the current rules.
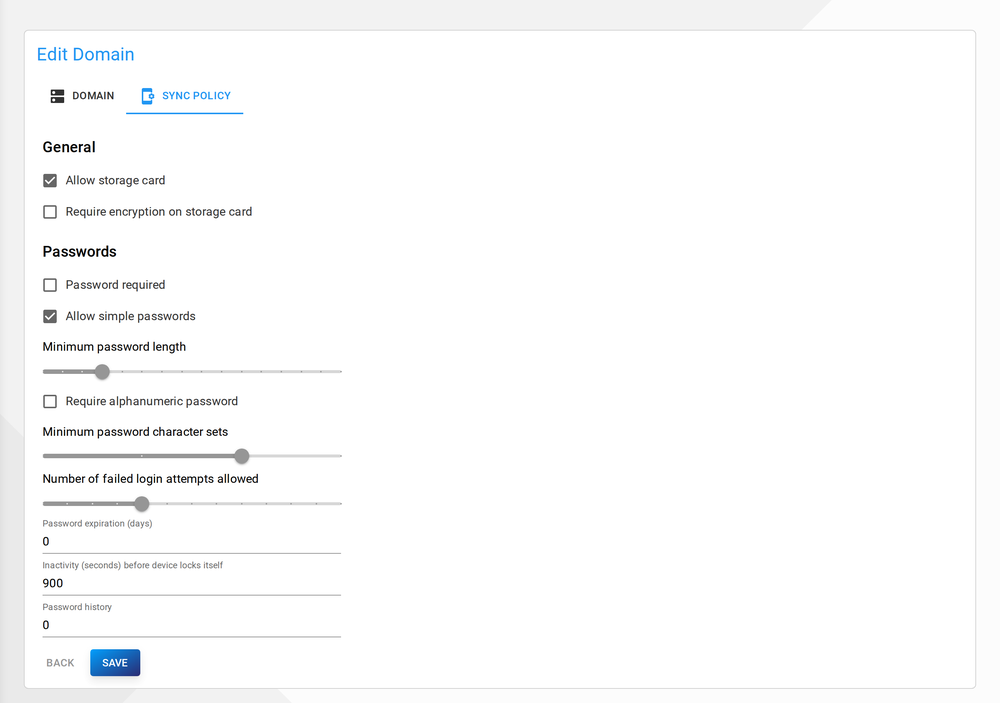
Blue checkboxes, sliders or textfields indicate deviations from the default policy, grey ones match it.
To specify specific rules for a user, navigate to list of users and click on the user for whom you want to change the policy. Just like domain-specific policies, current rules are displayed under the Sync policy tab. Again, blue checkboxes, sliders or textfields indicate deviations from the domain policy of this user, grey ones match it.
Live Status
Section titled “Live Status”Click on Live Status in the drawer, which will redirect you to the live, realtime view of the grommunio web services. Any HTTP request shows up in live status, including MAPI/HTTP, EAS, EWS and other requests made. All connections other than grommunio Groupware, e.g. Chat and Files are also viewable and can be tracked by the entrypoint URL in the list.
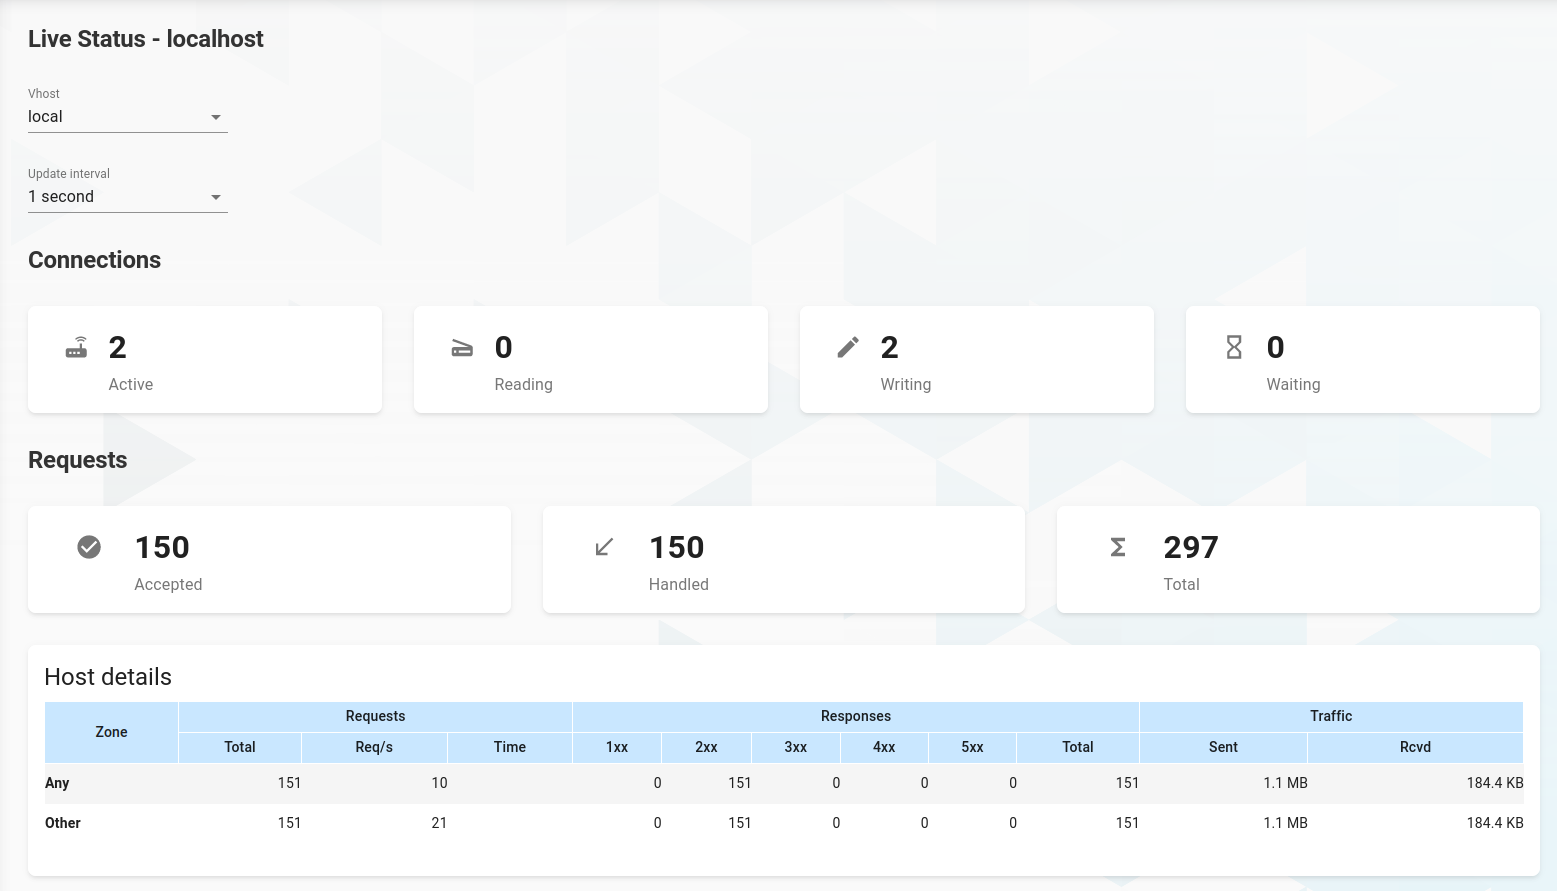
At the top you can select one of the available vhosts and the update interval.
grommunio admin CLI (ACLI)
Section titled “grommunio admin CLI (ACLI)”grommunio-admin
Section titled “grommunio-admin”grommunio-admin is the command line interface tool of the grommunio Admin API. grommunio-admin is a low level administrative tool for grommunio configuration and provides a large number of subcommands to administrate grommunio accordingly.
grommunio-admin also provides bash completion functionality and an interactive shell, with the following subcommands available:
| config | Show or check configuration. See grommunio-admin config. |
| connect | Connect to remote CLI. See grommunio-admin connect. |
| dbconf | Database-stored configuration management. See grommunio-admin dbconf. |
| domain | Domain management. See grommunio-admin domain. |
| fetchmail | Fetchmail management for retrieval of remote mails. See grommunio-admin fetchmail. |
| fs | Filesystem operations. See grommunio-admin fs. |
| ldap | LDAP/Active Directory configuration, diagnostics and synchronization. See grommunio-admin ldap. |
| mconf | Managed configurations manipulation. See grommunio-admin mconf. |
| mlist | Mailing/distribution list management. See grommunio-admin mlist. |
| passwd | Internal user password management. See grommunio-admin passwd. |
| run | Run the REST API. See grommunio-admin run. |
| shell | Start interactive shell. See grommunio-admin shell. |
| taginfo | Print information about MAPI property tags. See grommunio-admin taginfo. |
| user | User management. See grommunio-admin user. |
| version | Show version information. See grommunio-admin version. |