Guided Installation (grommunio Appliance)
grommunio delivers ready-to-use appliances for:
- bare metal or virtualized environments (ISO)
- container environments (docker)
- specialized, automated virtualization environments (OVA)
and a community image to run grommunio on a raspberry pi.
To deploy grommunio via ISO, you need to make the installation media available to your installation target. The ISO is a generic, bootable installation medium which works in most scenarios. To deploy the ISO with bare metal, the ISO can be imaged to USB drives for simplified installation.
The grommunio Appliance is a general-purpose installation target, which comes with all components required for successful operation of grommunio. It already includes the operating system for simplified management and allows general purpose usage. Every appliance installation is automatically deployed with update servers ready-configured and services prepared for usage. If you are seeking a general-purpose and simple deployment, grommunio Appliance is the right place for you. Simplified update management, backups and full portability allow the appliance to operate for any installation target sizing 1-2000 users with adequate hardware sizing. For larger installations or installations with special deployment needs, such as - but not limited to - geographically split, cluster or hyperscale installations, please refer our partners and/or our support/professional services team. Alternatively, the combined information from the manual installation in this chapter together with the man page sections is sufficient to build the grommunio setup of your needs.
grommunio Appliance configuration with CUI/setup
Section titled “grommunio Appliance configuration with CUI/setup”The grommunio console user interface (grommunio-cui) provides a console interface which allows the administrator to perform basic tasks to ready the appliance for the admin UI (admin web interface) or admin CLI (admin command line interface), such as network configuration and time synchronization.
Main screen
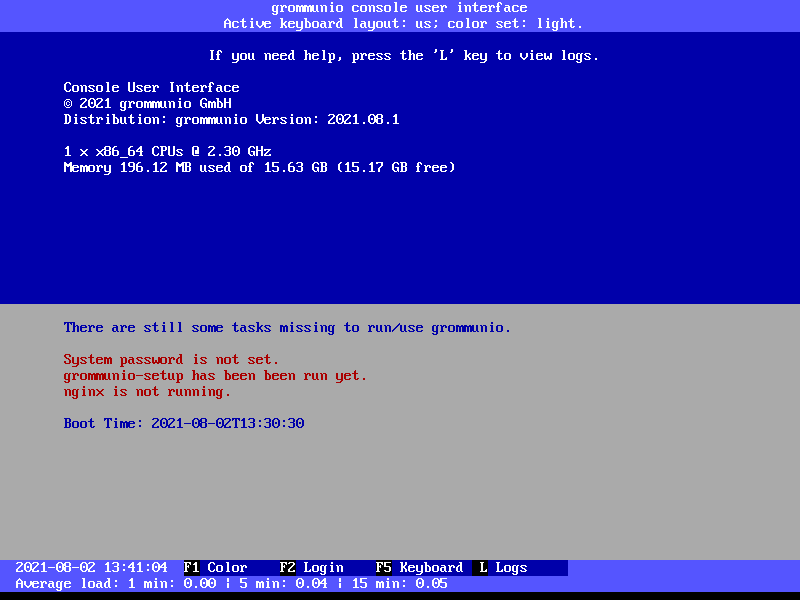
Section titled “Main screen”After starting grommunio-cui, you are in the main screen. Upon login, you are able to make system configuration changes.
In the main screen, the following functions are available:
- F1: Switching the color scheme (light vs. dark mode)
- F2: Login to unlock system configuration mode
- F5: Switching of keyboard layout
- L: Open system log viewer
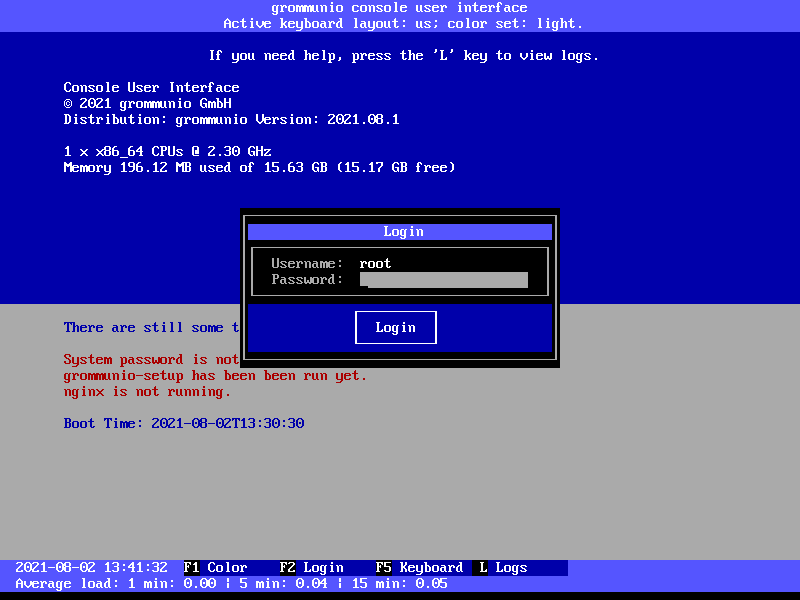
To enter into system configuration mode, press F2 and log in with the system superuser account (root).
Main configuration screen
Section titled “Main configuration screen”The main menu provides the following functionality available to grommunio-cui:
- Change system password
- Network configuration
- Timezone configuration
- Timesync configuration
- grommunio setup wizard
- Change Admin Web UI password
- Terminal
- Reboot
- Shutdown
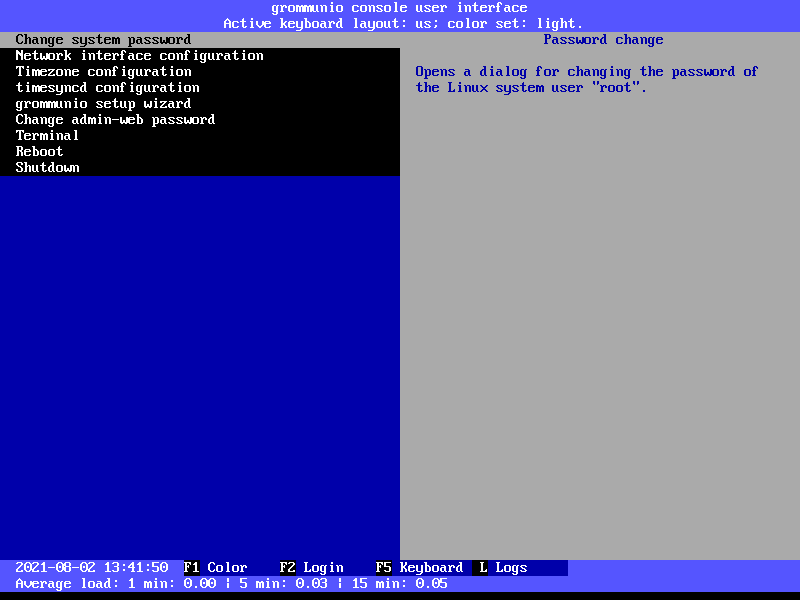
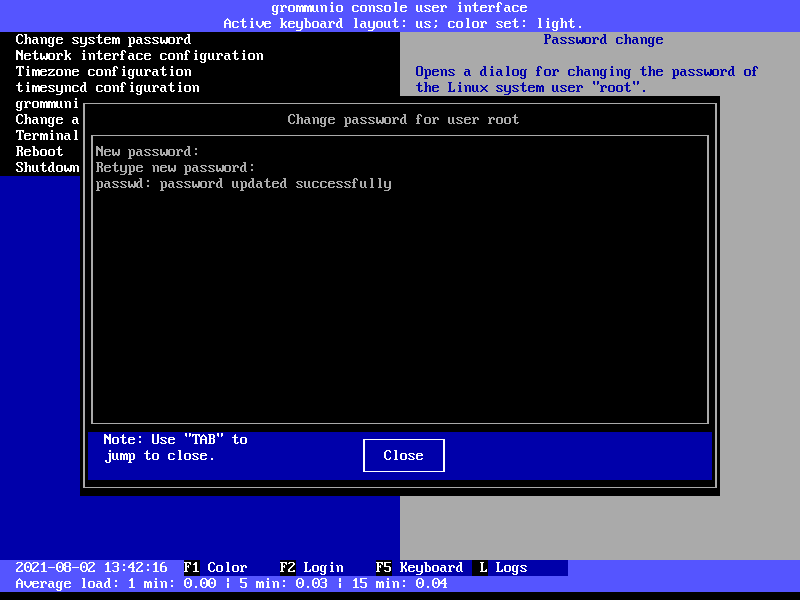
Change system password
Section titled “Change system password”The menu entry Change system password opens a window for setting the superuser (root) account password. Do this directly after installation. Use a secure password. We recommend using a password comprised of four words or more.
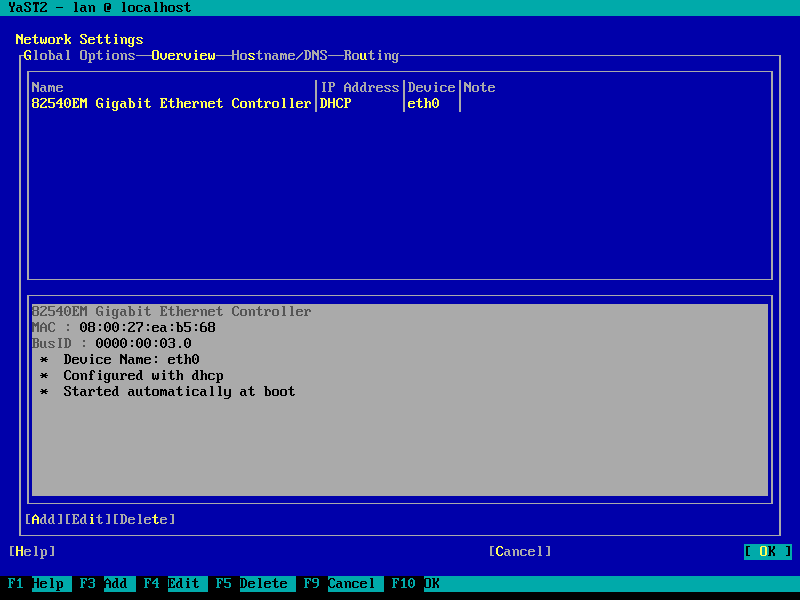
Network configuration
Section titled “Network configuration”The menu entry Network configuration starts the network configuration utility (yast2 lan), which provides support for all reasonable network configuration settings. For detailed information on how to configure the network by using the yast utility, refer to the online documentation of YaST at https://documentation.suse.com/sles/15-SP6/html/SLES-all/cha-network.html#sec-network-yast
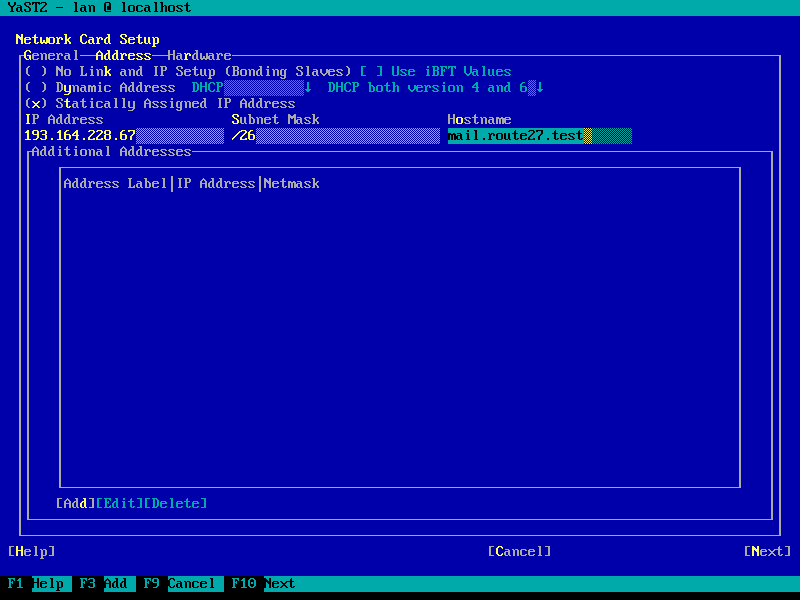
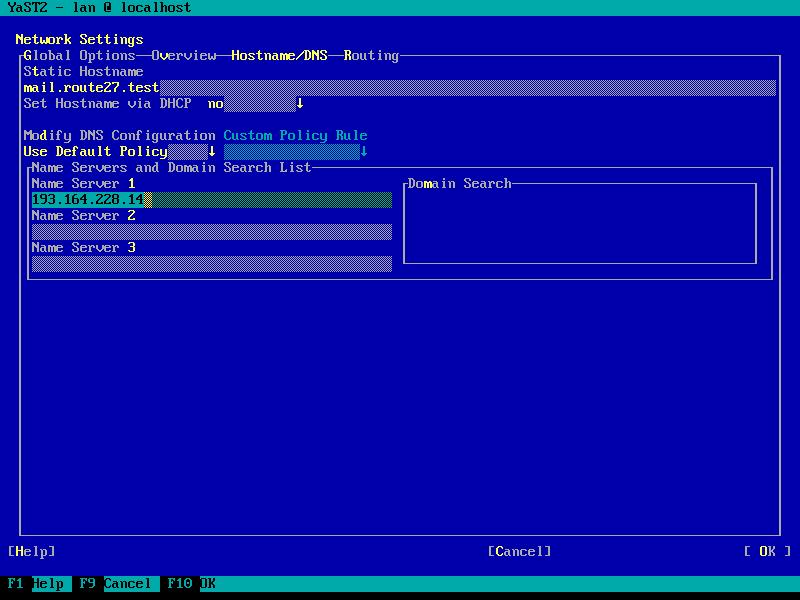
Hostname & FQDN setup
Section titled “Hostname & FQDN setup”It is a requirement to setup the system hostname and domainname correctly.
Second, for local name resolving of services to work properly, the correct entries should be either available in DNS and/or be set in /etc/hosts.
To do this with the appliance, set the fully qualified domain name (FQDN) in the interface settings (which will be mirrored to /etc/hosts) and in the "Hostname/DNS" tab (the static hostname relates to /etc/hostname). This way, any services of the appliance will be able to use the correct addressing based on the domain and host. A correct hostname/DNS setup is mandatory, especially for multi-host setups.
Timezone configuration
Section titled “Timezone configuration”The menu entry Timezone configuration can be used to set the preferred timezone displayed in server logs, etc. It has no practical impact on e-mails, because mail user agents such as grommunio-web translate timestamps to the timezone of the particular device the program is running on anyway.
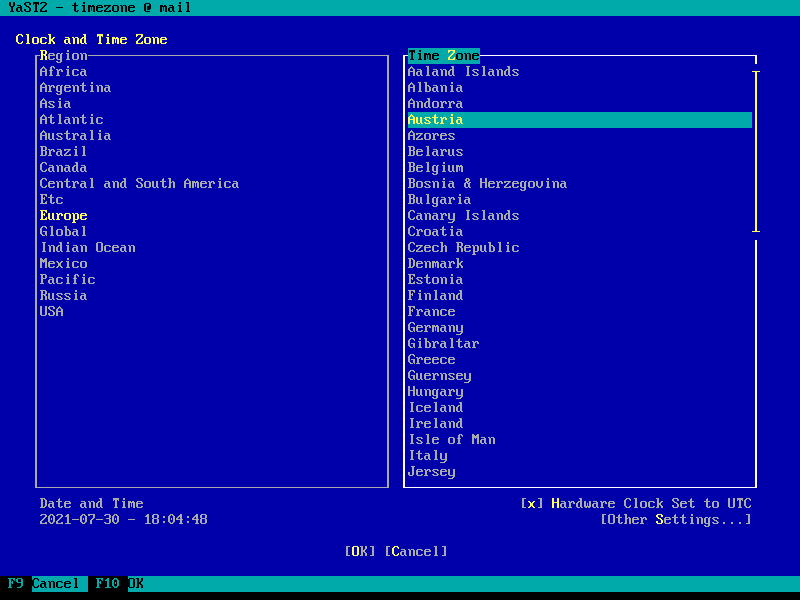
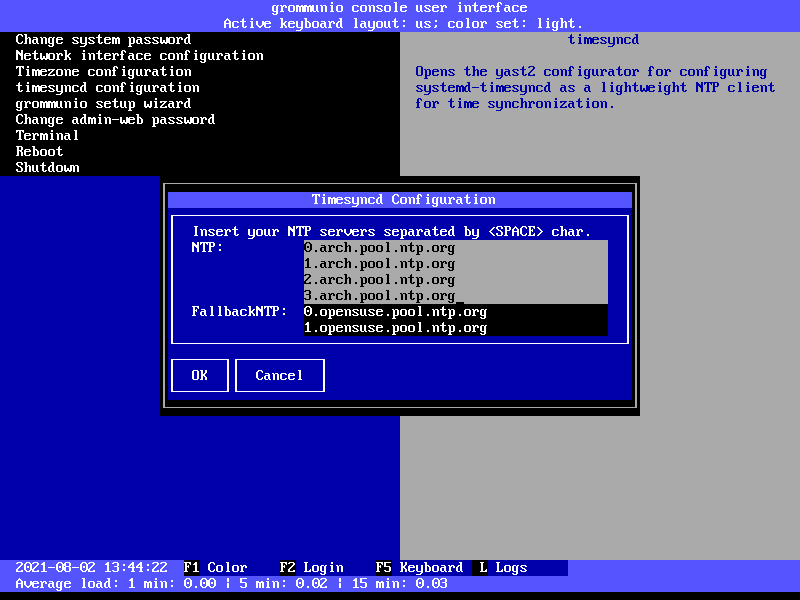
Timesync configuration
Section titled “Timesync configuration”Timesync configuration is done with a simple interface providing the ability to set the timezone according to your region and timezone of that region. It generally is recommended to keep the setting Hardware Clock Set to UTC, since this provides the recommended timezone-agnostic behavior for services (such as with logs, etc.).
After these basic setup, your grommunio Appliance should:
- be able to connect to the Internet (availability of Updates, etc.)
- have a valid timezone set
- have a valid timeserver configured, with the system time appropriately synchronized
grommunio setup wizard
Section titled “grommunio setup wizard”With the previous basic setup steps completed, it is recommended to run the grommunio setup wizard to complete the configuration based on your needs.
The menu entry grommunio setup wizard initiates the grommunio-setup program which walks you through the initial setup of grommunio.
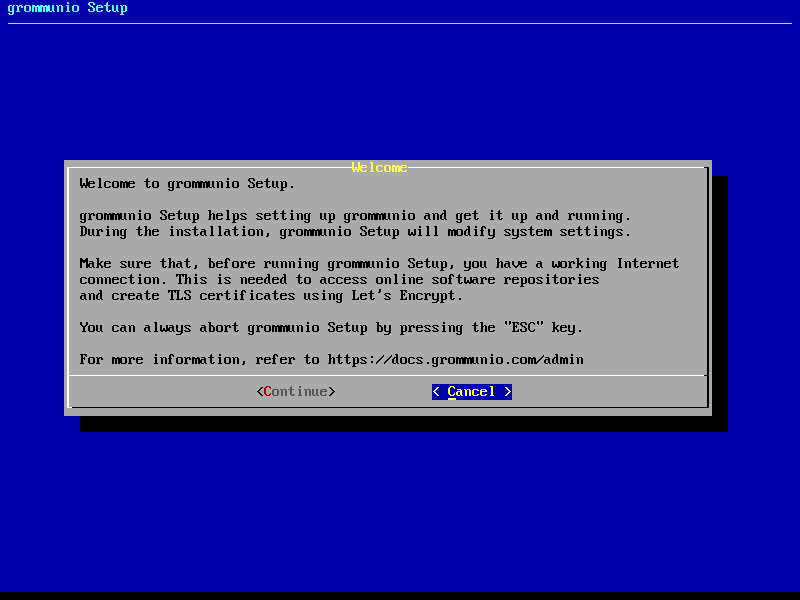
Welcome screen
Section titled “Welcome screen”Starting grommunio-setup presents you with a descriptive welcome screen.
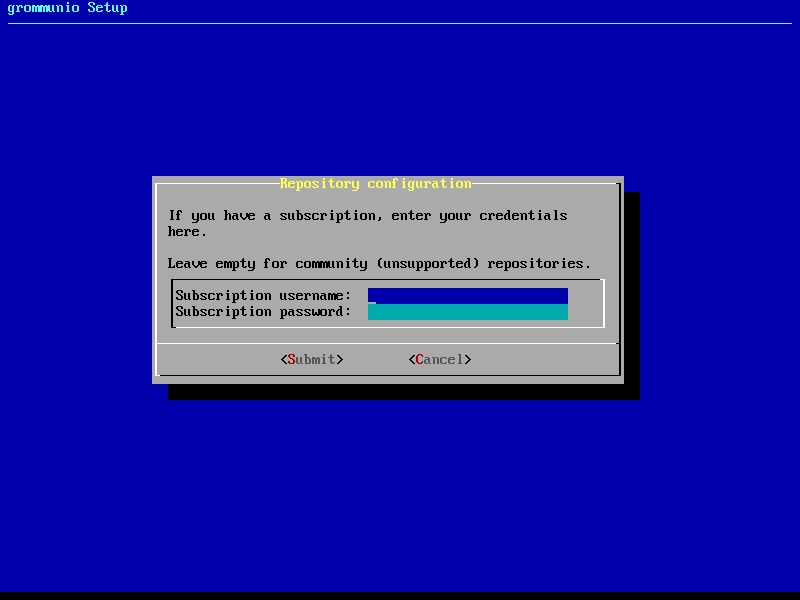
Repository setup
Section titled “Repository setup”As first step, grommunio-setup requests you to enter subscription details. These subscription details are included in your purchase of the product, alongside with the subscription certificate delivered for installation at a later stage. If left empty, grommunio-setup will automatically include the community repositories.
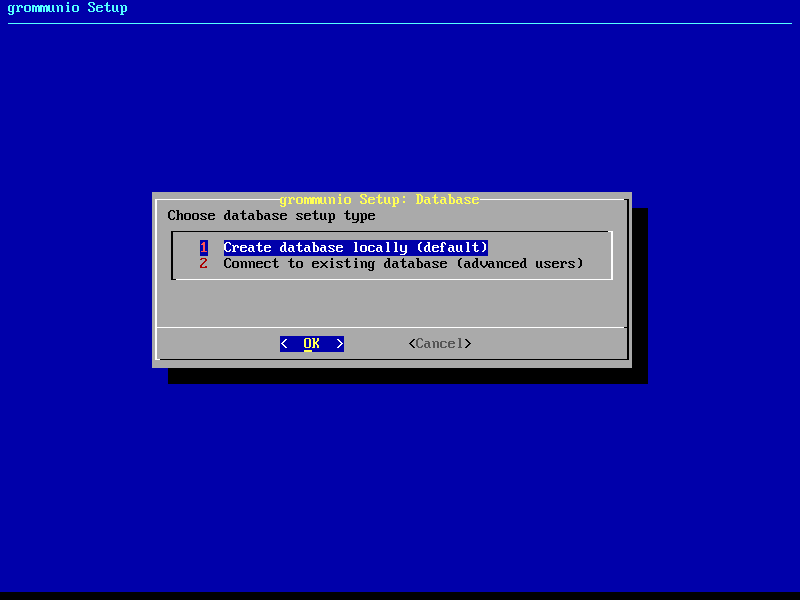
Database variant
Section titled “Database variant”In the next stage of grommunio-setup, you are requested to specify which central database type you want to configure. Most installations use the local database installation, where the MySQL-database is initialized and prepared automatically. For larger and/or special setups, e.g. clusters, multi-node and distributed setups, it might be recommended to connect to an already existing database instead.
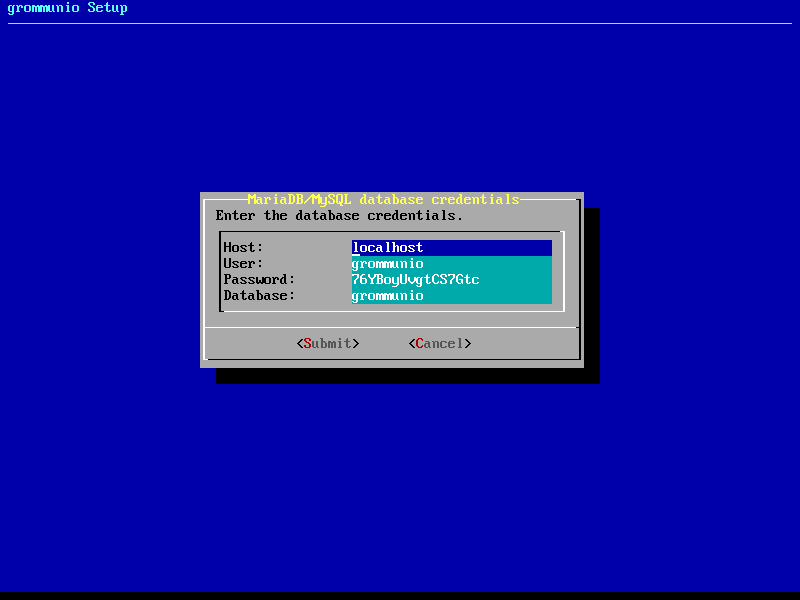
Database settings
Section titled “Database settings”With the choice of "local database", the next installation step will automatically provide you with information which is used for initialization of the database. For standard setups, it is recommended to go with the default values. The values for the installation are generated randomly, which protects your installation from unauthorized access.
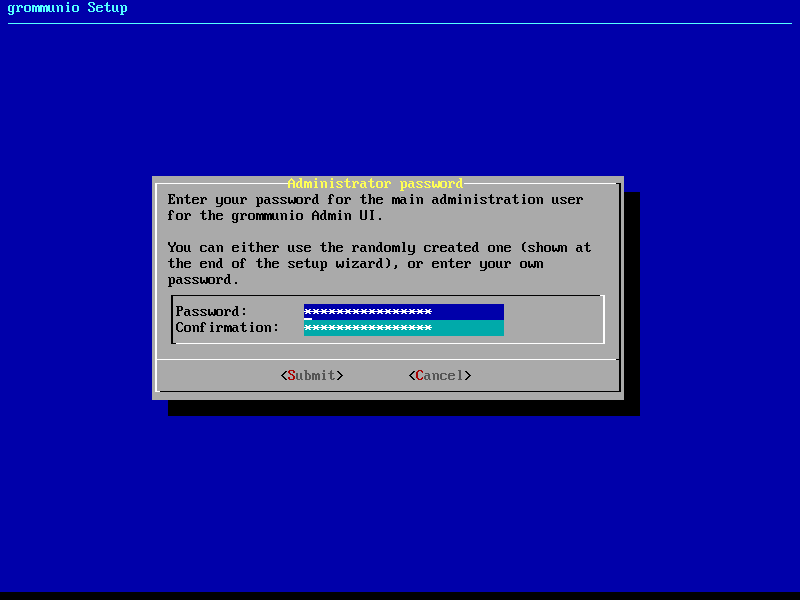
Administration User
Section titled “Administration User”After setting up the database, a default administrator password is requested for the login with the grommunio Admin API. The default user (admin) is then initialized with the password entered here. By default, grommunio automatically generates a password and shows it at the end of the setup procedure.
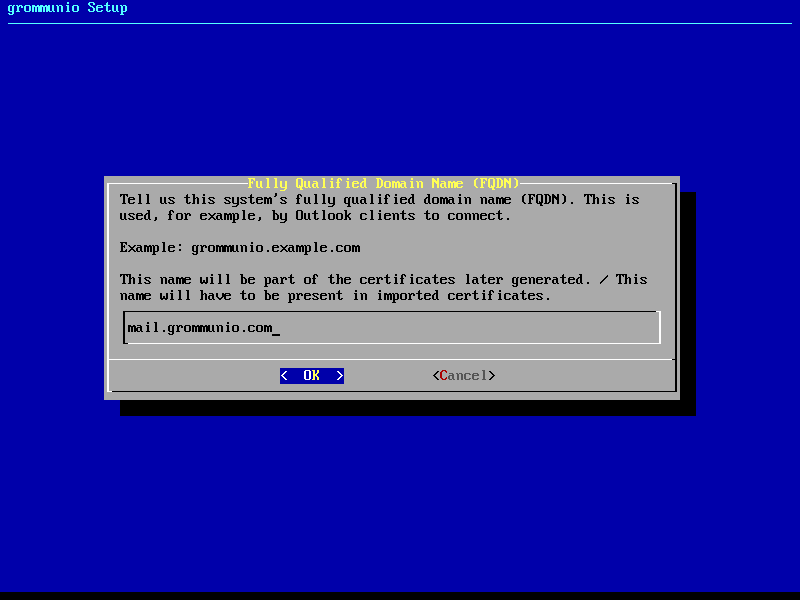
Fully Qualified Domain Name
Section titled “Fully Qualified Domain Name”The next stage of grommunio-setup requests the configuration of the fully qualified domain name (FQDN). The FQDN traditionally consists of the hostname, combined with the primary domain of the system. The name chosen here is strongly recommended to be part of the certificates generated at a later stage in grommunio-setup.
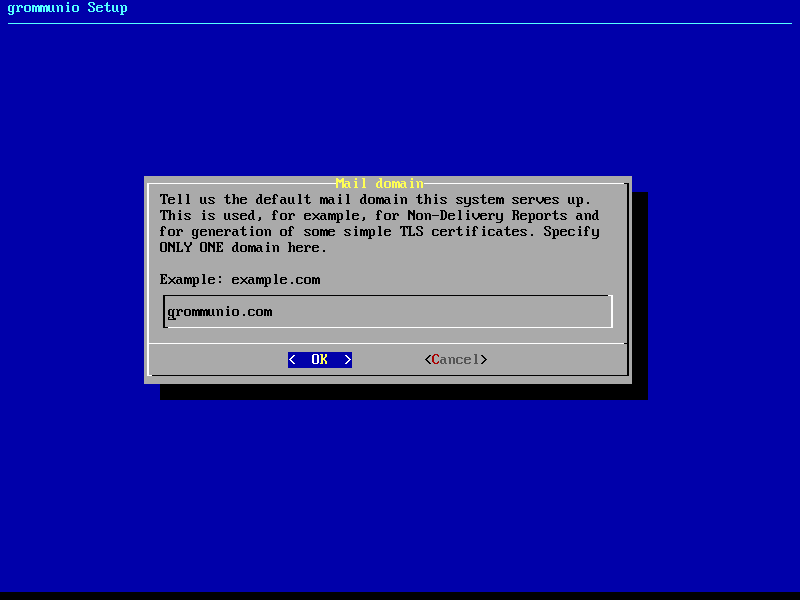
Primary mail domain
Section titled “Primary mail domain”By continuing to the next stage, it is requested to provide the primary mail domain. The primary mail domain is important as main system domain for further system configuration.
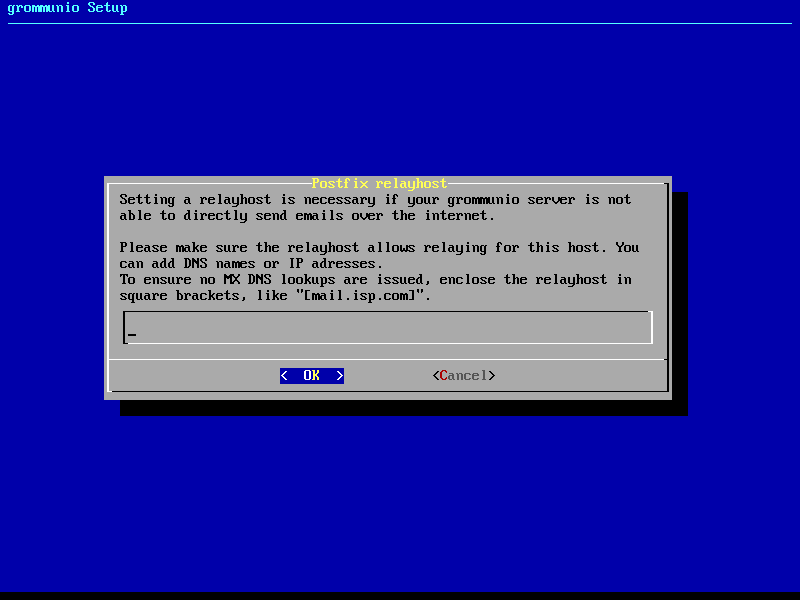
Relayhost configuration
Section titled “Relayhost configuration”If the installation is not to be directly sending E-Mails (by resolving the recipients' MTAs directly), a relayhost is recommended to be set. This next step allows the configuration of a relayhost which for example can be used for integration with existing firewalls or mail security appliances. If the configured target should be used directly (by requesting the IP address through DNS A records instead of the associated MX records), the relayhost should be enclosed with square brackets, like "[mail.isp.com]".
TLS configuration
Section titled “TLS configuration”The next step of configuration with grommunio-setup provides a menu with a choice of the preferred TLS setup with the grommunio installation:
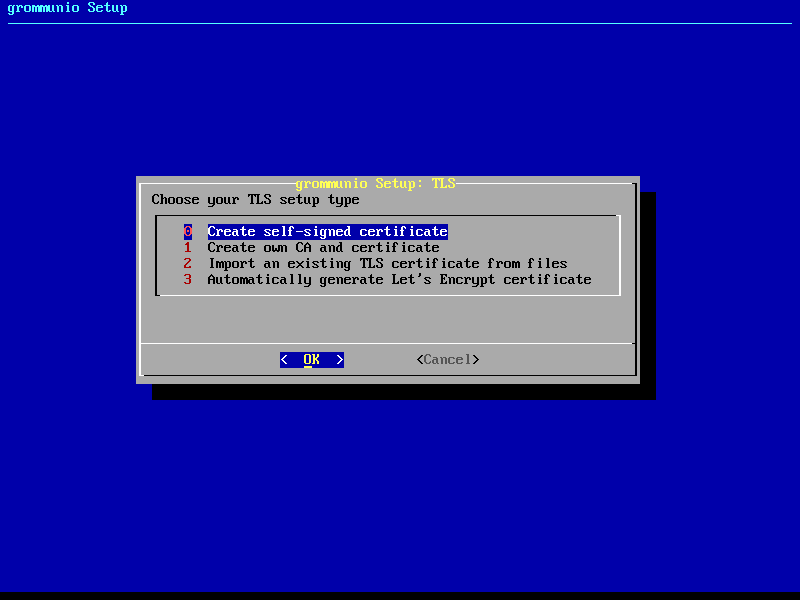
0: Creation of self-signed certificate
Creating your own self-signed certificate is the simplest option - Creating an own self-signed certificate will though show up as untrusted at first connect and needs to be trusted before continuing. This behavior is normal and is because any client that connects has no possibility validation if the certificate has a valid source. This setting is the default and does not require any preparation for certificate generation. grommunio does not recommend this option for production environments, as this option requires any client to first trust the certificate in use. This option is the best for validation and demo installations of grommunio.

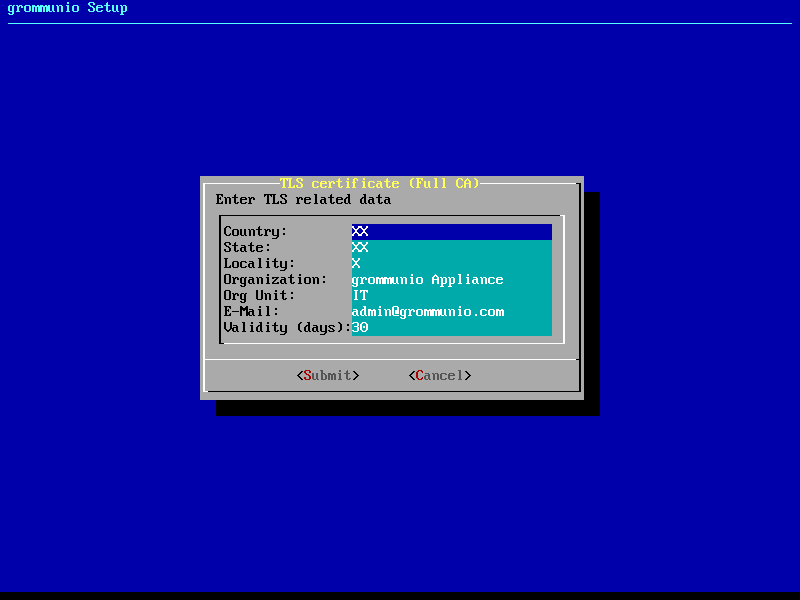
1: Creation of own CA (certificate authority) and certificate
Creating your own certificate authority is an extended option which allows you to create self-signed certificates with an own certificate authority. This way, you can (manually) create further certificates under the umbrella of a own central authority with multiple server certificates to be signed by the same certificate authority generated by yourself. This option is the best for validation and demo installation of larger installations of grommunio with multiple instances.
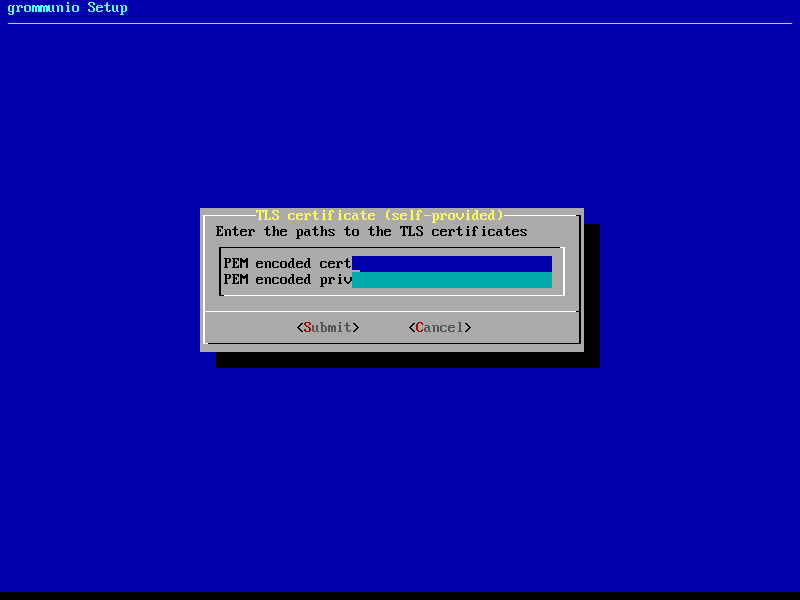
2: Import of an existing TLS certificate from files
Importing your own certificate allows any type of external certificate pair (PEM-encoded) to be used with your grommunio installation. Note that it is recommended to either use SAN certificates with multiple domains or a wildcard certificate. With your choice of your own TLS certificates, you have the highest flexibility to either use a trusted CA or a publicly signed certificate by an officially trusted certification authority including, but not limited to, Thawte, Digicert, Comodo or others.
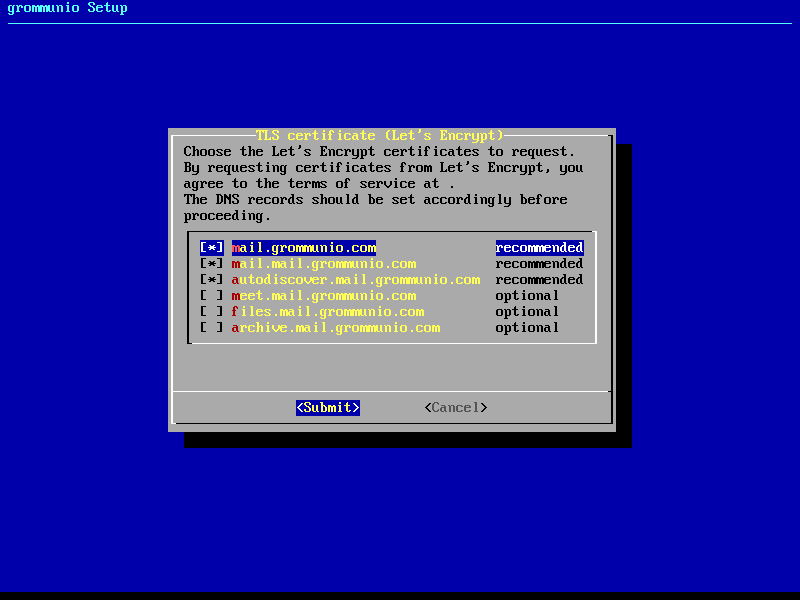
3: Automatic generation of certificates with Let's Encrypt
Using this option allows the automatic certificate generation process with the Let's Encrypt certificate authority. Using Let's Encrypt certificates is free of charge, however the terms of service by Let's Encrypt apply, which are referenced during installation. Using this option automatically requests the domains from the selection you made, and automatically starts the validation process. For this automated process to work successfully, Let's Encrypt verifies all defined domain names by creating a challenge on the appliance. For this to work, port 80 (HTTP) needs to be accessible from the Internet during this step of verification (and any subsequent automated renewal) with all the domains pointing to the appliance. This option is recommended for any simple installation and allows the most seamless installation experience if prepared correctly.
3.a: Generation of certificates with Let's Encrypt for Multi-Domains
For adding more domains to your Let's Encrypt certificate you can use the following command:
certbot certonly -n --standalone --agree-tos \--preferred-challenges http \--cert-name="<domain1>" \-d "<domain1>" \-d "<domain2>" \-d "<domain3>" \-d "<domain4>" \-d "<domain5>" \--pre-hook "service nginx stop" \--deploy-hook /usr/share/grommunio-setup/grommunio-certbot-renew-hook \--post-hook "service nginx start"While --cert-name="<domain1>" stands for the original domain and -d "<domain2>" to -d "<domain5>" are the multi domains to add to the LE certificate. The -m "[email protected]" is your email address while the --pre-hook "service nginx stop" stops nginx before the certificate modification, the --deploy-hook /usr/share/grommunio-setup/grommunio-certbot-renew-hook makes the changes and the --post-hook "service nginx start" starts nginx after the modification.
Any certificates so generated are placed in /etc/grommunio/ssl and are automatically referenced by any services of the appliance.
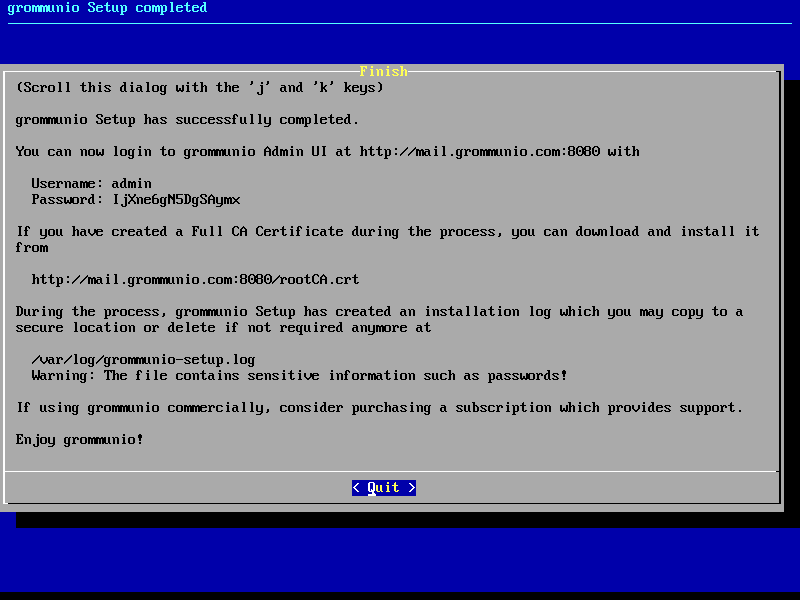
Setup finalization
Section titled “Setup finalization”After all above steps of grommunio-setup have been completed, the final dialog shows the summarized information of the installation as reference.
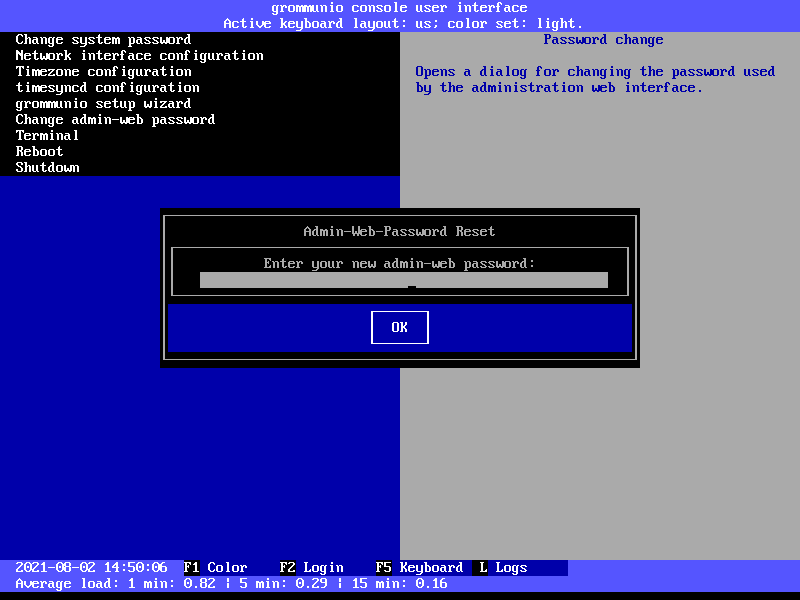
Admin web password reset
Section titled “Admin web password reset”The menu entry Admin web password reset changes the password of the main administration user (admin). For administrators which want to execute this option without running grommunio-cui first, this can be done anytime by executing the command grommunio-admin passwd.
Terminal
Section titled “Terminal”The option Terminal enables a classic shell with the ability to exit back to grommunio-cui by issuing the exit command at any given time. This option should be used with care and only by experienced administrators.

Reboot
Section titled “Reboot”
The option Reboot reboots the entire grommunio Appliance. Note that during the reboot the services provided will not be available.
Shutdown
Section titled “Shutdown”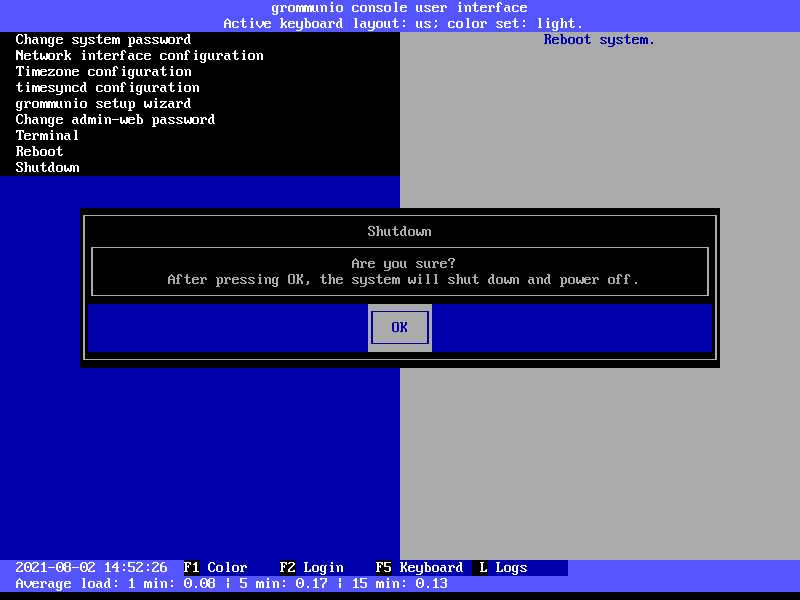
The option Shutdown shuts down the entire grommunio Appliance. Note that until the Appliance has been made available again by starting it again, the services will not be available.