

Signing & Encryption
A digital signature proves who sent a mail and that nobody changed it on the way. Encryption makes sure that only the recipients can read it. grommunio Web supports both common standards:
| S/MIME | OpenPGP | |
|---|---|---|
| Based on | certificates issued by a certificate authority | keys you create yourself |
| Typical use | companies and public authorities | individuals, developers, privacy-minded users |
| Trust | via the certificate authority | via fingerprints you verify yourself |
| In grommunio Web | certificate stored on the server, protected by a passphrase | keys created and used in your browser, stored passphrase-protected in your mailbox |
Both use the same pair of buttons in the mail editor: Sign and Encrypt.
 A mail can be protected with one of the two standards, not both at once.
S/MIME
Section titled “S/MIME”Uploading your certificate
Section titled “Uploading your certificate”You receive your personal certificate from your IT department or a certificate authority, usually as a .p12 or .pfx file with a passphrase.
- Open Settings › S/MIME.
- Under Upload your certificate, click Select and choose the file.
- Enter the Certificate passphrase.
- Click Upload.
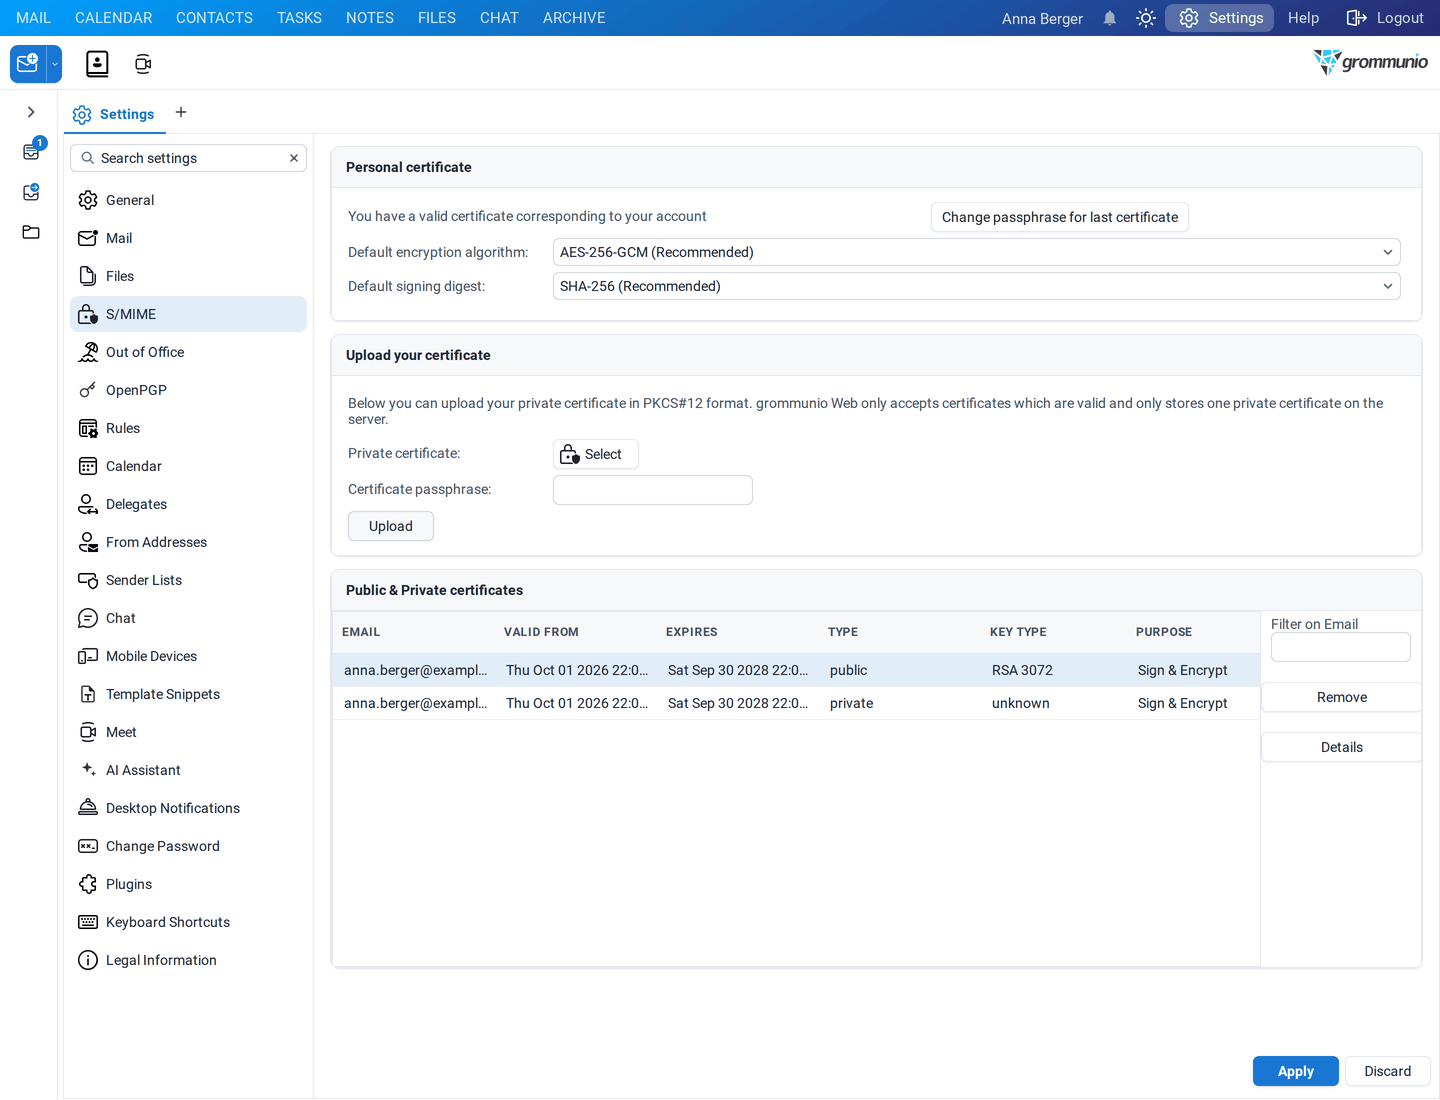
The status line then reads You have a valid certificate corresponding to your account. The list Public & Private certificates shows your own certificate and the public certificates of your contacts. Use Details to inspect a certificate and Remove to delete one.
Under Personal certificate you can change the passphrase and choose the default encryption algorithm (AES-256-GCM recommended) and signing digest (SHA-256 recommended).
Sending signed or encrypted mail
Section titled “Sending signed or encrypted mail”In a new mail, click Sign, Encrypt or both. The arrow next to each button lets you choose S/MIME or OpenPGP and offers the S/MIME options for this mail.
- Signing asks for your certificate passphrase when you send. If your administrator allows it, your browser can remember it for the session.
- Encrypting needs the public certificate of every recipient. grommunio Web collects certificates automatically from signed mails you receive and from the address book. If one is missing, grommunio Web tells you which recipients cannot receive encrypted mail.
Reading S/MIME mail
Section titled “Reading S/MIME mail”Signed and encrypted mails show a status line in the header, for example Signature verified successfully or Message decrypted successfully. For an encrypted mail you first click Please click here to unlock your certificate and enter your passphrase. Click the status line to see the details: who signed the mail, whether the certificate is valid and trusted, and which algorithms were used.
OpenPGP
Section titled “OpenPGP”Creating your key
Section titled “Creating your key”- Open Settings › OpenPGP.
- Click Generate key.
- Enter your Name and check the Email address.
- Choose the Algorithm (RSA 3072, RSA 4096, Ed25519 or Curve25519) and when the key Expires in.
- Enter a Passphrase of at least 12 characters twice. Choose a strong one you can remember; nobody can recover it for you.
- Click Generate.
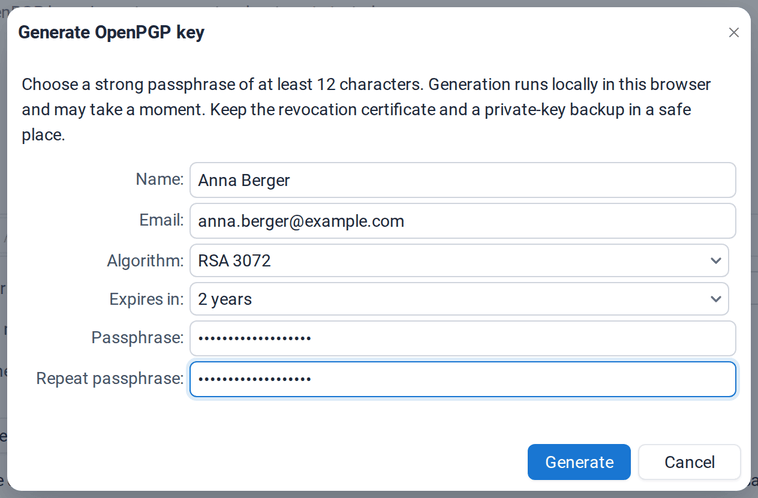
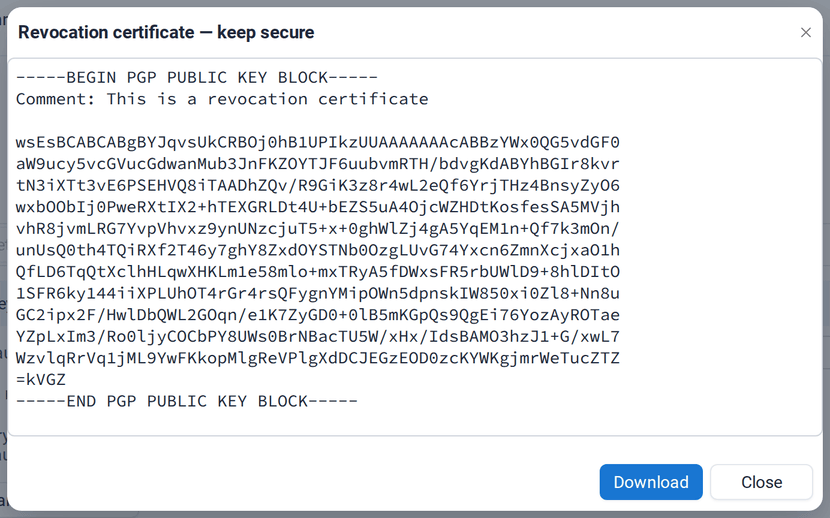
The key is generated in your browser. Afterwards grommunio Web shows your revocation certificate. Download it and keep it in a safe place: with it you can declare your key invalid if you ever lose it or the passphrase.
Managing keys
Section titled “Managing keys”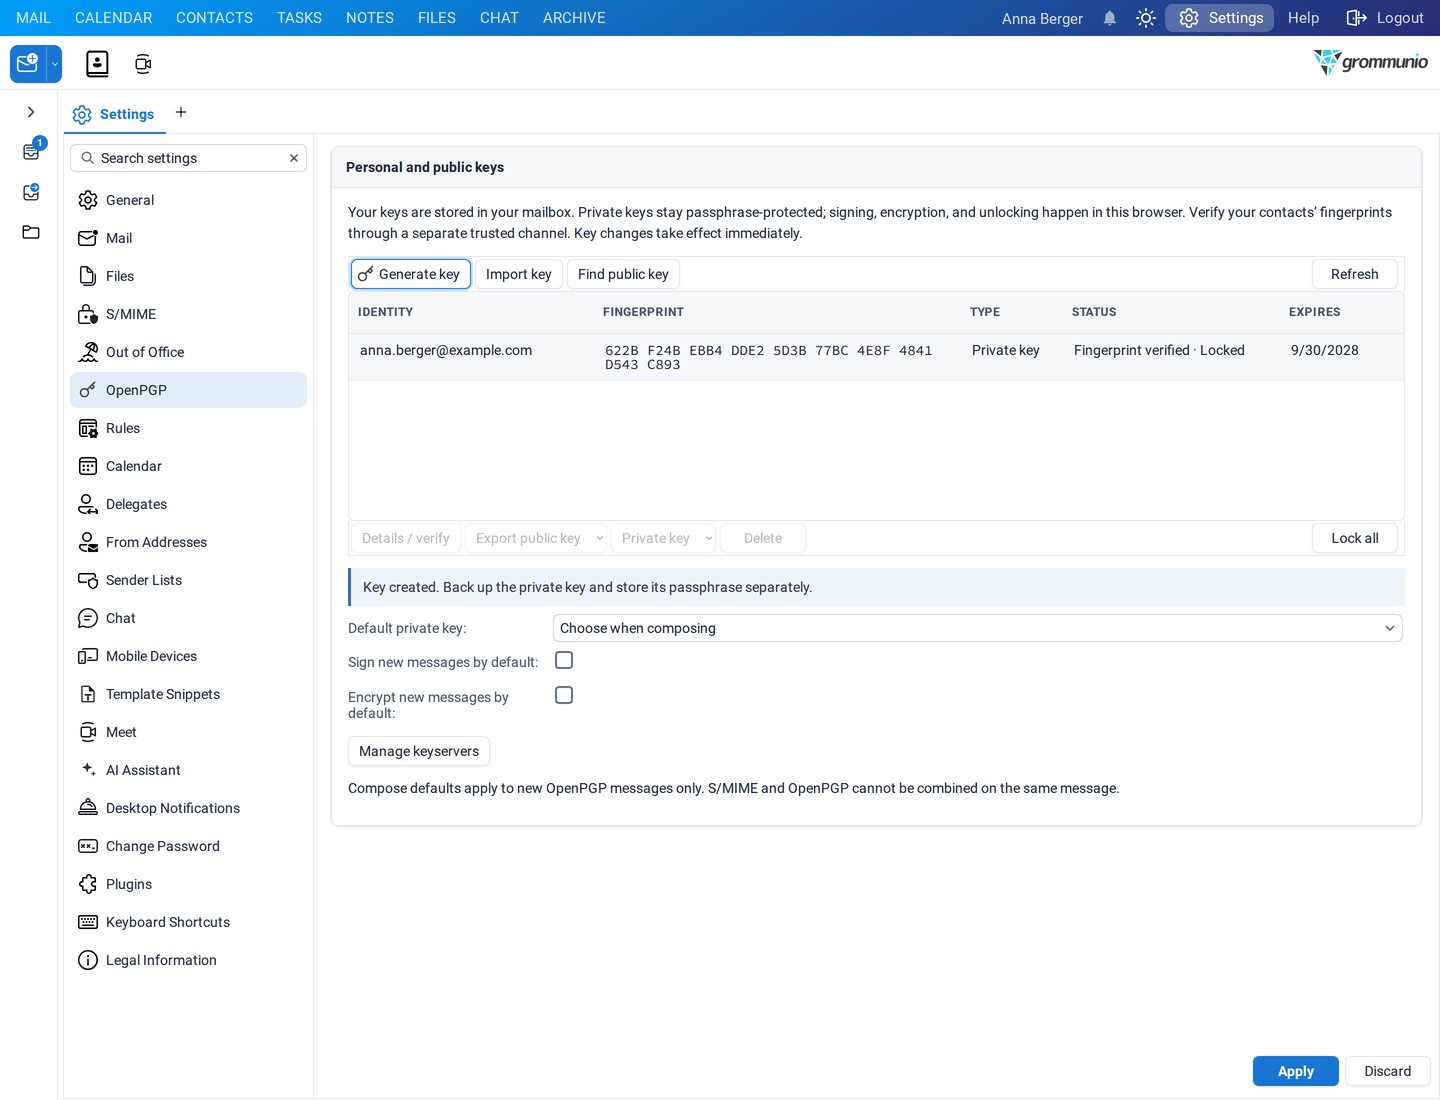
- Import key imports a key from a
.ascfile or pasted text, for example your existing private key or the public key of a contact. - Find public key looks up a public key on a key server by its full fingerprint.
- Details / verify shows a key and lets you verify its fingerprint. Compare the fingerprint with your contact over another channel, for example by phone, then tick I verified this fingerprint. Only verified keys are used for encryption.
- Export public key gives you your public key to pass on to others. Its menu also offers Back up private key (encrypted with your passphrase).
- Private key ▸ Unlock in this browser or Change passphrase. Lock all locks all unlocked keys again.
- Delete removes a key; you confirm by typing its fingerprint.
- Default private key, Sign new messages by default and Encrypt new messages by default set the defaults for new mail.
- Manage keyservers lists the key servers used for Find public key.
Sending OpenPGP mail
Section titled “Sending OpenPGP mail”- Write your mail.
- Click the arrow next to Encrypt (and/or Sign) and choose OpenPGP.
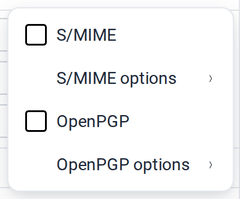
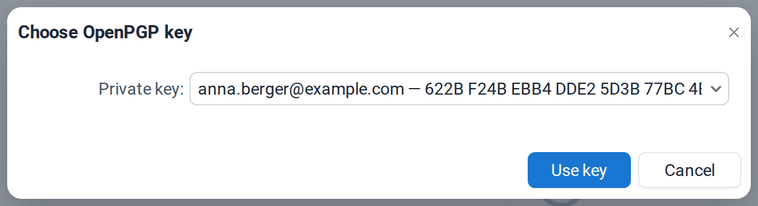
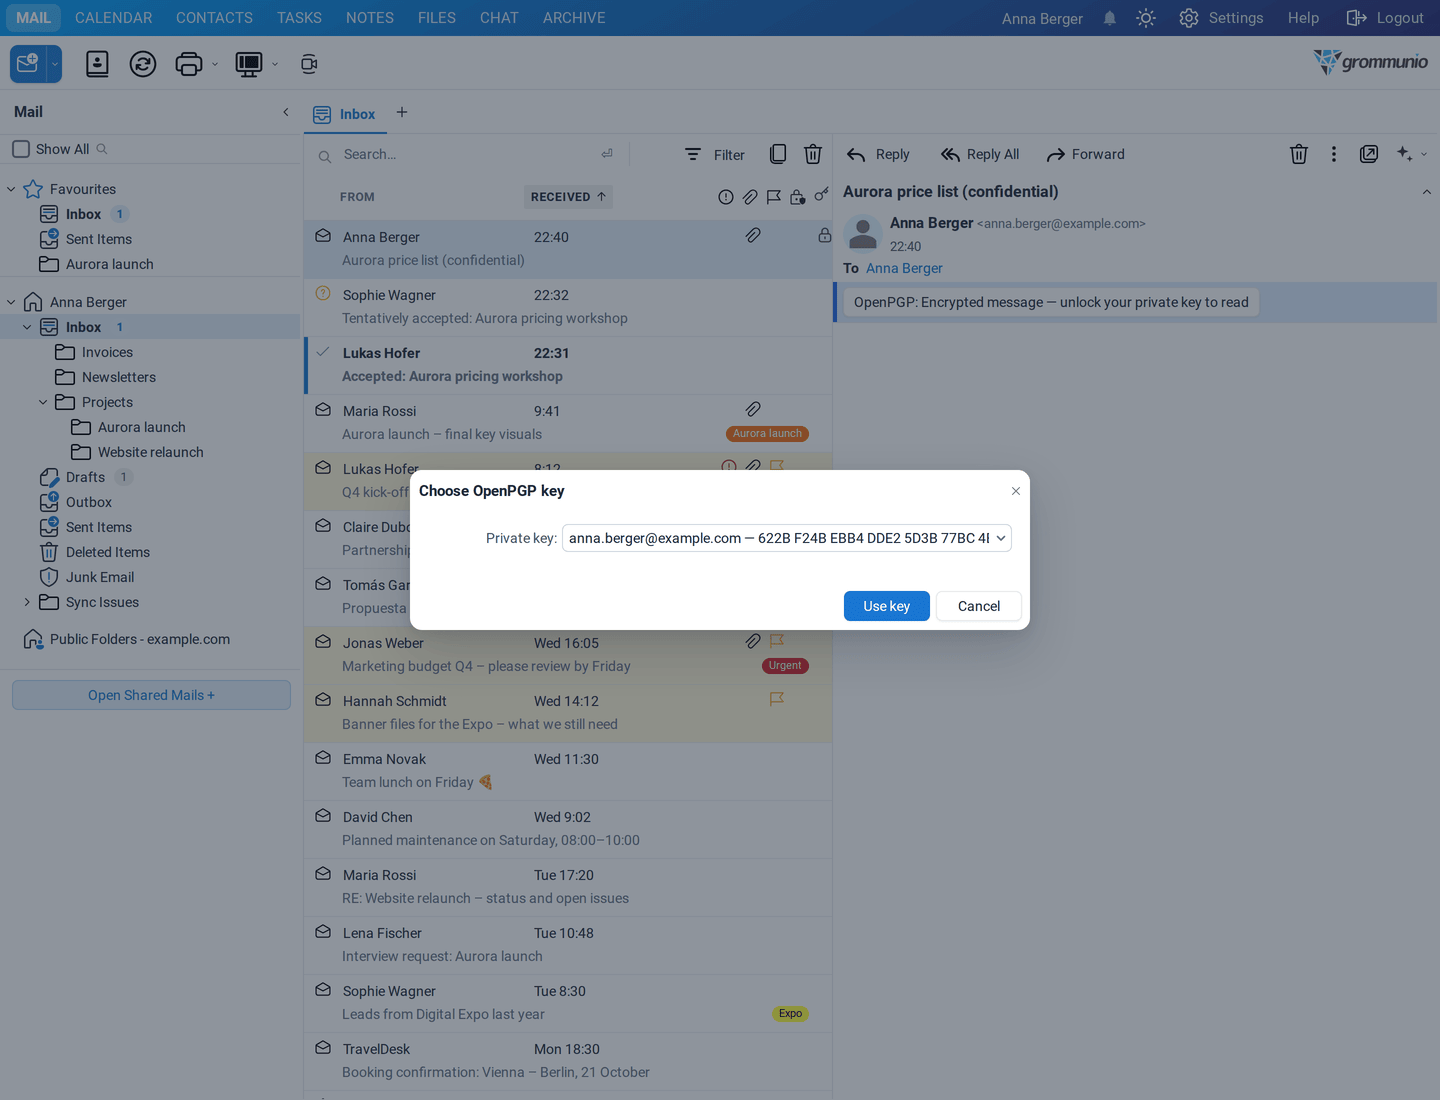
- Click Send. If you have several keys, grommunio Web asks which one to use:
- Enter your passphrase to unlock your private key:
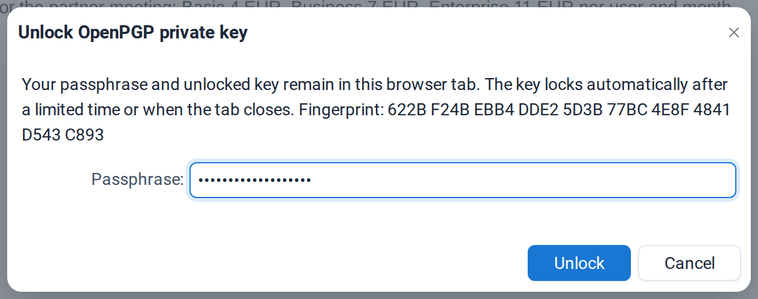
The key stays unlocked in this browser tab for a few minutes, so you don't have to enter the passphrase for every mail. It is locked again automatically, or when you close the tab.
To encrypt, grommunio Web needs a verified public key of every recipient. If one is missing or not verified, you are told which recipient is affected. Expand distribution lists into single recipients before encrypting.
Reading OpenPGP mail
Section titled “Reading OpenPGP mail”An encrypted mail shows OpenPGP: Encrypted message — unlock your private key to read:
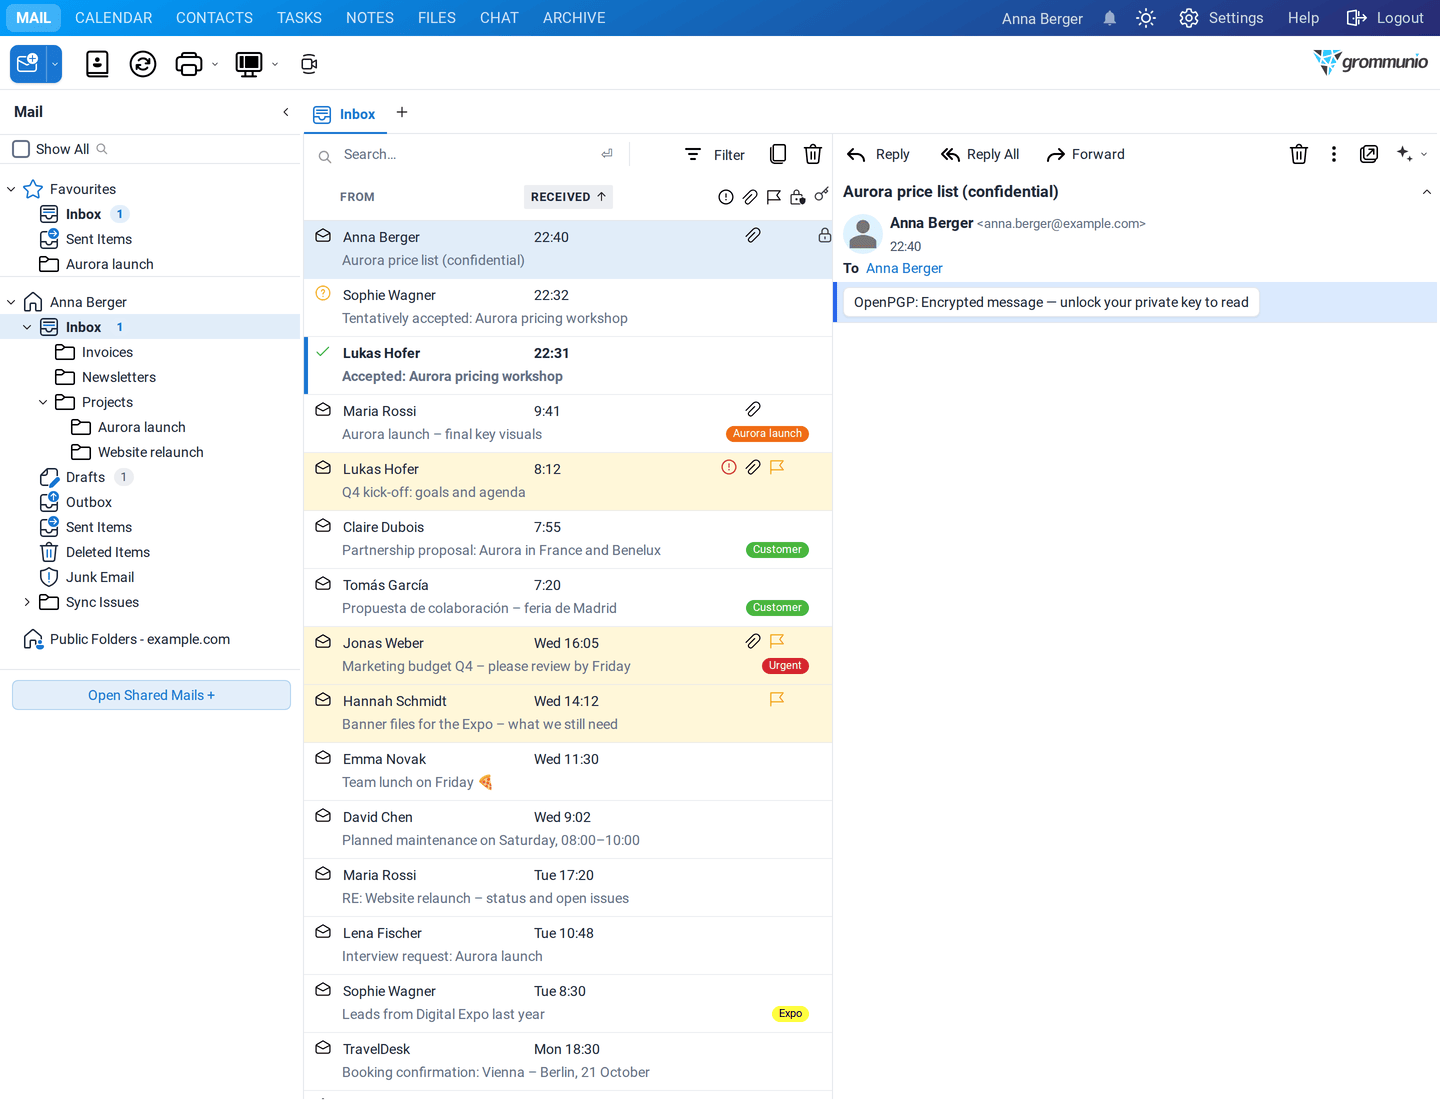
Click the line, enter your passphrase, and the mail is decrypted in your browser:
The status line tells you whether the signature is valid and whether the sender's key is verified, for example Valid signature from a verified sender, Valid signature — sender fingerprint has not been verified or Signature could not be verified. Click it for the details. Replying and forwarding work as usual; the decrypted text never leaves your browser.